
How to Set Up USPS Rates in Shopify Advanced Shipping Calculator?
GENERAL
ADVANCED SHIPPING SETTINGS
SHIPPING PROFILE & ZONES
SHIPPING RULE/RATE SETUP
SHIPPING RULE/RATE SETUP USING CARRIER RATES INTEGRATION
SHIPPING RULES IMPORT/EXPORT FUNCTIONALITY
MERGING MULTIPLE SHIPPING RULES
PRODUCT DIMENSIONS SETUP
HISTORY/AUDIT TRAIL
COMMON ISSUES & FAQs
How to Set Up USPS Rates in Shopify Advanced Shipping Calculator?
Dr Cart Shipping Rates & Rules not only allows you to create fully customizable shipping rules from tiered-based rates to location-based rates tailored to your unique business needs, it also seamlessly integrates leading carriers such as UPS, USPS, Fedex, DHL and more! This means you can offer your customers real-time and competitive shipping options at cart or checkout, improving their experience while ensuring you stay profitable.
In this section you will learn how to integrate USPS to Dr Cart Shipping Rates & Rules to display USPS rates to your customers. To check out instructions on how to integrate other carriers to our app, click the carrier listed below:
Requirements to Integrate USPS
Before we begin, you need to have the following:
- a USPS account (number)
- Consumer Key
- Consumer Secret
How to Get a USPS Account
If you don’t have a USPS account yet, go to www.usps.com and click the Register/Sign In link. You will then have to fill out the form and complete the steps to create an account.

How to Get the Consumer Key & Secret
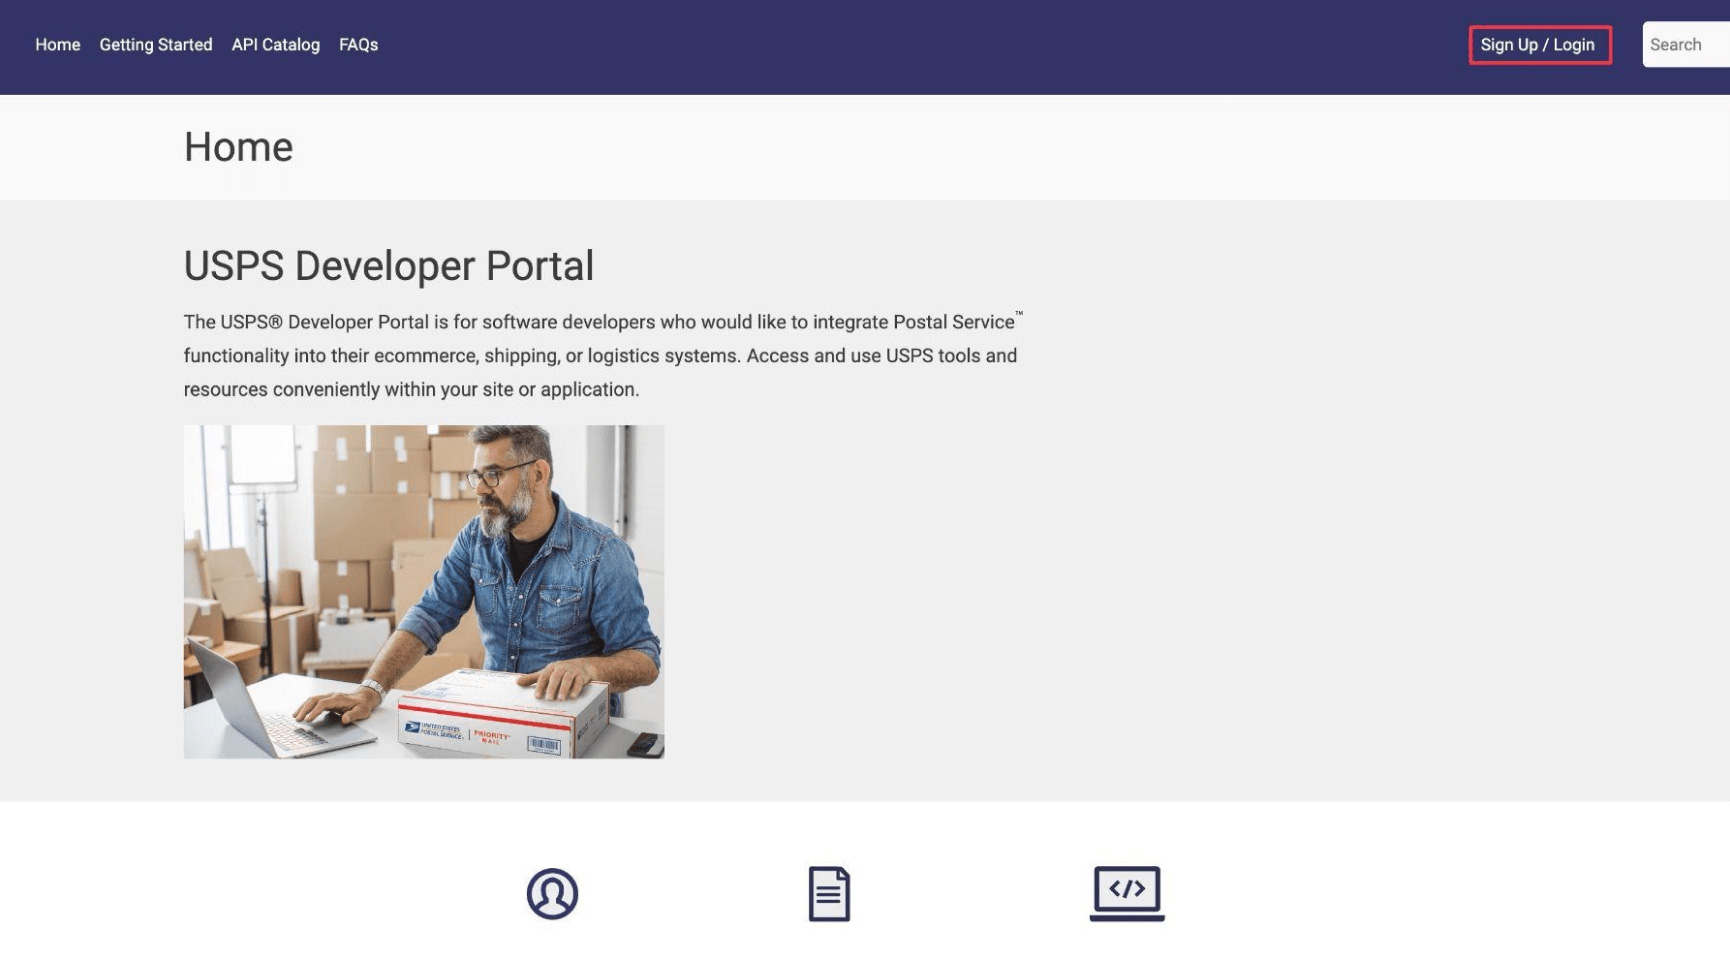
Once you have your account created, the next step is to get the Consumer Key and Consumer Secret. To do this you need to go to developers.usps.com (NOT the deprecated developer.usps.com). If you are not logged in yet, click the “Sign Up/Login” button and log in using the same credentials you used to create your USPS account.
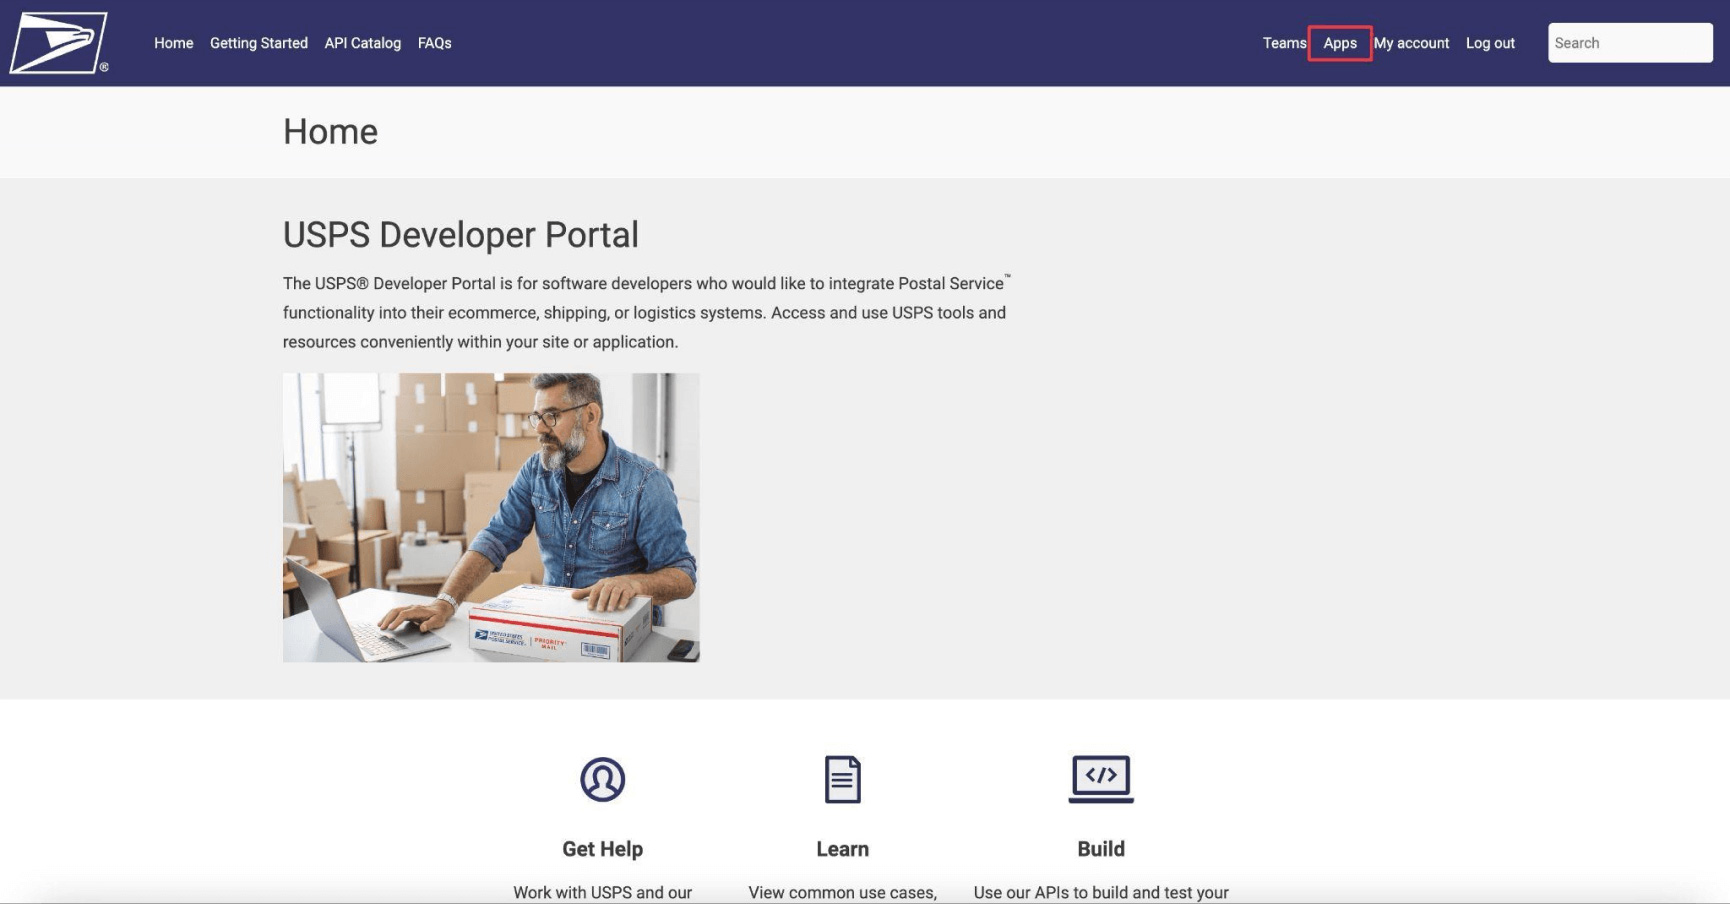
Once logged in, click on “Apps” located at the top right of the page.
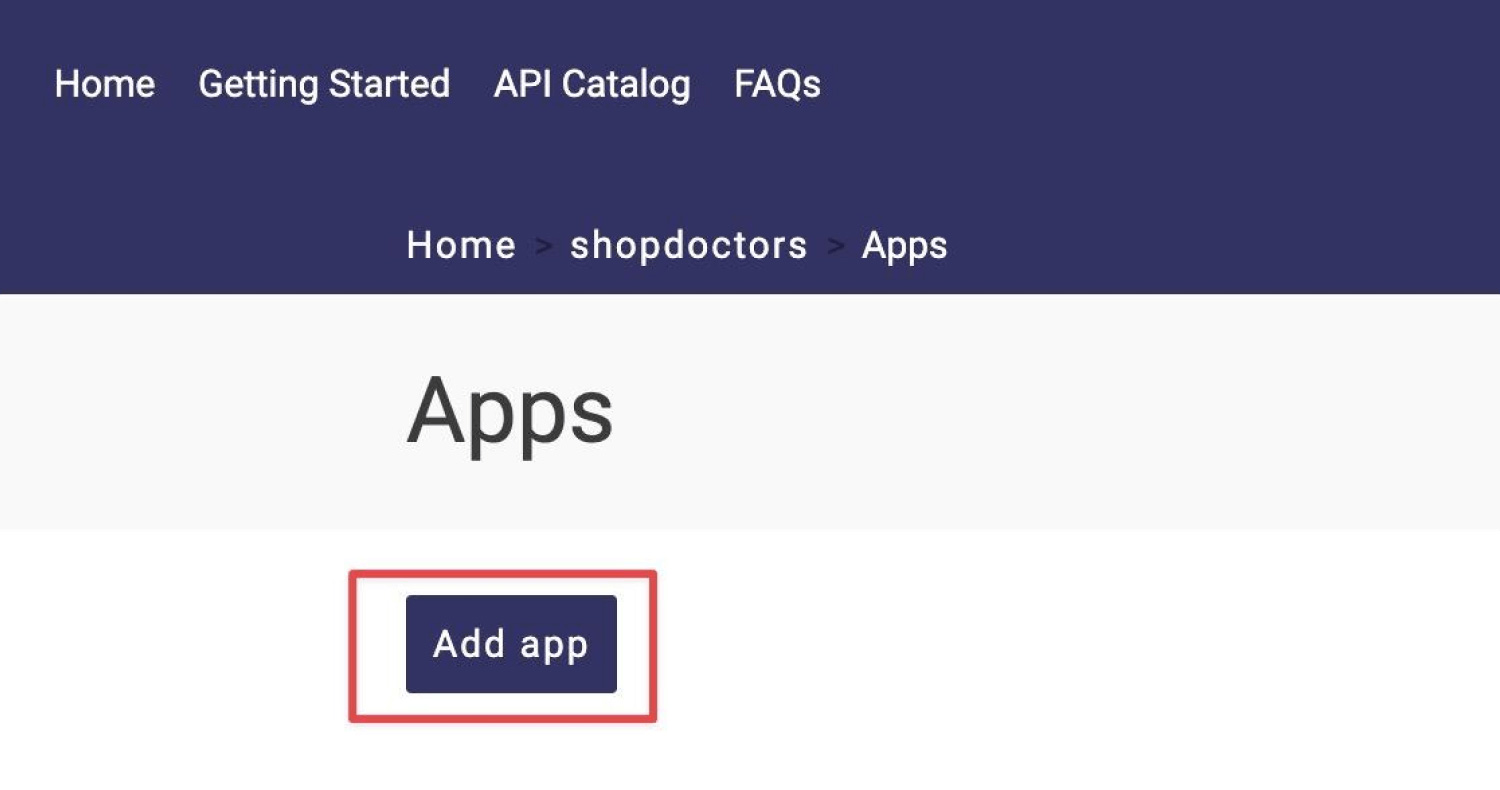
You will be redirected to the Apps page. Click on the “Add app” button next.
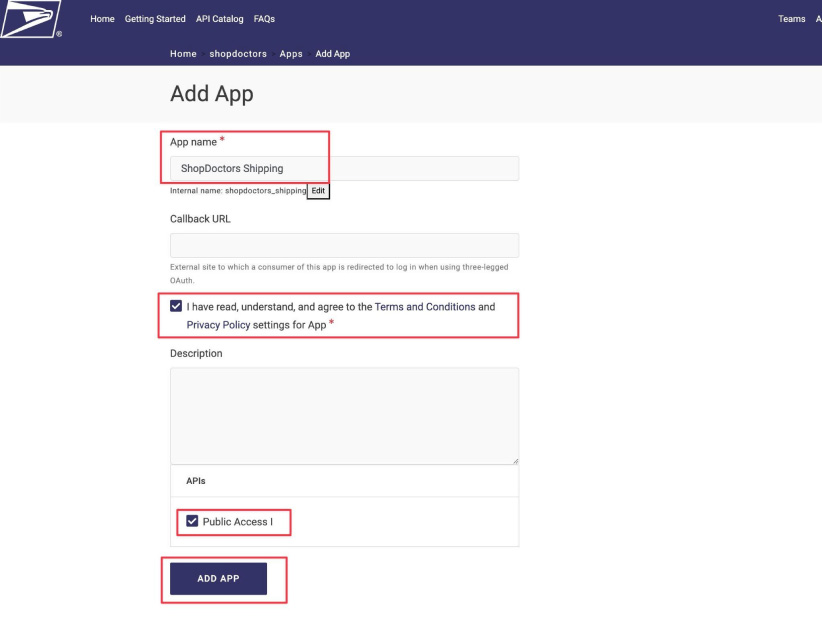
The next page will ask you to fill in App details. Under “App name”, enter “ShopDoctors Shipping”. Leave Callback URL blank and add a checkmark on “I have read…” and “Public Access I”. Then click the “Add App” button.
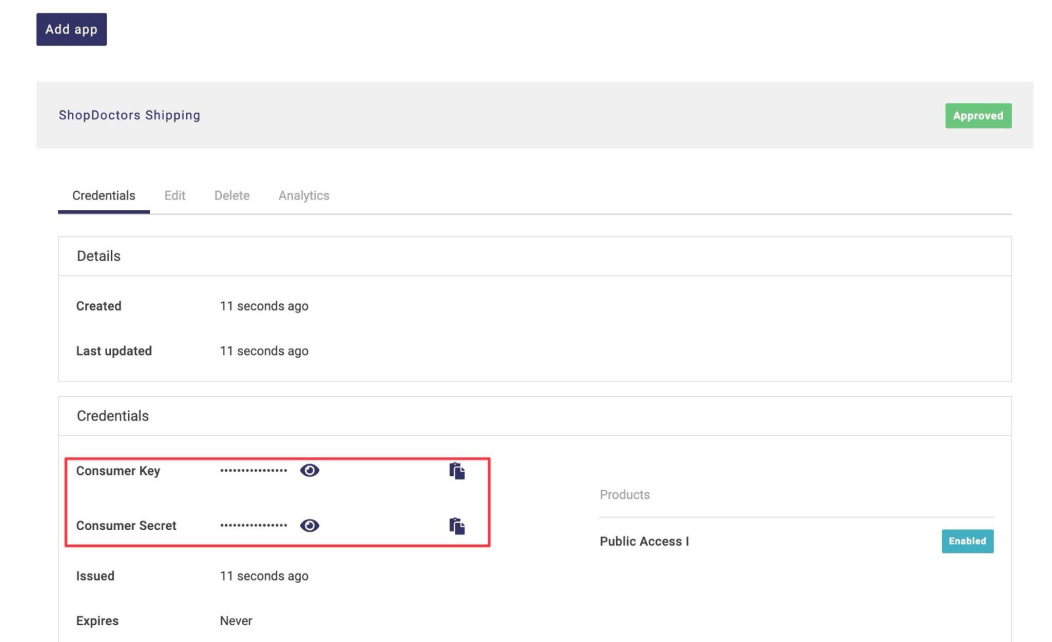
You should get a message that the app has been successfully created and the “ShopDoctors Shipping” app should appear on your list

Click “ShopDoctors Shipping” to expand and view your Consumer Key and Consumer Secret.
How to Integrate USPS account to our App?
Under Advanced Shipping Calculator homepage, click the “Advanced Shipping Settings” button.

Scroll down to the Carrier Service Setup section and click the + icon to expand the section for USPS
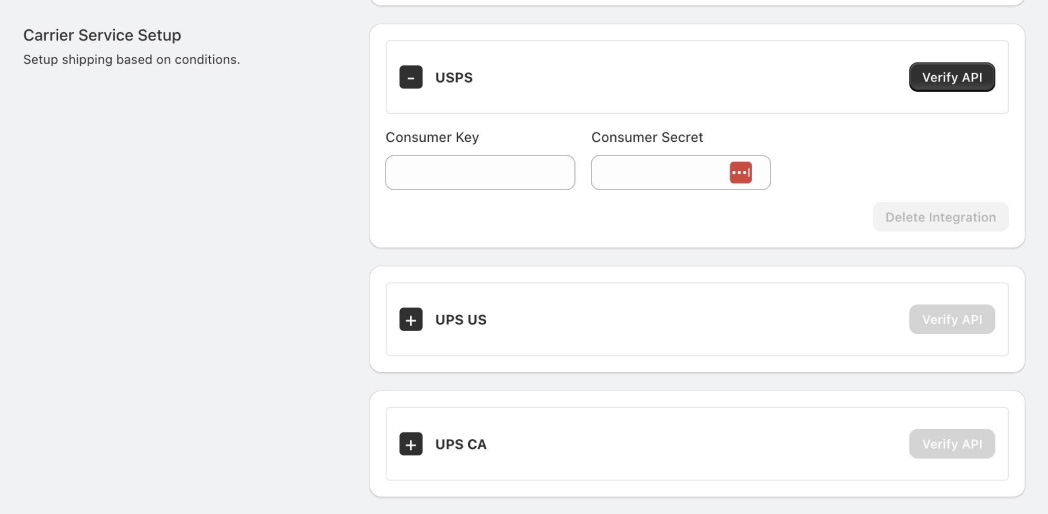
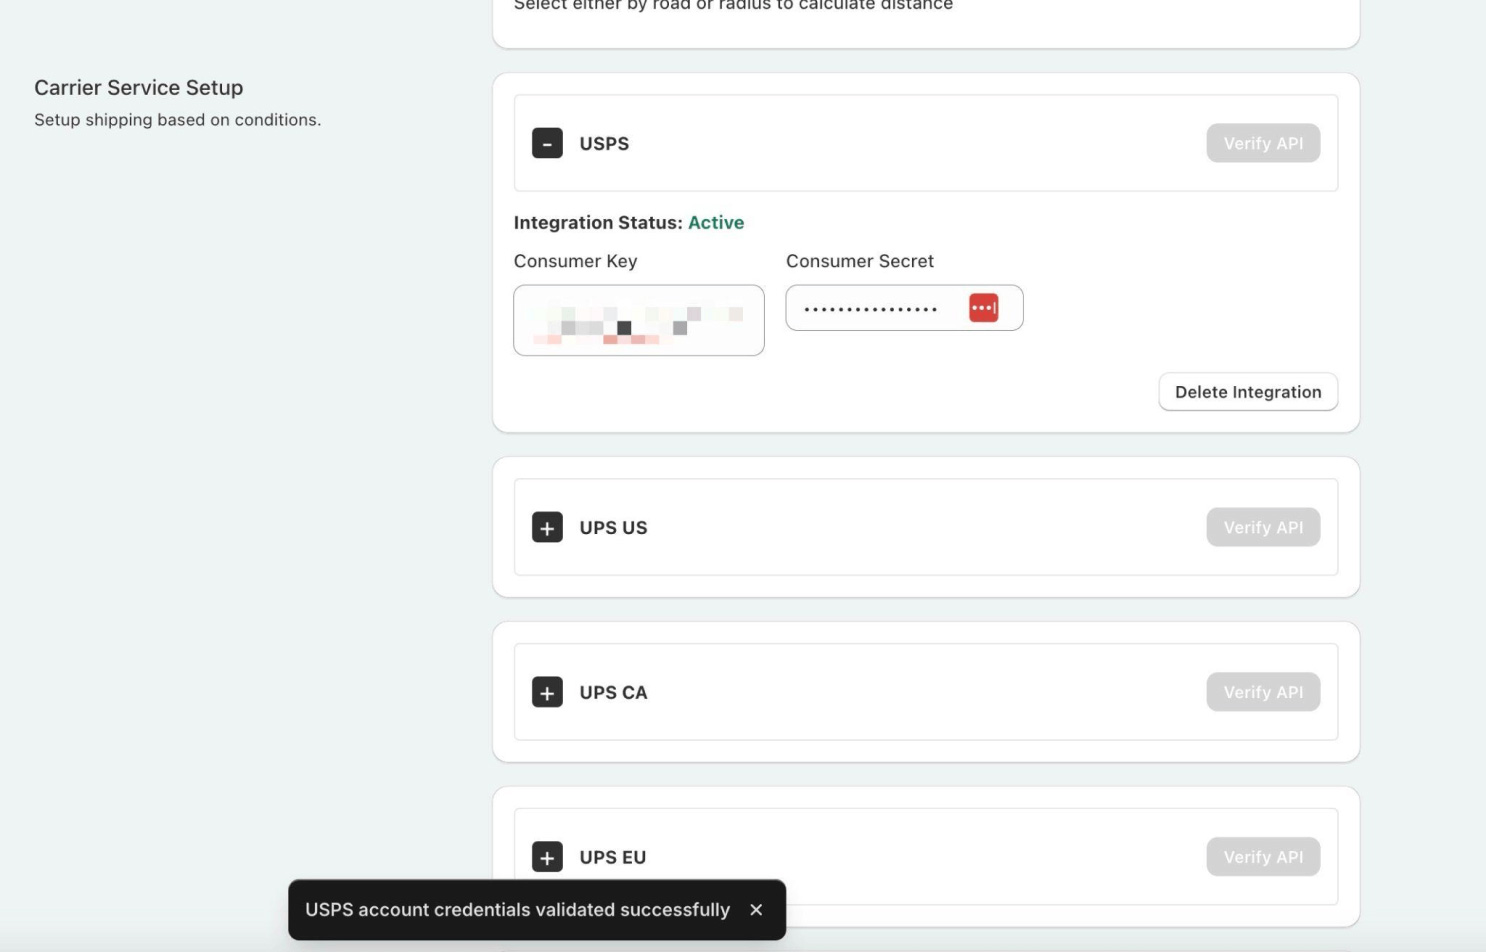
Copy the Consumer Key from USPS and paste it in the Consumer Key field. Then copy and paste the Consumer Secret in the Consumer Secret field. Lastly, click the “Verify API” button after. If the integration is successful, you will get a message confirming that the validation is successful. You will also see “Active” under “Integration Status”.
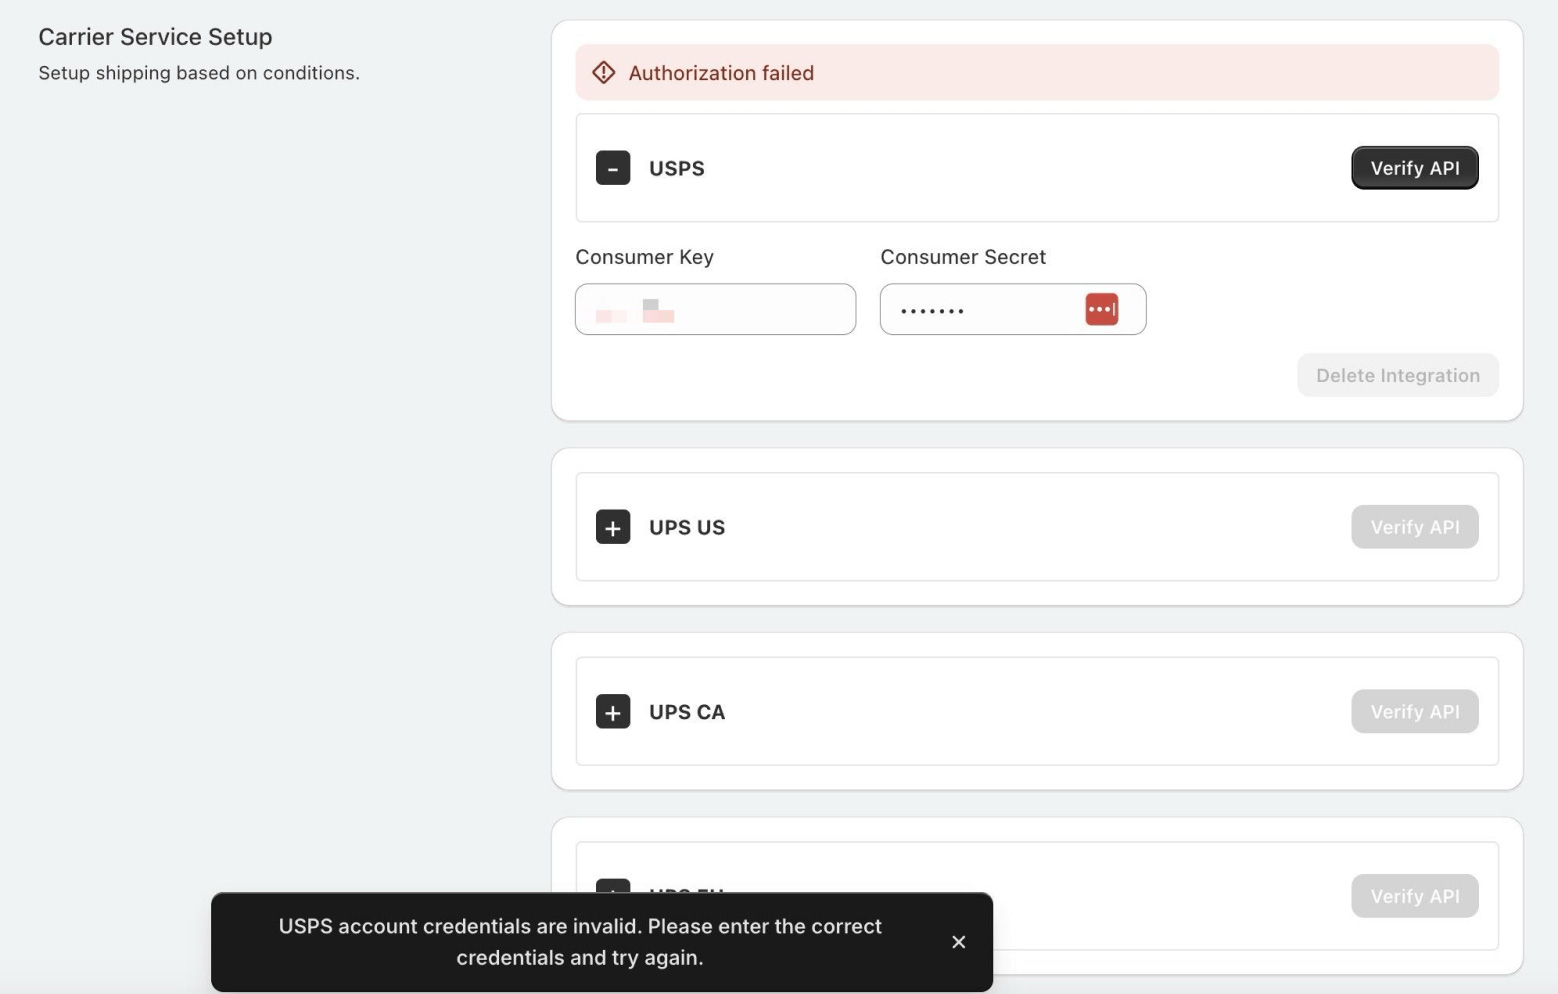
If the validation fails, you will get the “Authorization failed”. Make sure you have followed the steps to get your Consumer Key & Secret and you have entered them correctly.
Create USPS Shipping Rule
The first step is to create a shipping rule in the shipping zone or destination you want to set up a carrier rate. In this example, we want to set up USPS carrier rates for US customers. So, I head to my US shipping zone and click on the “Add Shipping Rule” button.
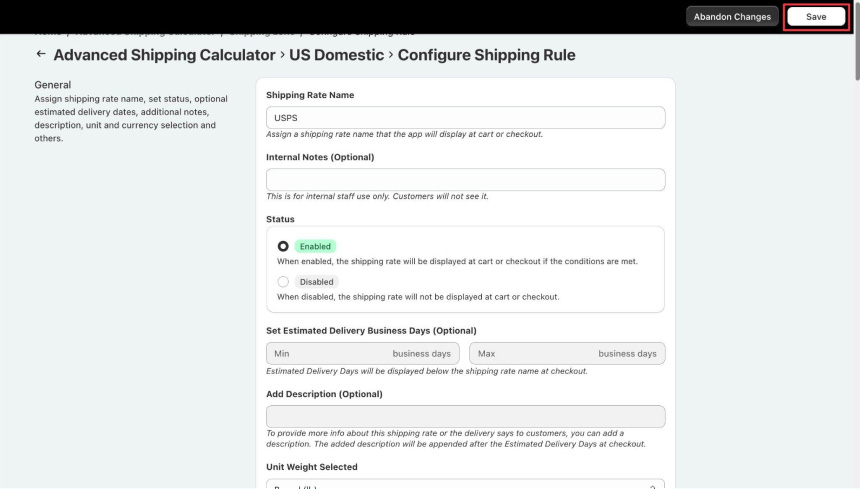
Shipping Rule General Section
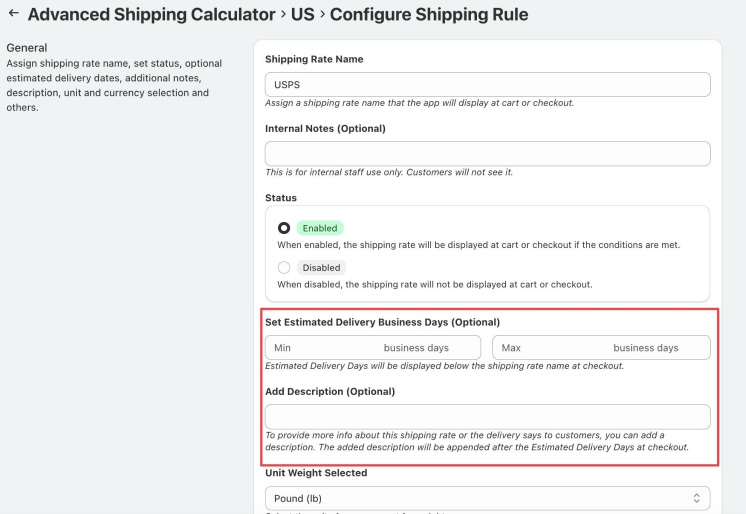
Next, assign a shipping rate name for this rate. Note that for third-party carrier rates such as USPS, USPS, Fedex and others, we will display the carrier’s service rate name to the customers instead of the assigned shipping rate name in the shipping rule.
For this example, I will name the shipping rule USPS. Then I fill out the rest of the General section such as the status, internal notes and unit/currency selection.
If you will be using cart total weight as your condition and you want to use kg, then you can change the unit under Unit Weight Selected. Or if you are configuring a shipping rule for Europe and you want to enter the amounts in Euro currency, then you can change it in the Currency. Be sure to check out our Anatomy of Shipping Rules and Rates article as you work through the setup.
Under the General section, you will see Set Estimated Delivery Business Days and its associated description. You can skip these fields since there is a separate field for setting estimated delivery business days for carrier integration.
Shipping Rule Location Section
The next section is the Location. Here, you can include or exclude specific countries, states, regions, or postal/zip codes. For now, we’ll include All in this shipping rule.

Shipping Rule Conditions Section
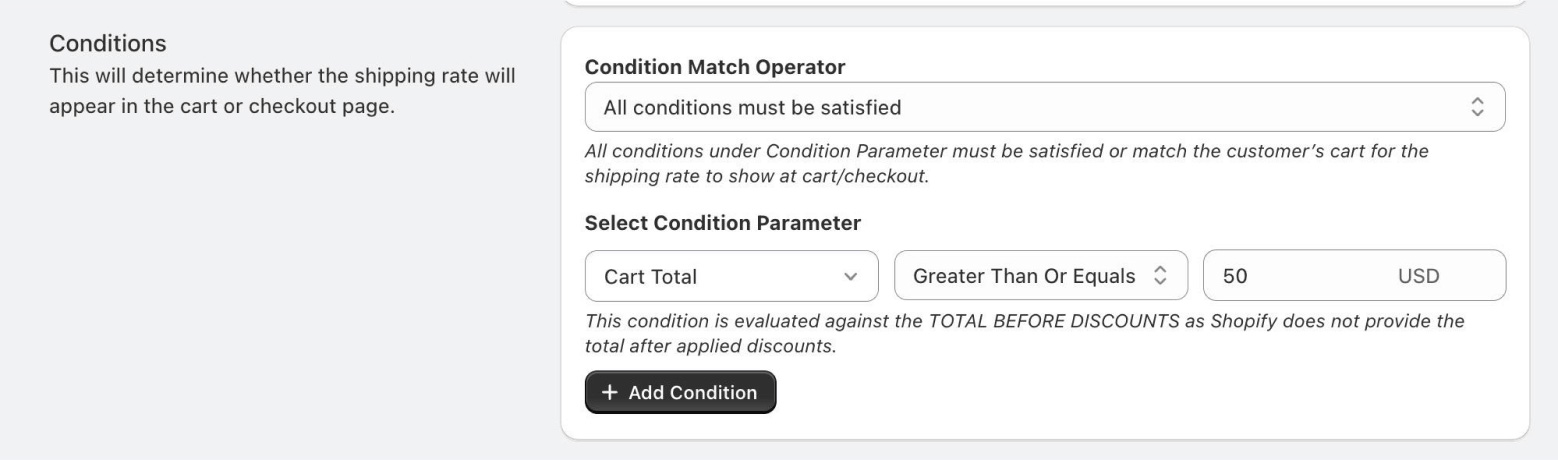
Next, you need to set your Conditions. Conditions will determine whether the shipping rule will be displayed to the customer on the cart or checkout page. You can choose to have 1 condition only, or you can add multiple conditions.
To keep it simple, we’ll set the USPS carrier rates to appear when a customer’s cart total before shipping is greater than or equal to $50.
Shipping Rule Shipping Rate Section
Then, in the shipping rate calculation section, under Select Rate Type, choose USPS .
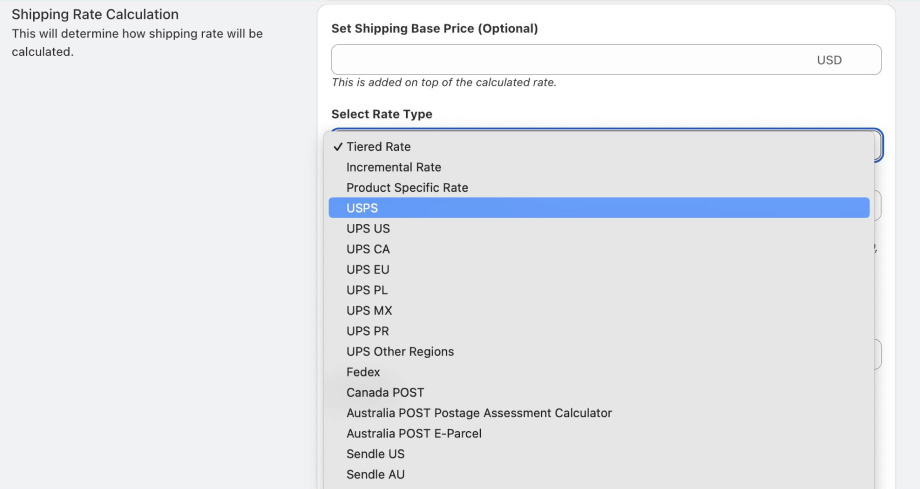
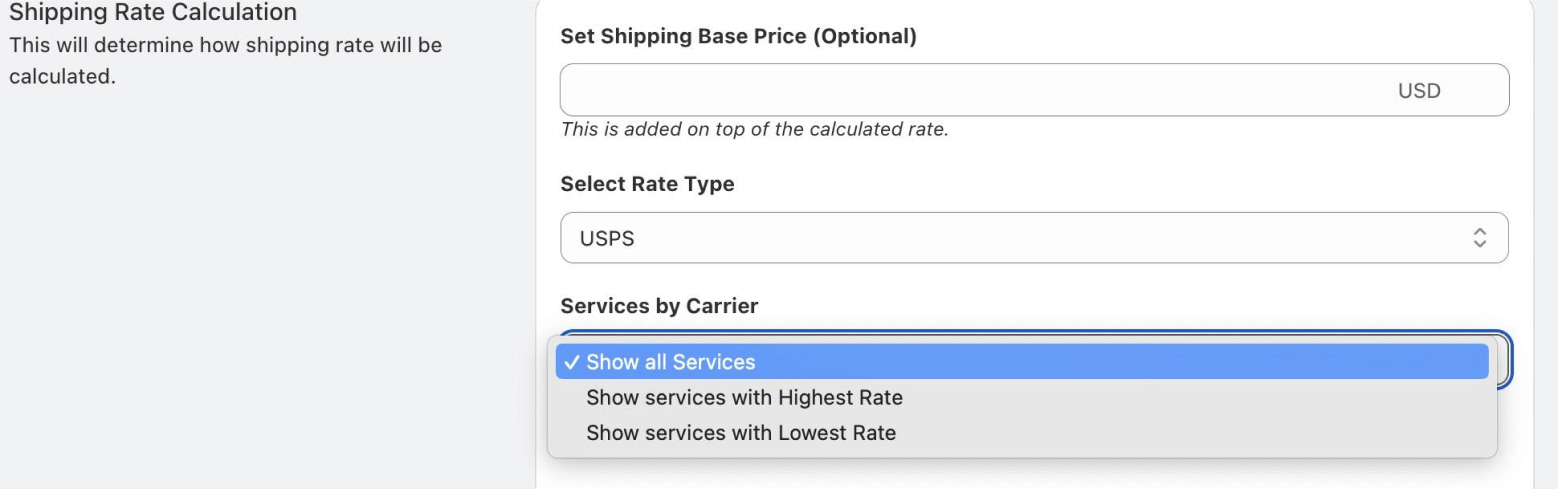
Under “Services by Carrier, select one of the options below. Depending on the number of services you include in your configuration, you can either opt to show all those services to customers, or show only the highest or the lowest rate.
Next, select the list of services you want included under Domestic & International Services. In this example, I will only select Priority Mail Express and Priority Mail.
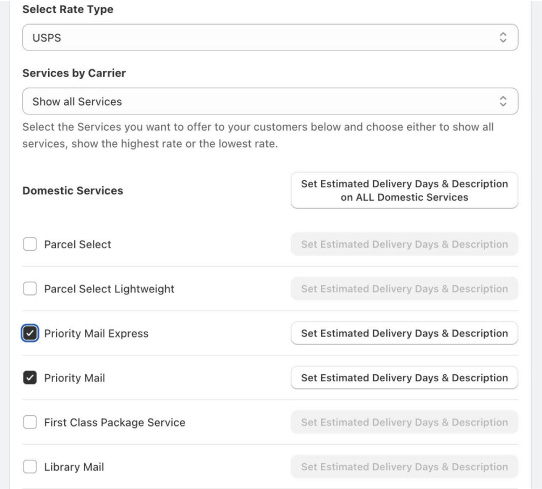
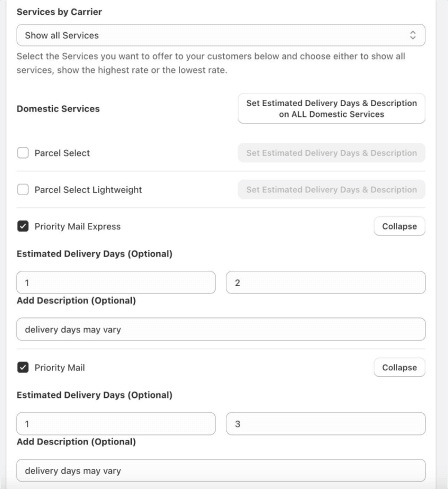
Optionally, you can also set the estimated delivery days and description for each service by clicking the “Set Estimated Delivery Days & Description” button.
The next step is to select the Parcel Category. USPS categorizes parcels into categories: package, machinable, irregular, letters, flats or nonmachinable. These categories are based on the physical dimensions of the piece.
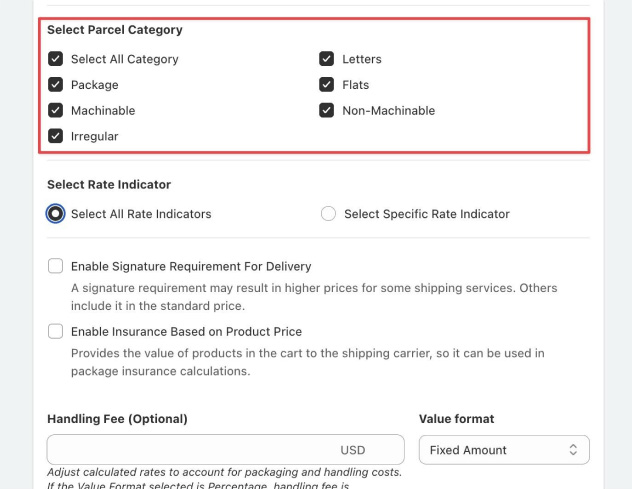
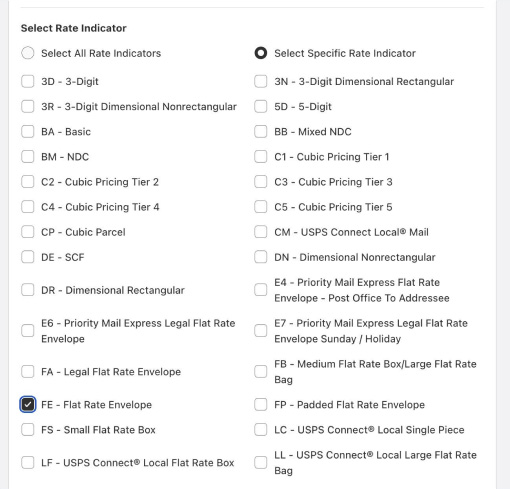
Next, select the Rate Indicators to determine pricing categorization for calculating the price. Select to either include all rate indicators or select rate indicators. For example, if you only want to include rates for “Flat Rate Envelope”, then select the FE – Flat Rate Envelope rate indicator.
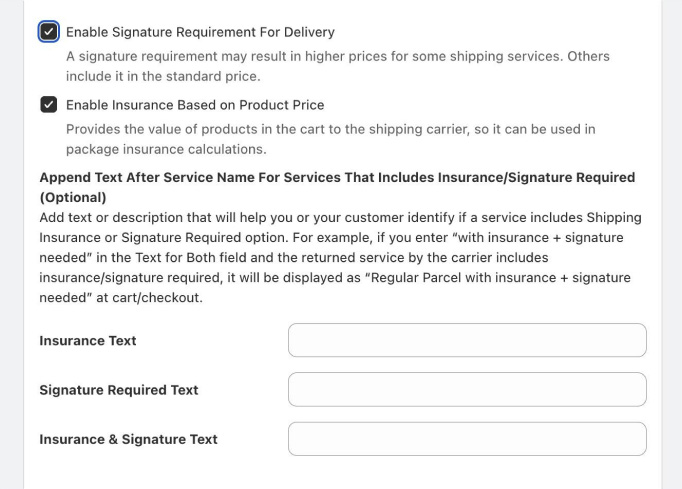
Next, you can choose to include add-ons such as insurance or signature-required delivery.
If you selected “Enable Insurance Based on Product Price”, this means that we will request the rates that the carriers will return to include insurance cost. Note that some carriers offer insurance up to a certain order value amount and will only bill additional insurance if that amount is exceeded.
If you selected “Enable Signature Requirement For Delivery”, this means that we will request the rates that the carriers will return to include signature on delivery cost.
You also have the option to append additional text to let your customers know if the shipping rate includes insurance/signature-required delivery or not. For example, if you add “ with insurance & required signature delivery” under Insurance & Signature Text field, if the carrier returned the rate for USPS Priority Mail that includes insurance and signature-delivery required, we will display it to your customers as “USPS Priority Mail with insurance & required signature delivery” instead of just “USPS Priority Mail”.
If you want to charge a handling fee, you can do so in a Fixed Amount or Percentage. If you choose Percentage as the Value Format, that means that we will add an x% of the returned rate by the carrier. For example, if you set 5% as the handling fee, if the carrier returned a shipping rate of $20, we will add 5% of the $20 as the handling fee ($1), so the shipping rate that will be displayed to the customer is $21 ($20 carrier rate + $1 handling fee).
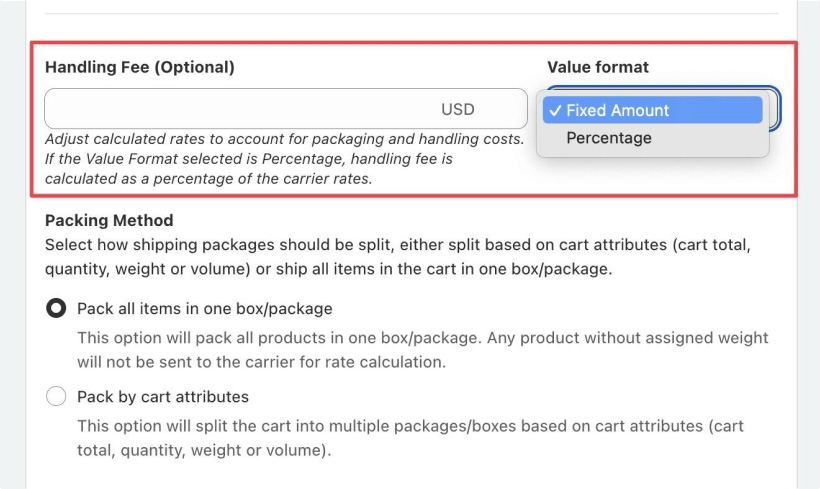
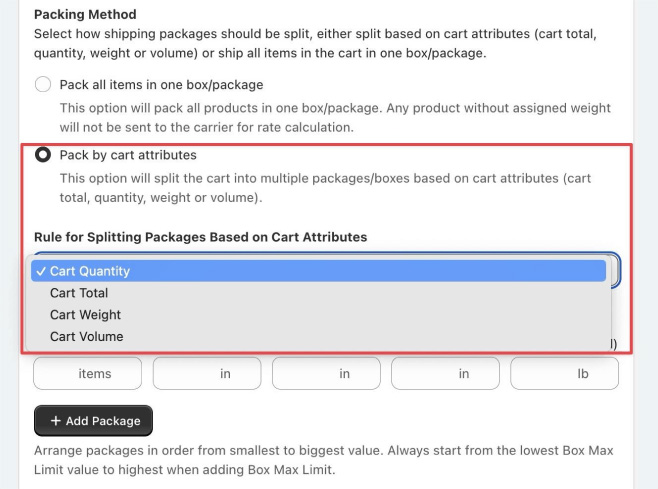
Packing Method
The next step is to select your Packing Method. There are 2 methods to choose from:
1. Pack all items in one box/package
2. Pack by cart attributes.
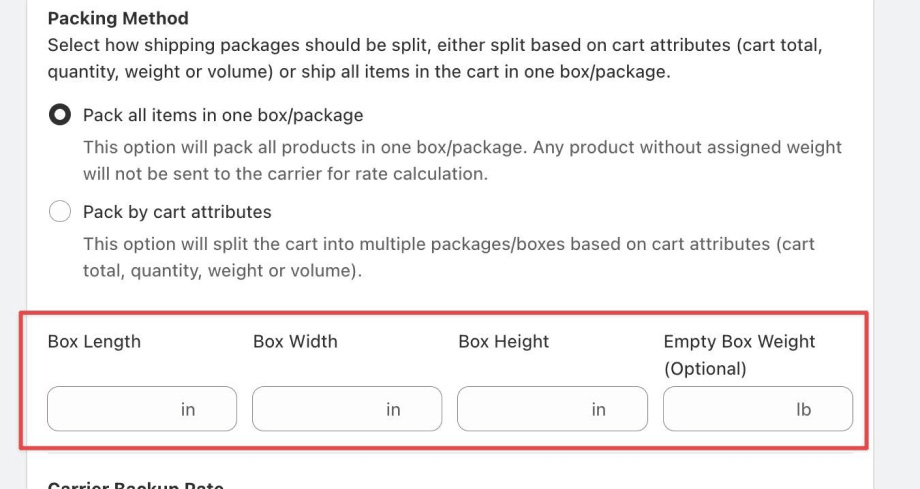
Pack all items in one box/package
As the name suggests, Pack all items in one box/package will pack all items in the order/cart into one box. If you select this option, you will have to provide your box dimensions, and you have the option to set an empty box weight.
Pack by cart attributes
If you select Pack by cart attributes, you can choose how the app will decide to pack the items in the cart either by Cart Quantity, Cart Total, Cart Weight or Cart Volume.
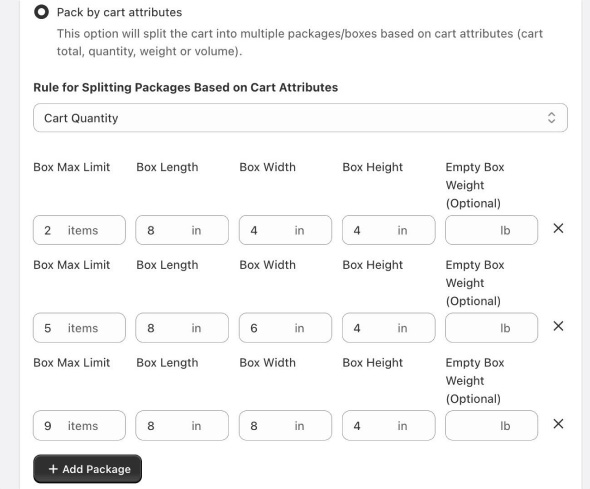
Cart Quantity will find the most optimal box to package the order into based on the customer’s cart quantity.
For example, you have a box with max quantity limit of 2, another with max limit of 5 and a third with max quantity of 10.
If a customer’s cart has 2-quantity, then we will provide the box size (8x4x4) with a Box Max Limit of 2-items to USPS.
If a customer’s cart has 4-quantity, then we will provide the 8x6x4 box size to USPS since it has a max limit of 5 items.
If a customer’s cart has 11-quantity, this will result in 2 packages/box sizes (8x8x4 and 8x4x4) that will be sent to USPS since no single box can accommodate 11 quantity..
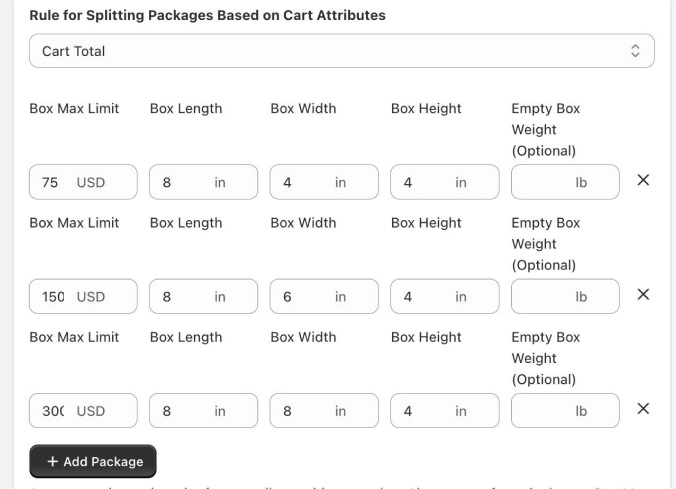
Cart Total functions the same way as Cart Quantity except that we will base it on the cart’s dollar amount and not quantity. Note that Cart Total is before shipping/taxes and any discounts applied.
Let’s look at an example where we have a box with max total limit of $75, another with max limit of $150 and another with max total limit of $300.
If a customer’s cart total is $50, then we will provide the box size (8x4x4) to USPS.
If a customer’s cart total is $200, then we will provide the 8x8x4 box size to USPS.
If a customer’s cart total is $400, this will result in 2 packages/box sizes (8x6x4 and 8x8x4) that will be sent to USPS.
Cart Weight functions the same way as Cart Quantity except that we will base it on the cart’s dollar amount and not quantity. Note that Cart Total is before shipping/taxes and any discounts applied.
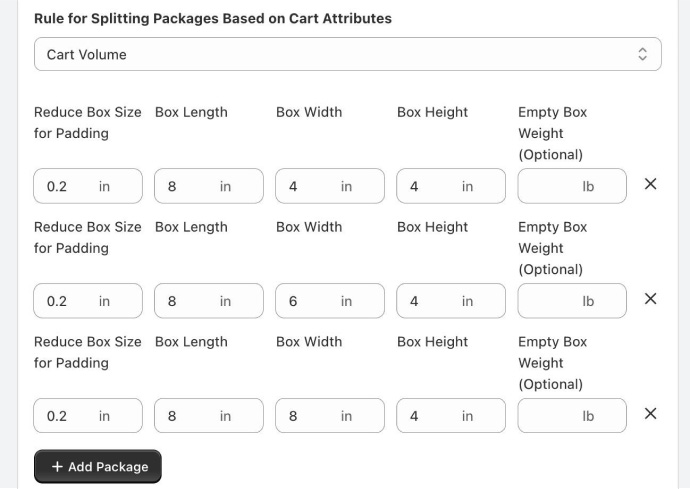
Cart Volume on the other hand, uses an algorithm to pack items based on volume. At a high level, the algorithm works by:
- Packing largest (by volume) items first
- Packing vertically up the side of the box
- Packing side-by-side where item under consideration fits alongside the previous item
- If more than 1 box is needed to accommodate all of the items, then aim for boxes of roughly equal weight (e.g. 3 medium size/weight boxes are better than 1 small light box and 2 that are large and heavy)
For Cart Volume, you have the option to reduce the size of the box for padding. In this sample screenshot, we will reduce 0.2 inches on each side (length, width, height) of the box for padding when packing the items.
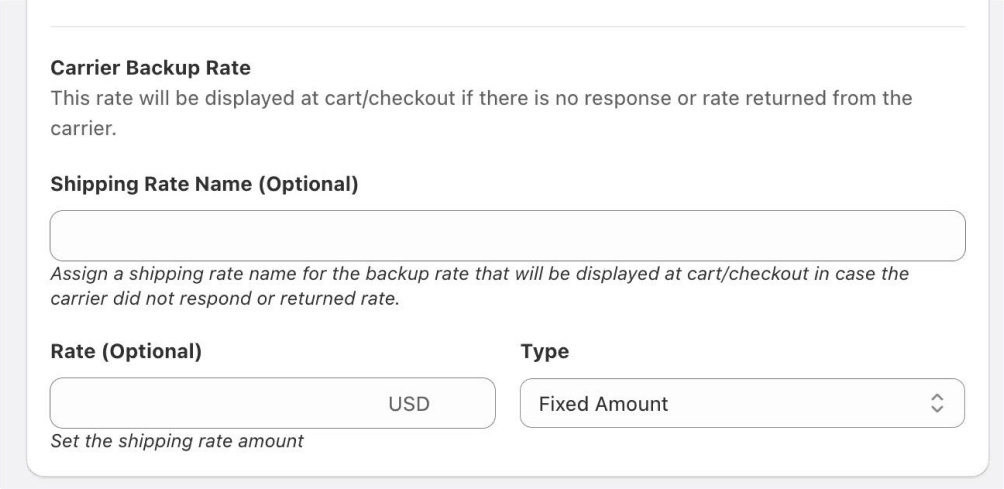
After configuring your Packing Method, you can optionally configure a Carrier Backup Rate. In cases where the carrier did not return any rate due to some errors like an outage on the carrier’s end, we will display this backup rate to the customer instead.
Shipping Rule Merge Tag
Merging rates are not available in carrier-configured shipping rules. This is because a carrier-configured shipping rule can return two or more rates unlike a tier-based or incremental rate shipping rules which always return just one rate.
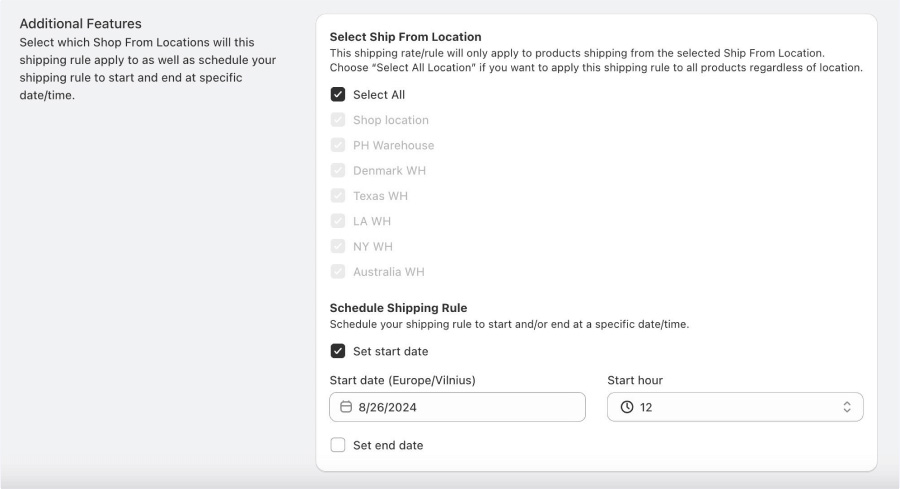
Shipping Rule Additional Features
The last section is the Additional Features where you can select to apply this rule to ALL or specific Ship From Locations only. You can also schedule the start and/or end time of your shipping rule.
Once you’re done configuring your shipping rule, click the “Save” button located on the right upper part of the page.
Important Things to Remember
- When creating carrier rates shipping rules, make sure you have added weights and dimensions on each of your products. For instructions on how to add product dimensions, you can refer to our How to add product dimensions (manual and using import tool) article.
- If you set the estimated delivery dates and added description, make sure you have Show Shipping Rate ETA (days) and Show Shipping Rate Description enabled under Cart Summary.
