
How to Create Product Specific Rate Using Import in Shopify Advanced Shipping Calculator
GENERAL
ADVANCED SHIPPING SETTINGS
SHIPPING PROFILE & ZONES
SHIPPING RULE/RATE SETUP
SHIPPING RULE/RATE SETUP USING CARRIER RATES INTEGRATION
SHIPPING RULES IMPORT/EXPORT FUNCTIONALITY
MERGING MULTIPLE SHIPPING RULES
PRODUCT DIMENSIONS SETUP
HISTORY/AUDIT TRAIL
COMMON ISSUES & FAQs
How to Create Product Specific Rate Using Import in Shopify Advanced Shipping Calculator
- Why You Might Consider Using the Product Specific Shipping Rate Creation Option with Imports
- How to Create Product Specific Shipping Rates Using the Main Shipping Rates Import.
- How to Modify Shipping Rates Using the Product-Specific Import from the Shipping Rate Edit Section.
Why Use the Product Specific Shipping Rate Creation Option with Imports?
Using the Product Specific shipping rate creation option through imports offers several key benefits:
- Flexible Rate Calculation: You can set up shipping rates based on a fixed price or a percentage of the product’s price, allowing you to tailor shipping costs to match your pricing strategy.
Efficient Bulk Editing: With imports, you can easily edit multiple product values at once, saving time and reducing the chance of errors when updating shipping rates across a large catalog.
- Versatile Rate Management: This method allows you to assign new rates, edit existing ones, or remove outdated rates effortlessly, giving you complete control over your shipping cost structure.
How to Create Product Specific Shipping Rates Using the Main Shipping Rates Import
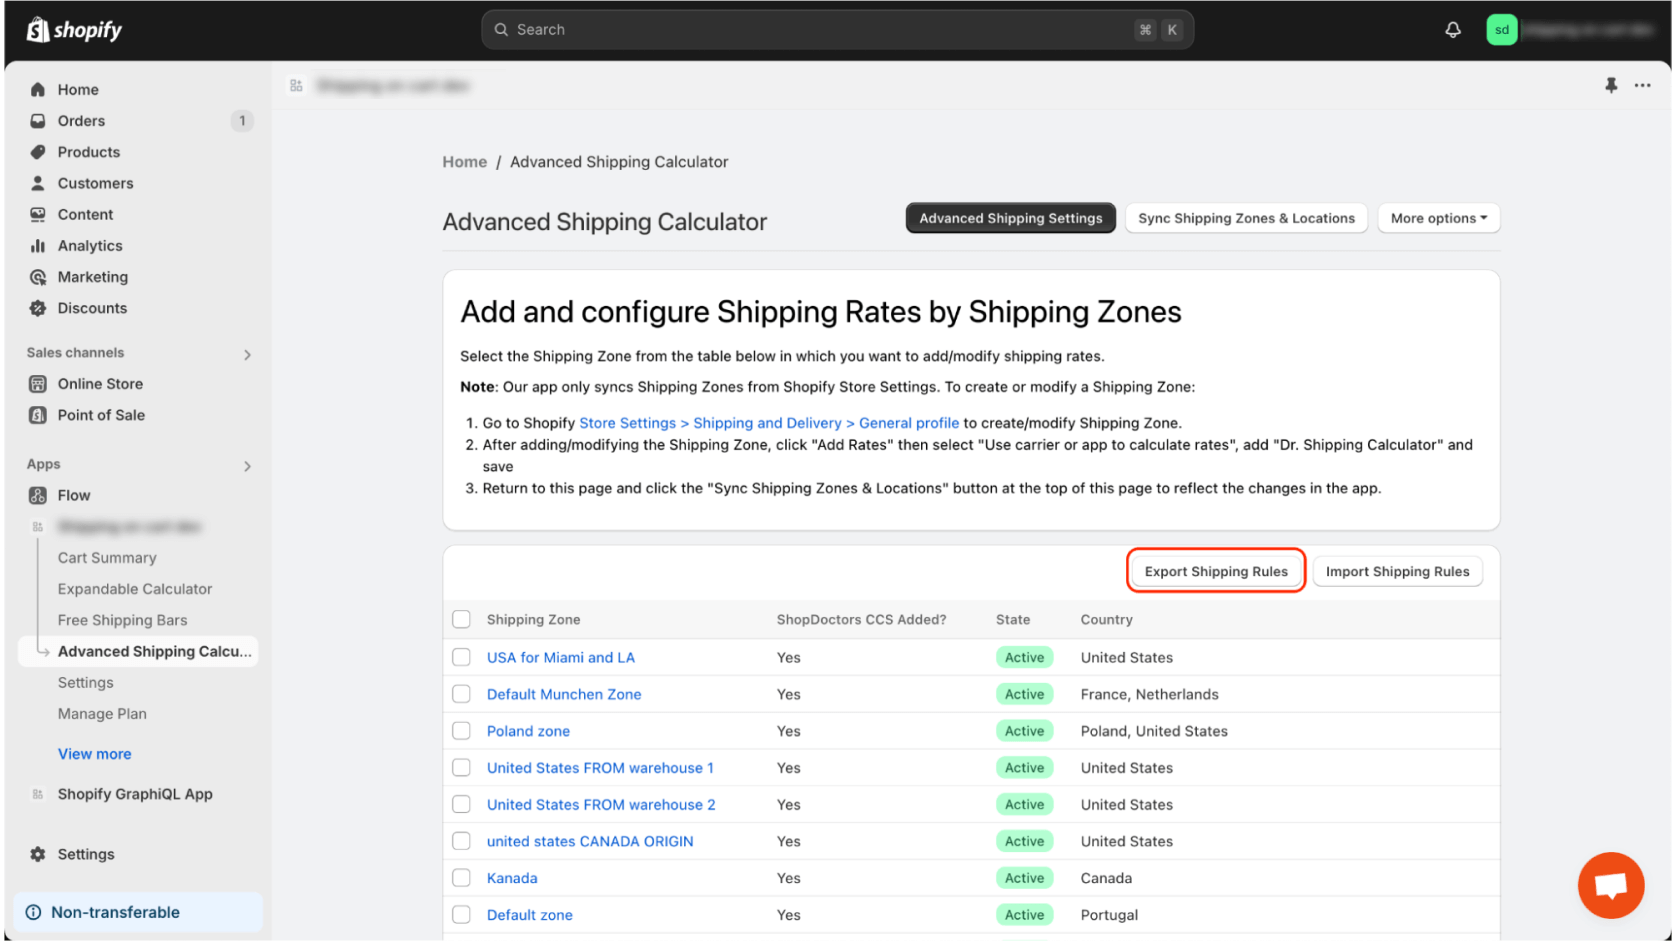
- Go to the “Advanced Shipping Calculator” tab.
- Click the “Export Shipping Rules” button.
- In the dialog window, click “Export.”
You will receive two files, shipping_rules.xlsx and products.xlsx, which will be used to create your import file.
Next, go to the “Product Specific Rate Template” tab in the shipping_rules.xlsx file.
If you haven’t previously created any Product Specific rates, sample rates will appear in this document, marked in gray. Keep in mind that these sample rates won’t be imported.
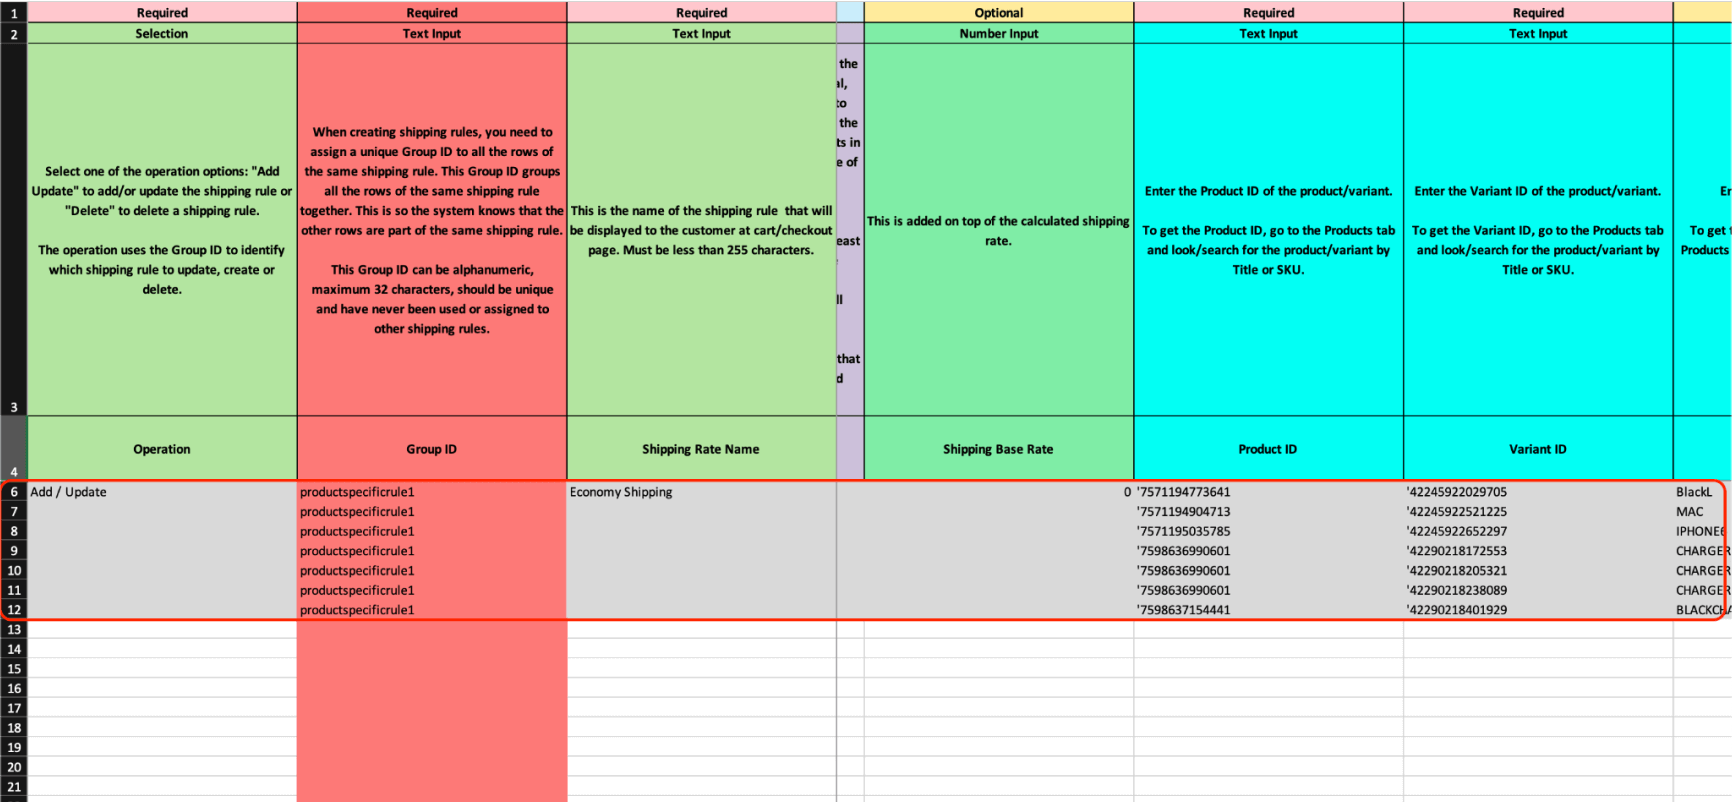
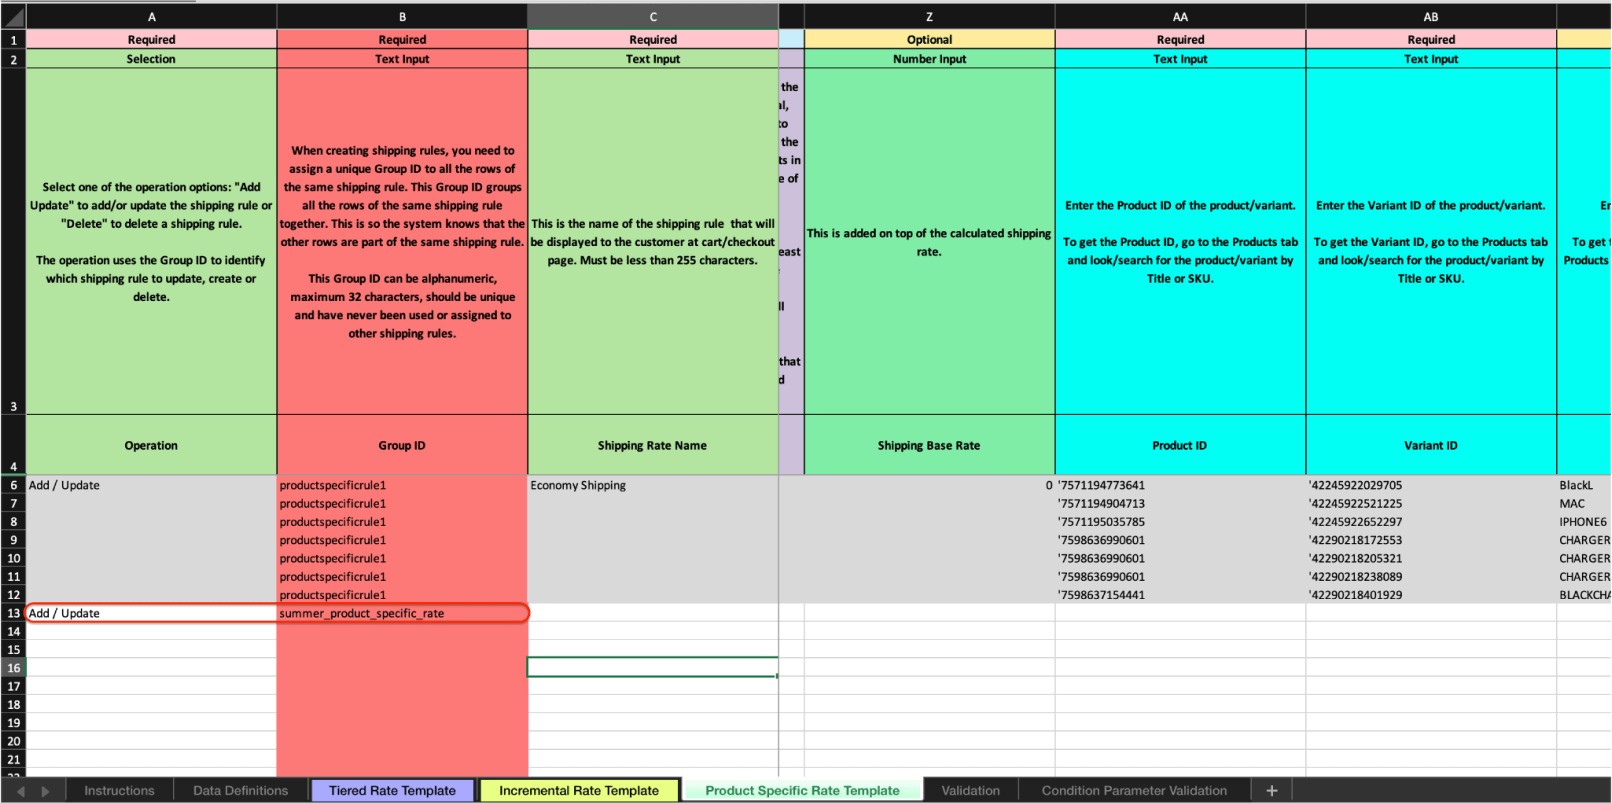
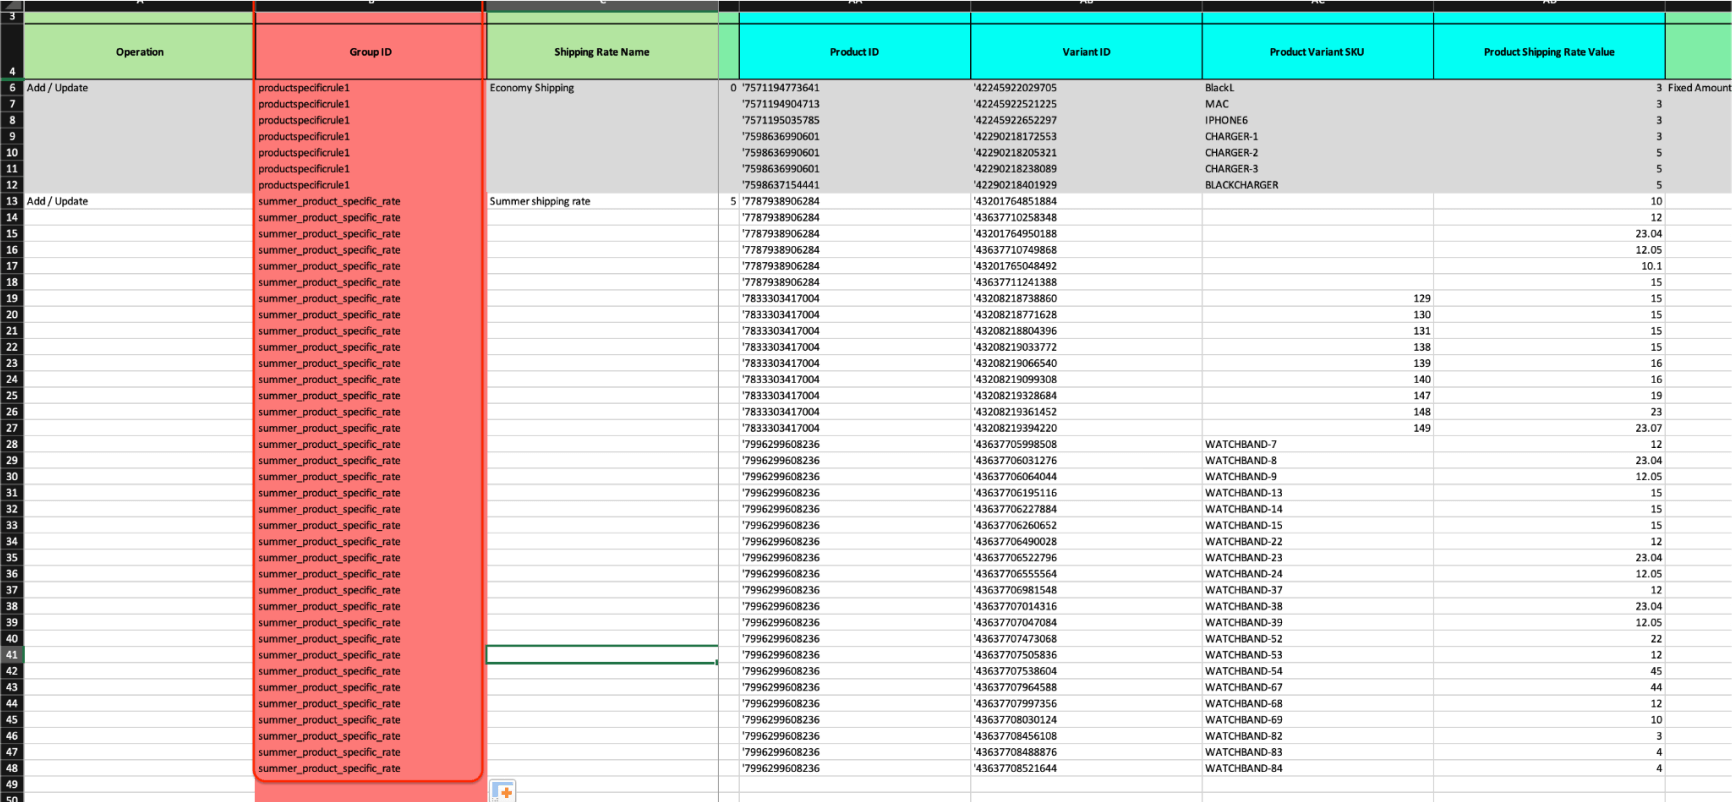
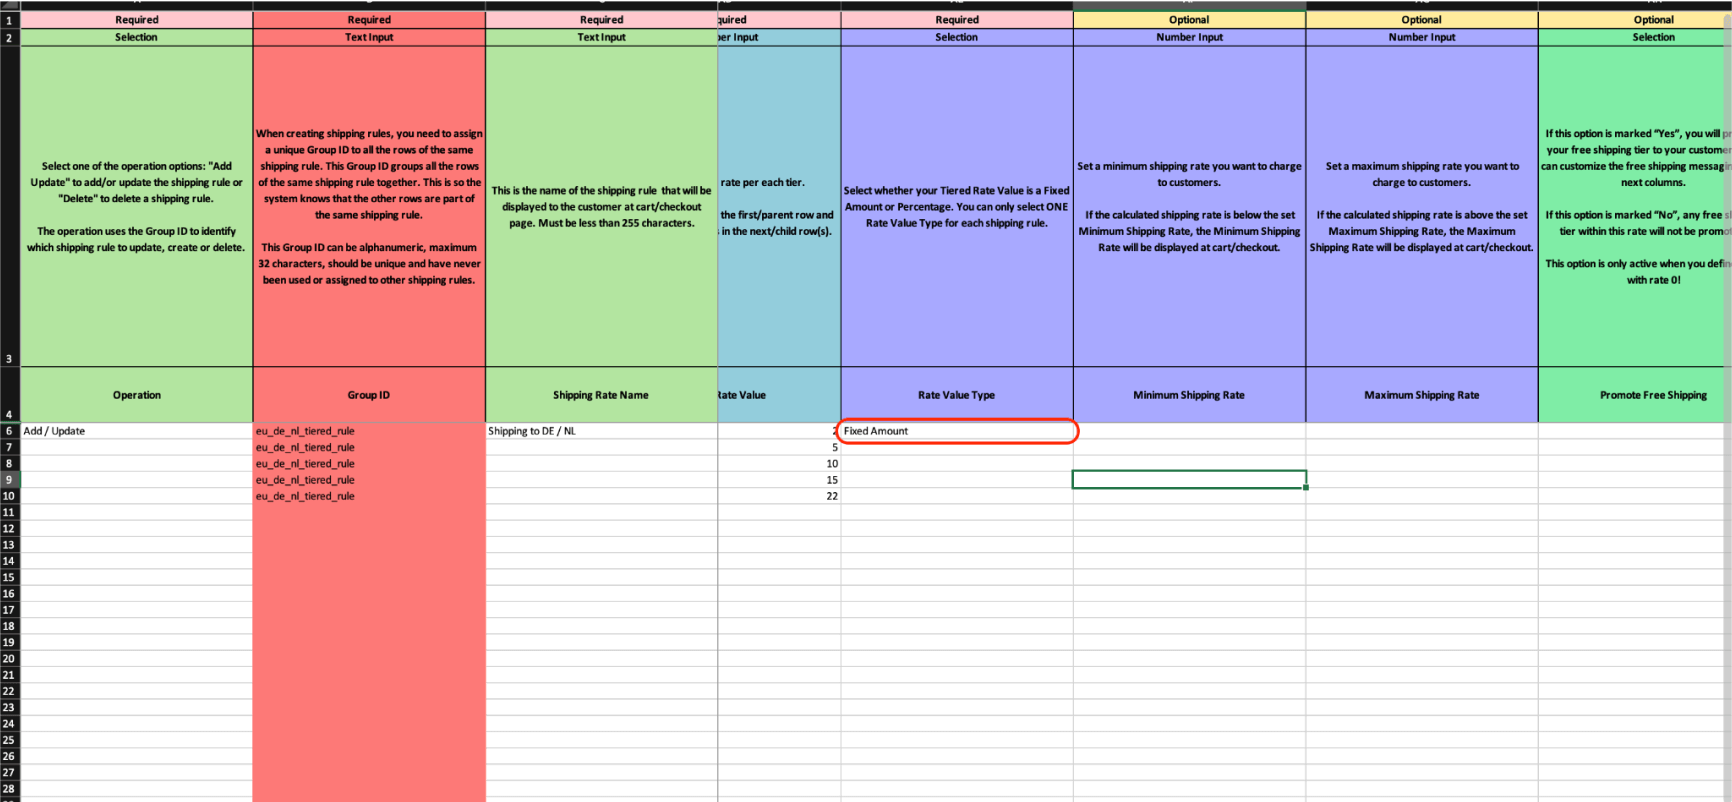
To create a sample rate, select “Operation” as “Add / Update” and assign a new Group ID (this is a unique value within the app).
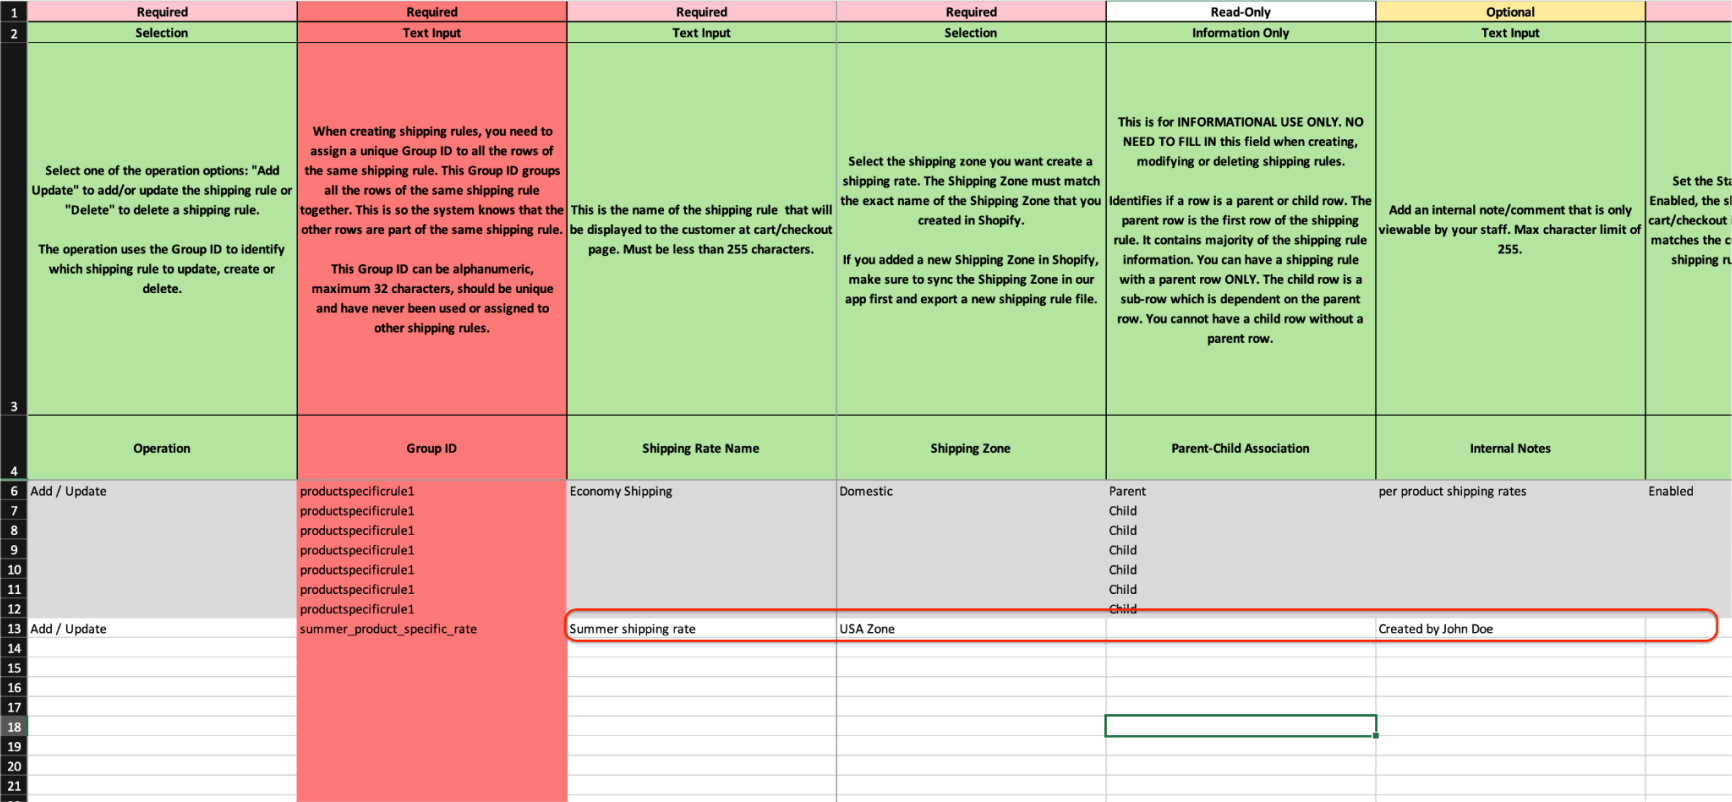
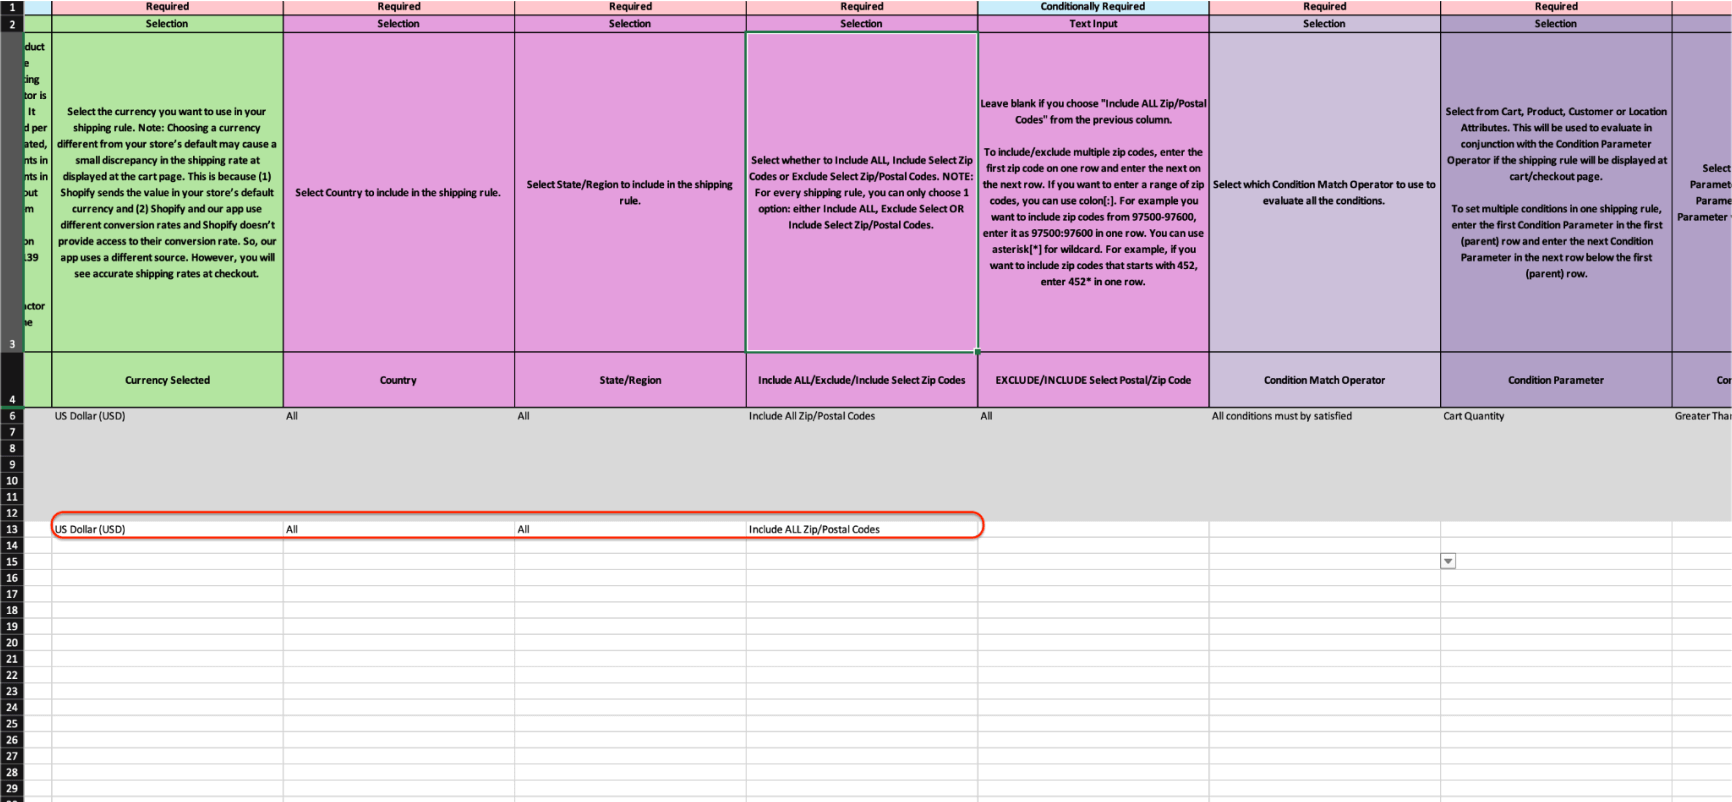
Then, fill in the basic information for the shipping rate, such as the name, zone, description, internal description, units, and currency. After completing these values for the main row (if you’re unfamiliar with the concept of a main row/child row, read this article), proceed to configure the locations. In this example, we won’t link shipping to specific locations, so we’ll select “All.”
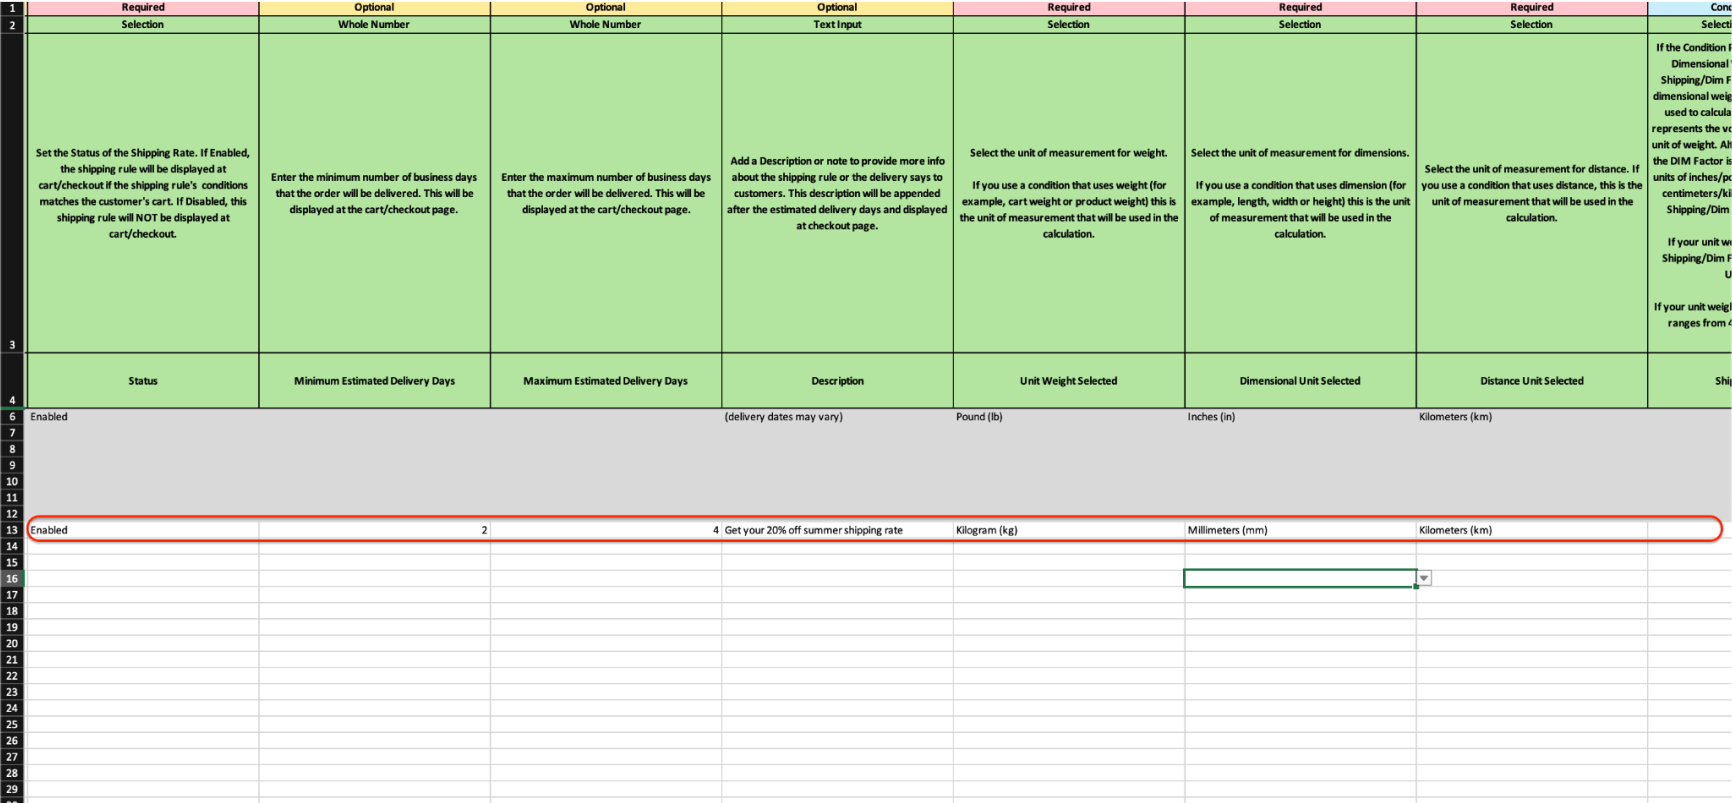
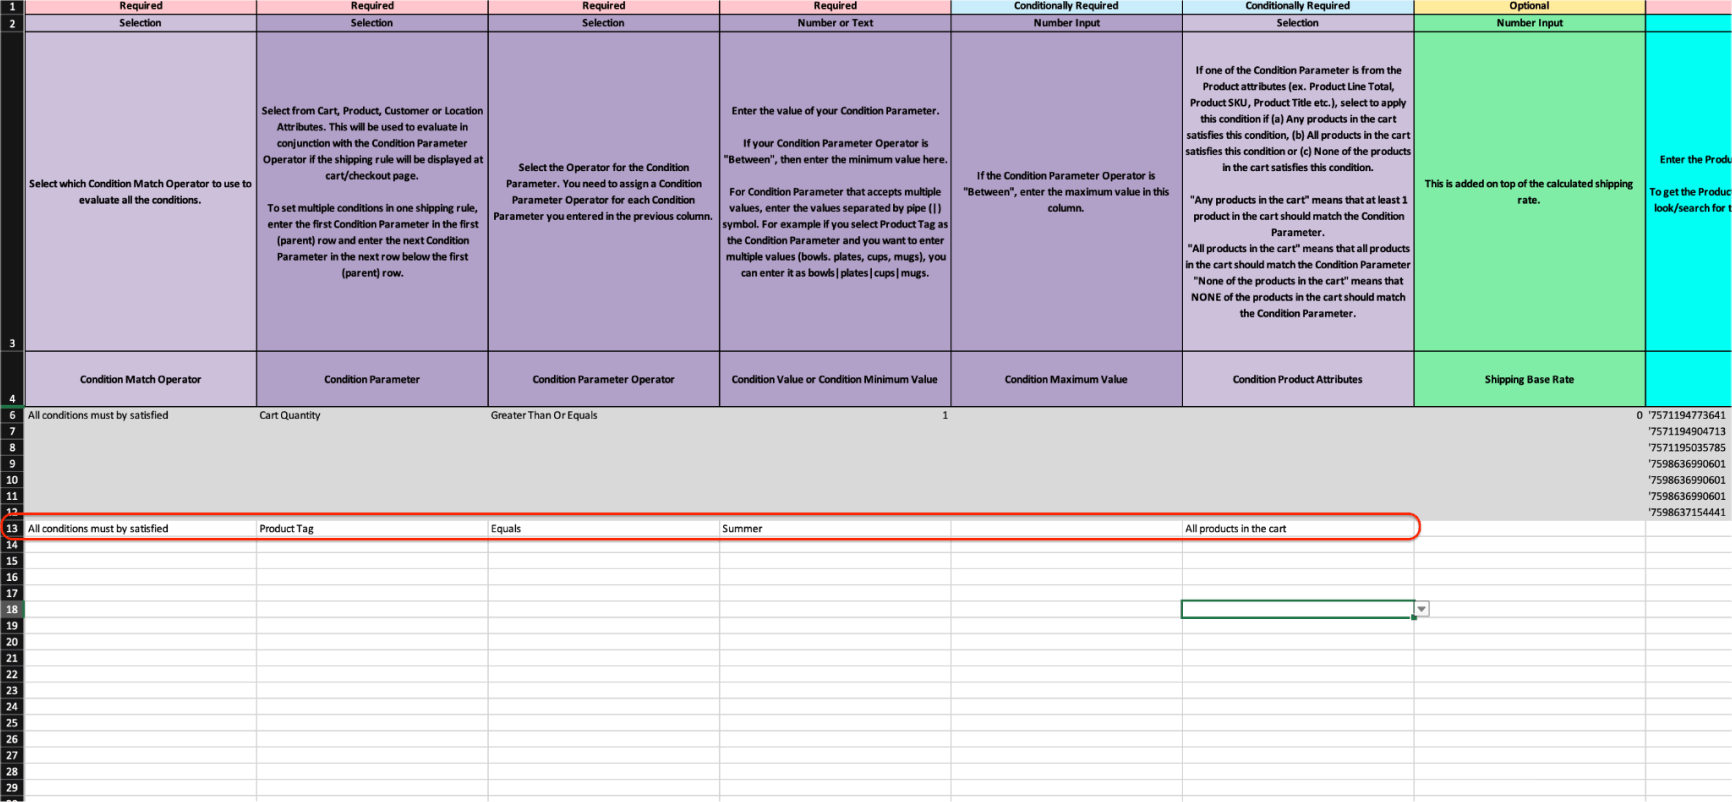
Next, let’s create the conditions for this shipping rate. In this example, we’ll use a condition that applies only to products tagged as “Summer.” Of course, you can create more conditions with different combinations. To learn more about how to do this in the import file, read this article.
Now, we move on to setting up how the calculation for this rate will work.
First, let’s set the base price for the rate. This will be a price of $5.

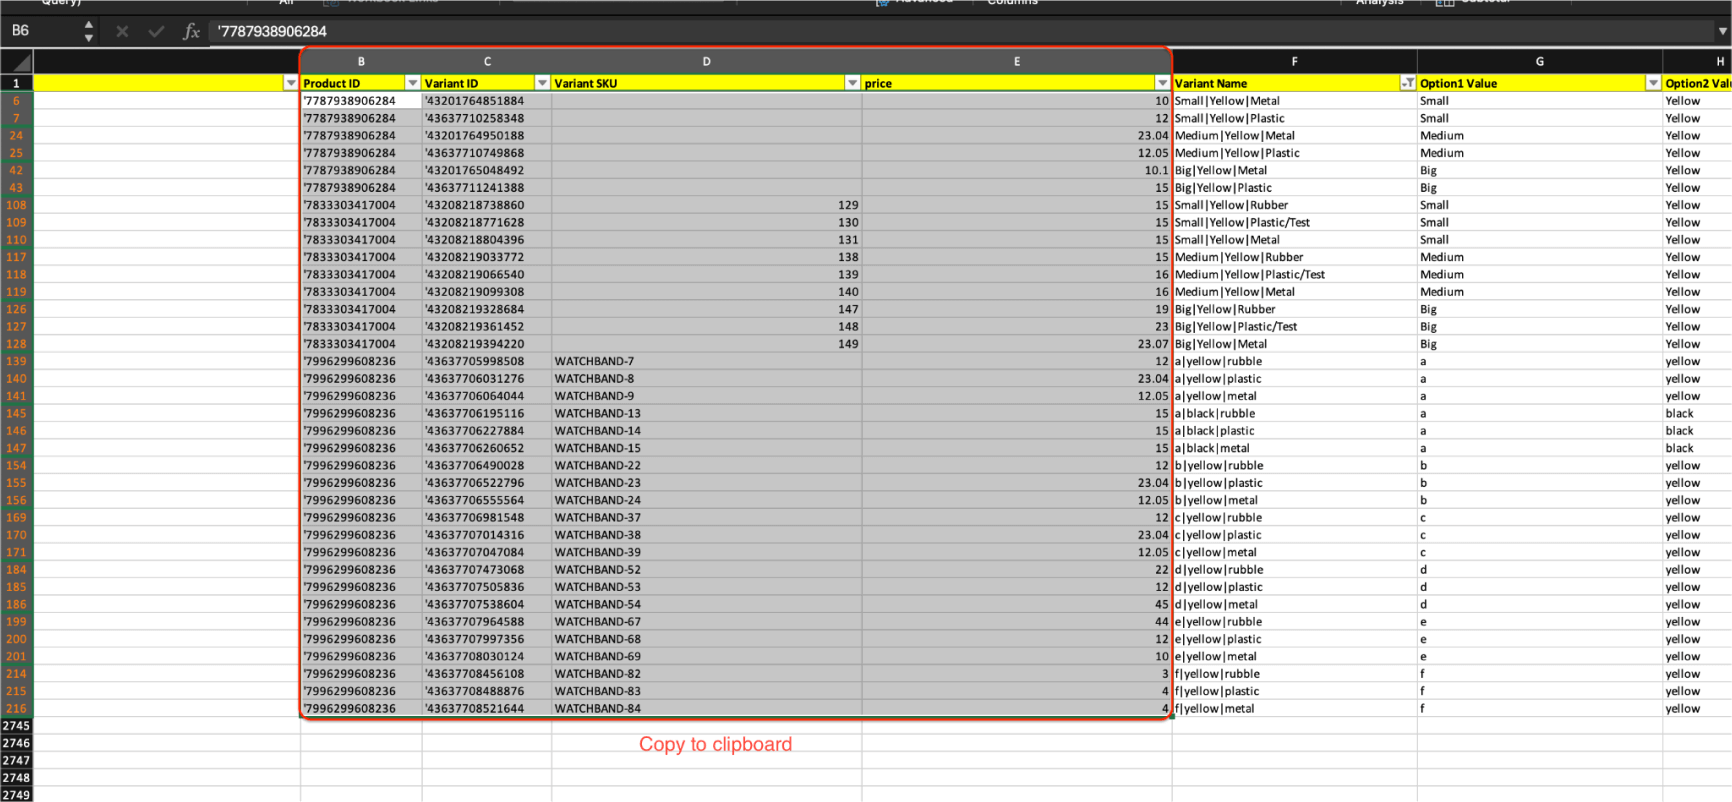
Next, we need to assign prices to the products. For this, we’ll use the products.xlsx sheet.
The products.xlsx file is designed so that you can easily copy values from this sheet to the shipping rates sheet. The columns for Product ID, Variant ID, and Variant SKU are in the same order as in the shipping_rules.xlsx file.
You can copy all product data or just a part of it. To copy the specific data you’re interested in, you can use the data filtering option in Excel.
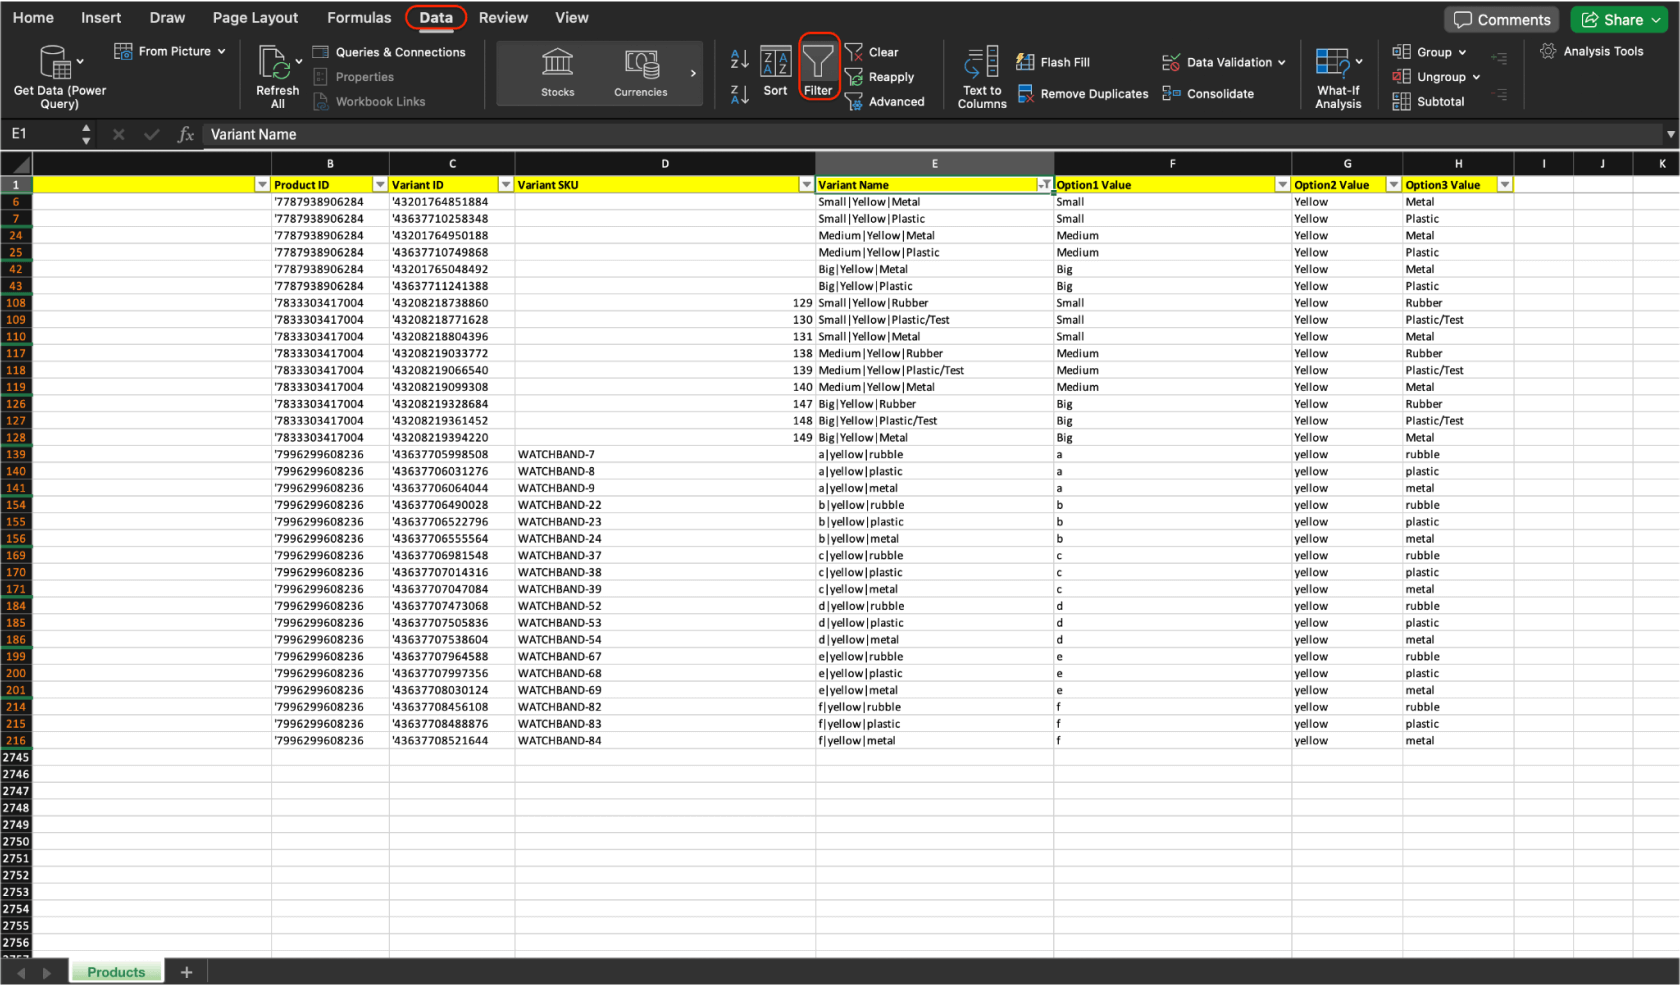
Next, you can copy the values in the Product ID, Variant ID, and Variant SKU columns into the shipping_rules.xlsx sheet.
A good approach is to add a column called “Price” in the products.xlsx file to fill in the prices for variants directly in this file since you’ll see the exact product names (variants). When you copy the values into the shipping_rules.xlsx sheet, you’ll only see the IDs and SKUs.

With this data prepared, you can copy it into the shipping_rules.xlsx sheet.
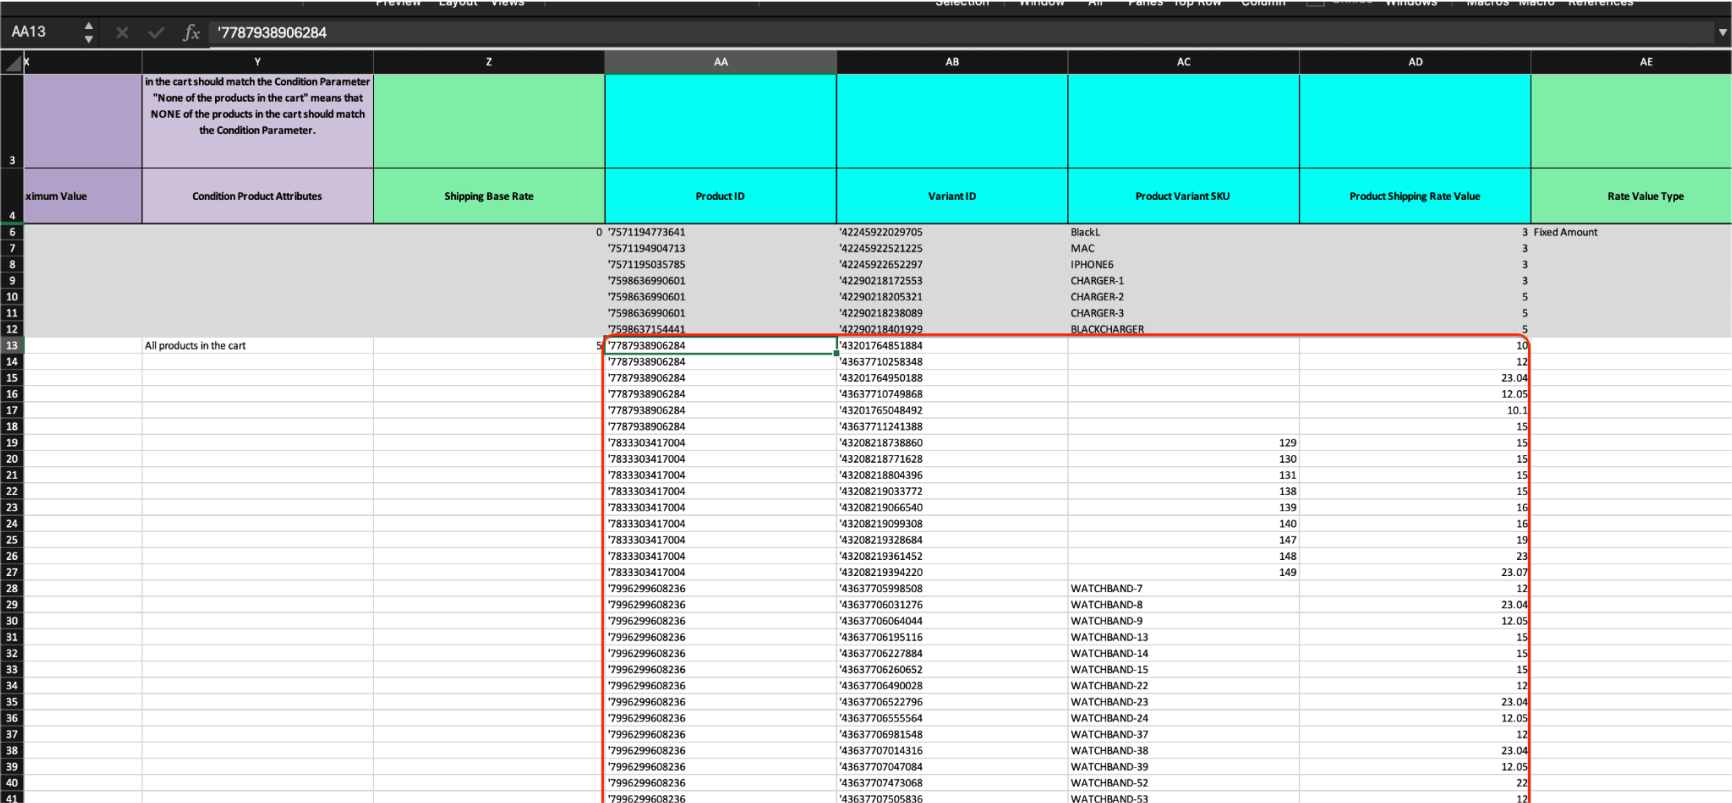
Remember to assign the same Group ID to all additional rows.
We’ve now assigned the shipping rate prices for the products.
Next, fill in additional information about the calculation, such as whether the provided value should be “Fixed” or “Percentage,” whether the value should be multiplied by the quantity of products in the cart during calculation (Yes/No), the default value for products that don’t have a set rate or for new products (here, provide the value and type—Fixed/Percentage), and the minimum and maximum shipping rate.
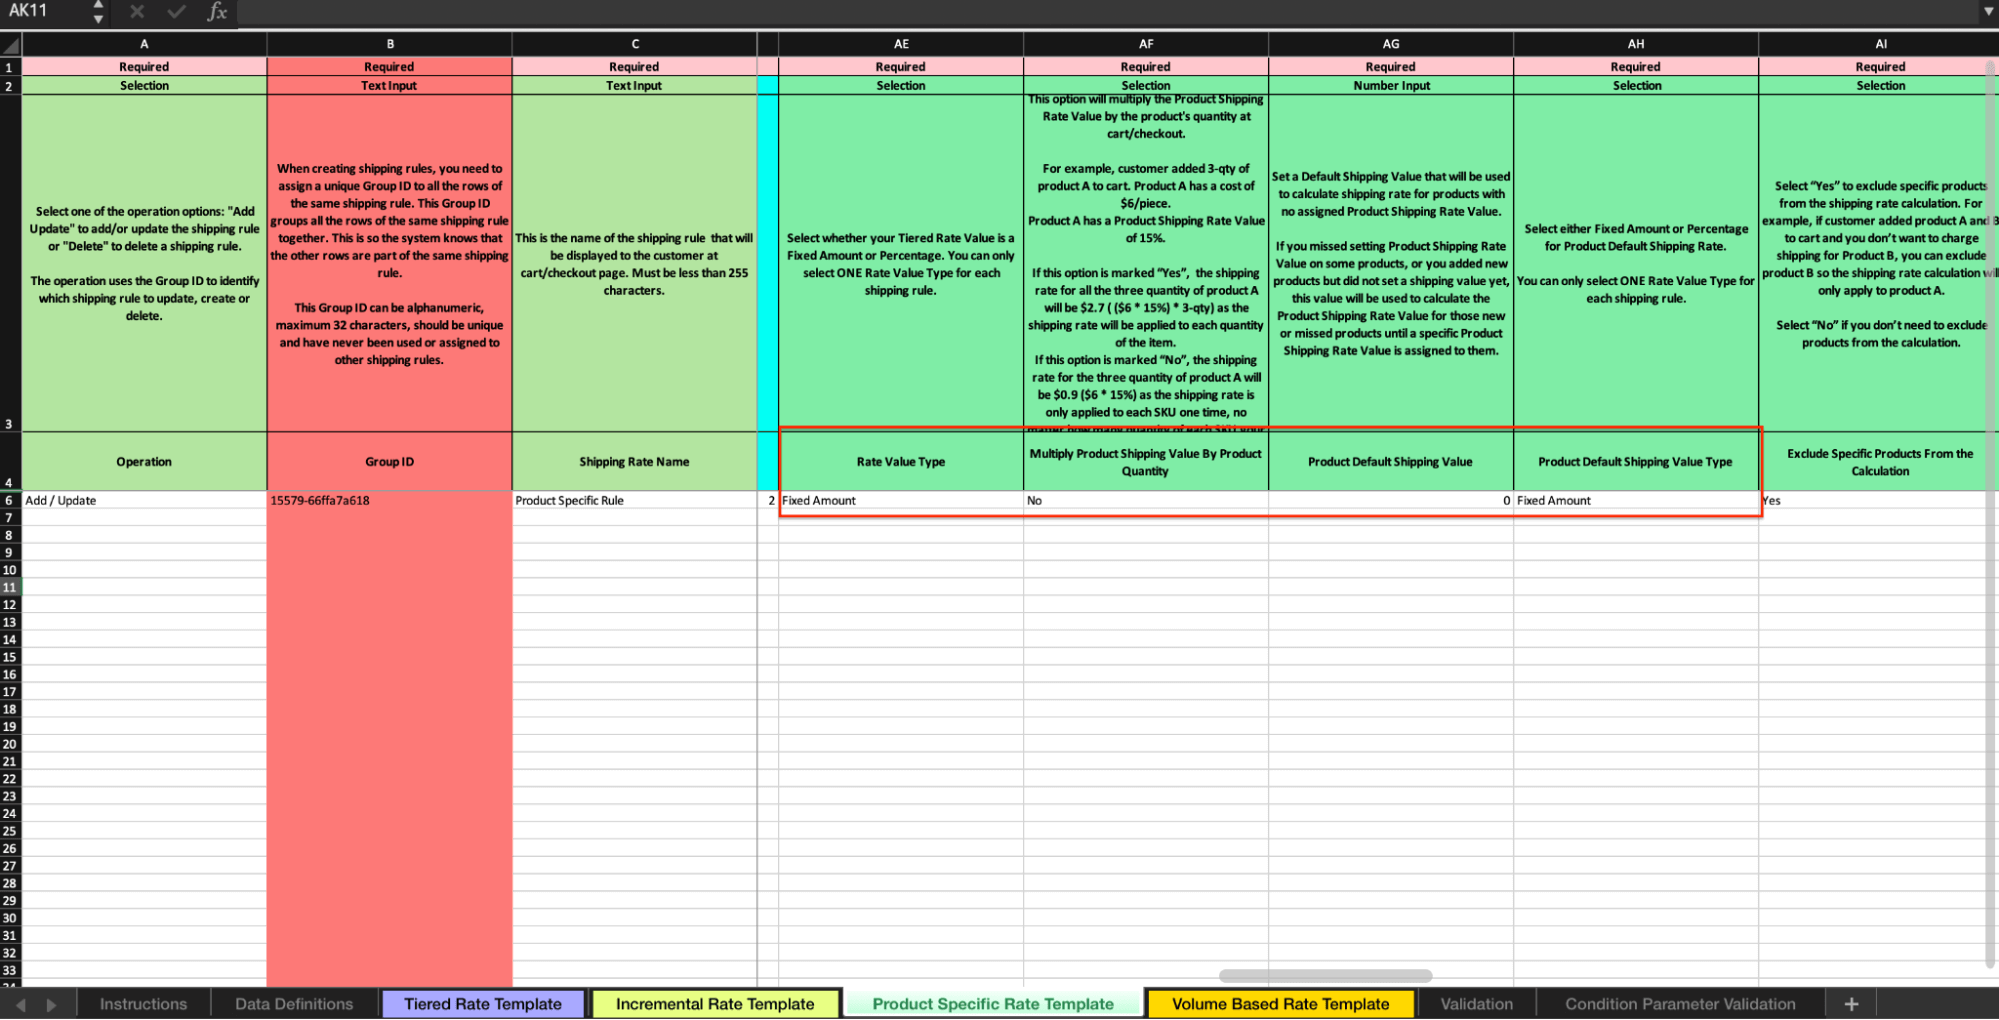
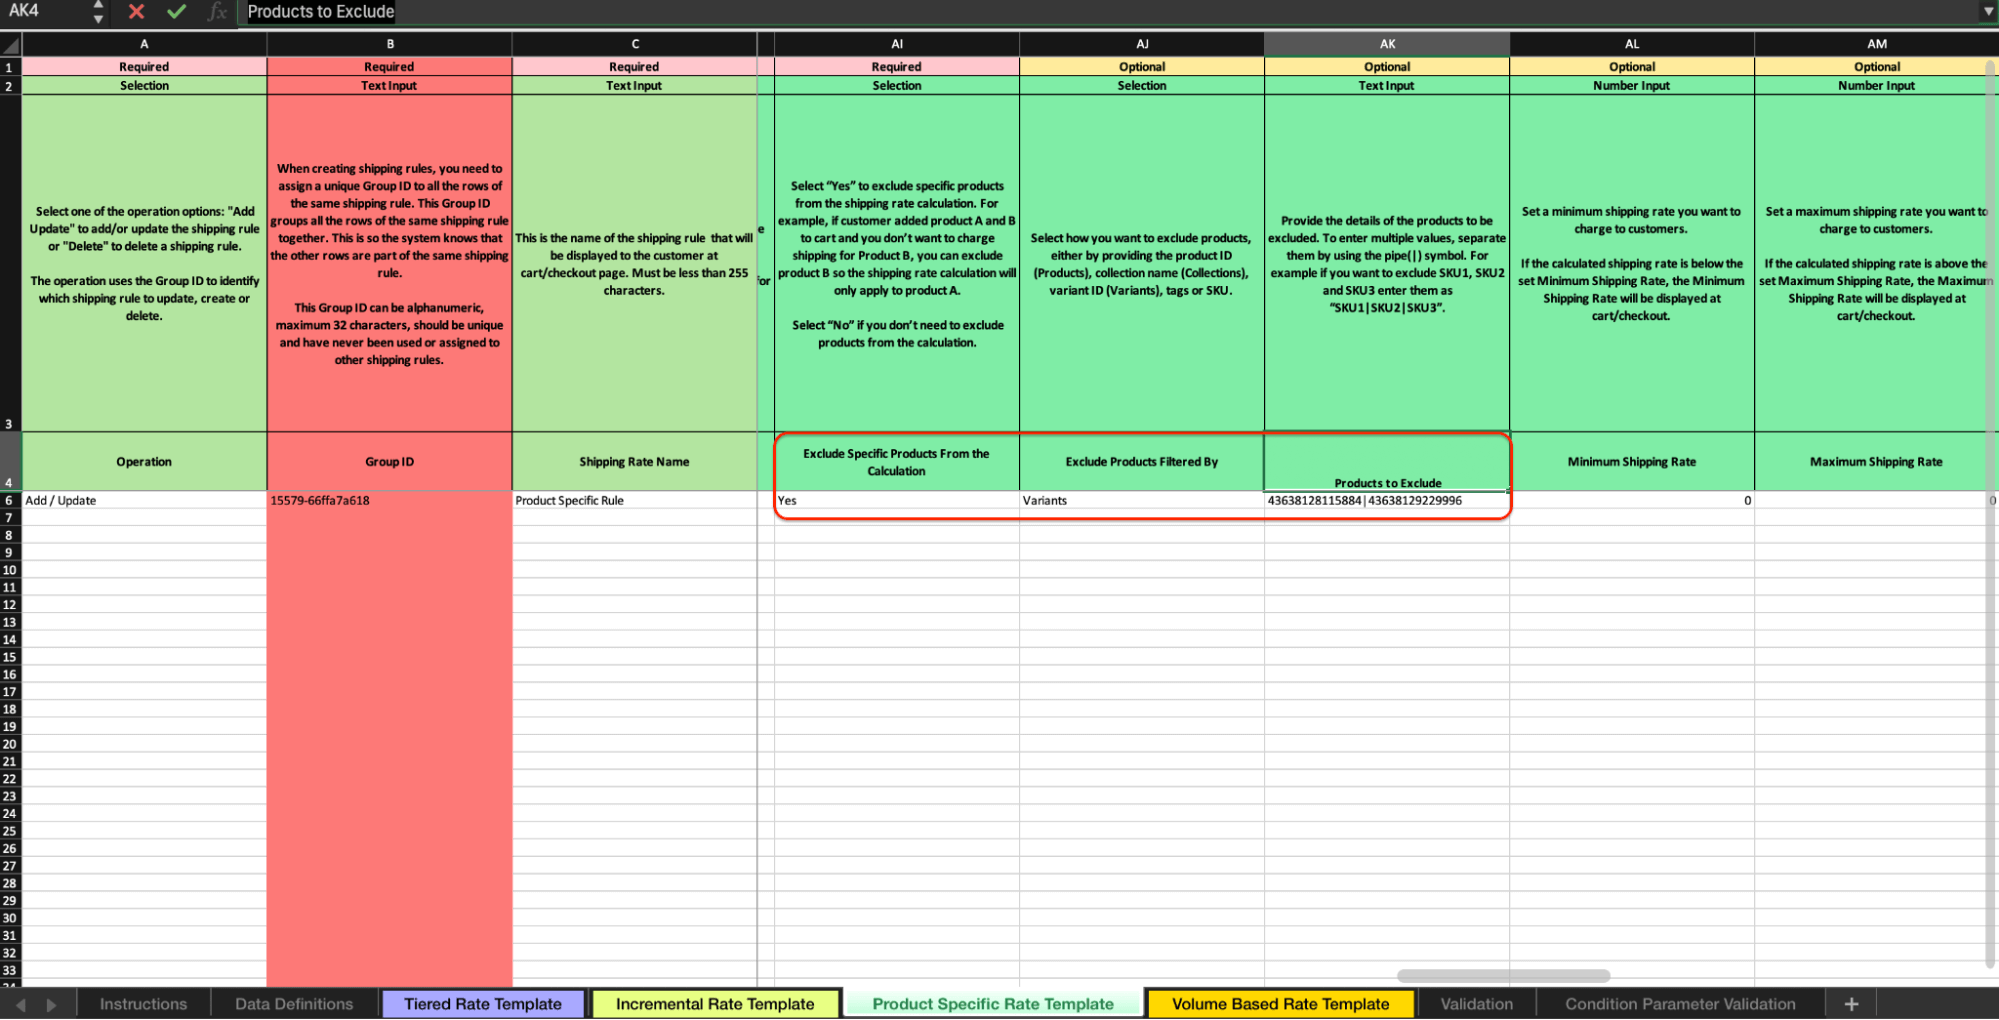
The next step is to set up products excluded from the rate calculation. This is an optional field. If you do not wish to use this feature, select ‘No’ in the ‘Exclude Specific Products From the Calculation’ field. If you choose ‘Yes,’ you will need to fill out two additional fields: ‘Exclude Products Filtered By’ and ‘Products to Exclude.’ An example configuration of these values can be seen in the spreadsheet image below. If you would like to learn more about this feature, please read the article on this topic.
Then, we will fill in the information about merging the shipping rate and the origin locations and dates for this rate.
We are now ready to import the prepared file into the application.
Go to the “Advanced Shipping Calculator” tab and click the “Import Shipping Rules” button above the shipping zones table. Select the file and click “Upload.”

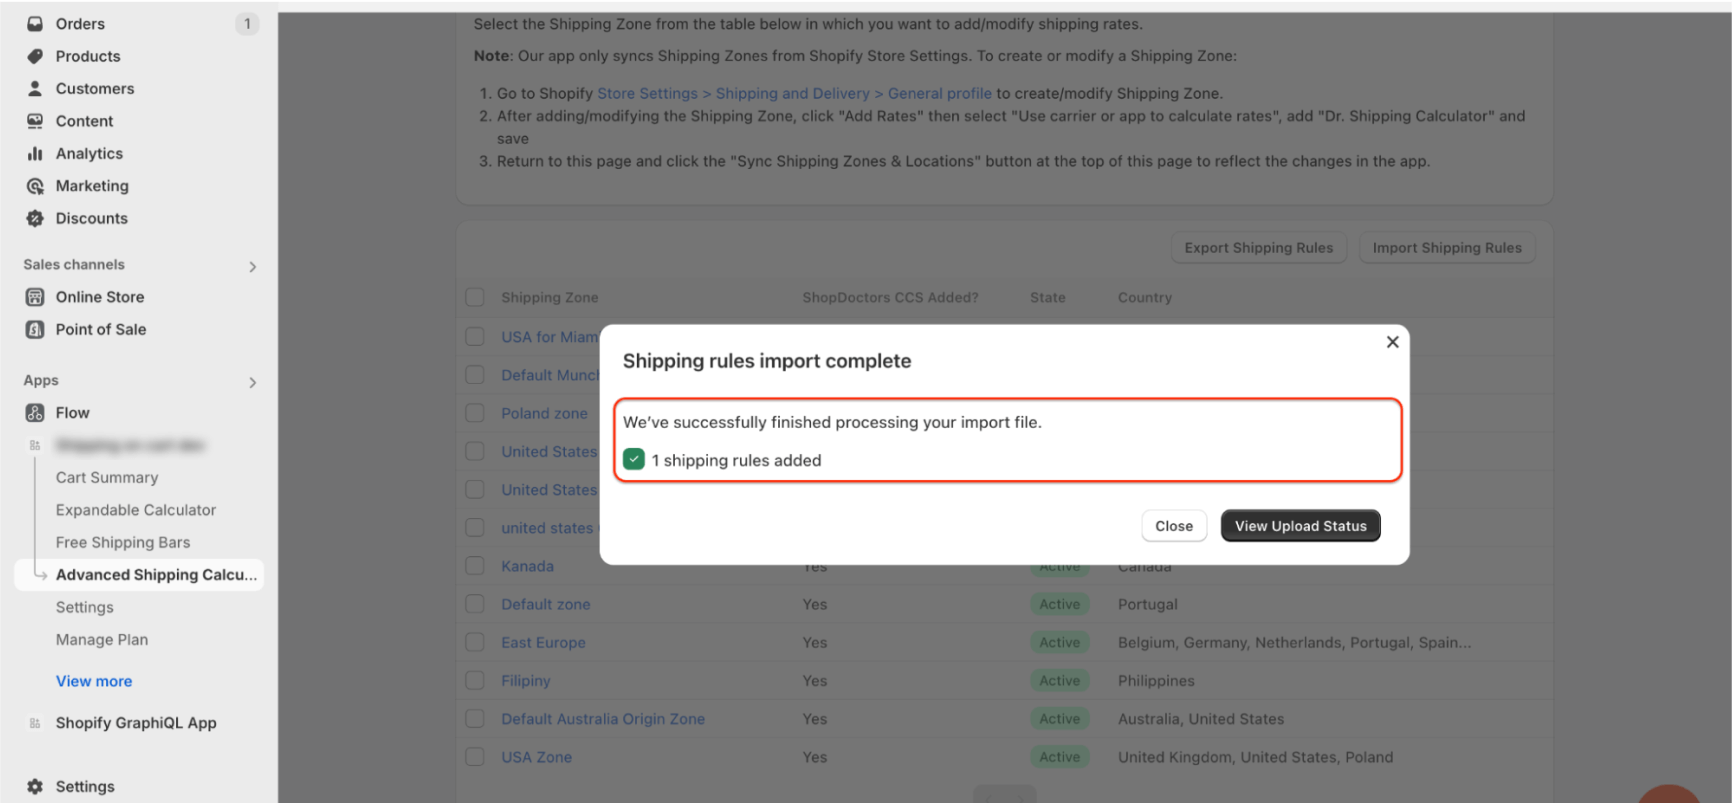
The import process will start, and you will be notified when it’s completed and informed about the status.
To learn more about the import history and import status, read this article.
Troubleshooting
Sometimes your shipping rates import file might be quite large, depending on the number of products you’ve assigned prices to. We recommend not importing files with sheets containing more than 20,000 rows. In this case, you can do the following:
- Remove unnecessary sheets that shouldn’t be part of the import. You can delete all sheets except “Product Specific Rate Template.”
- If your file contains several rates with many products, you can split the rates into separate files.
- If you still have too many rows, contact our support team, and we’ll find a solution for your issue.