How to Create Incremental Shipping Rules Using Import in Shopify Advanced Shipping Calculator
GENERAL
ADVANCED SHIPPING SETTINGS
SHIPPING PROFILE & ZONES
SHIPPING RULE/RATE SETUP
SHIPPING RULE/RATE SETUP USING CARRIER RATES INTEGRATION
SHIPPING RULES IMPORT/EXPORT FUNCTIONALITY
MERGING MULTIPLE SHIPPING RULES
PRODUCT DIMENSIONS SETUP
HISTORY/AUDIT TRAIL
COMMON ISSUES & FAQs
How to create Incremental Shipping Rules Using Import in Shopify Advanced Shipping Calculator
In this article, you will learn about:
- Why would you use an incremental shipping rate import?
- How to create shipping rates based on the “Incremental” calculation type using the import feature.
For more basic information about import/export, please refer to this article: Understanding the shipping rules import file.
For more details on creating shipping rates based on the “Incremetnal” type, check out this article.
Why would you use an incremental shipping rate import?
Incremental shipping rate import is a powerful tool that allows you to efficiently manage and update multiple shipping rates at once. This feature is particularly useful when your shipping rates depend on various parameters such as cart value, cart/product weight, distance between sender and recipient, etc.
The incremental type of import enables you to create shipping rates based on these parameters, allowing for adjustments such as increasing the rate by a specific amount for every X units, weight, or distance. The increase can be applied either as a percentage or a fixed amount.
Additionally, you have the flexibility to choose whether the increment should apply partially (if the threshold is partially reached) or only when the full threshold is met. This allows for precise control over how your shipping rates scale, ensuring that your shipping costs align with the specific details of each order.
How to create shipping rates based on the "Incremental" calculation type using the import feature?
To create incremental shipping rates using the import functionality, you’ll first need to download a template file, which will be used to create the import file.
Step 1: Download the Template
- Go to the “Advanced Shipping Calculator” page.
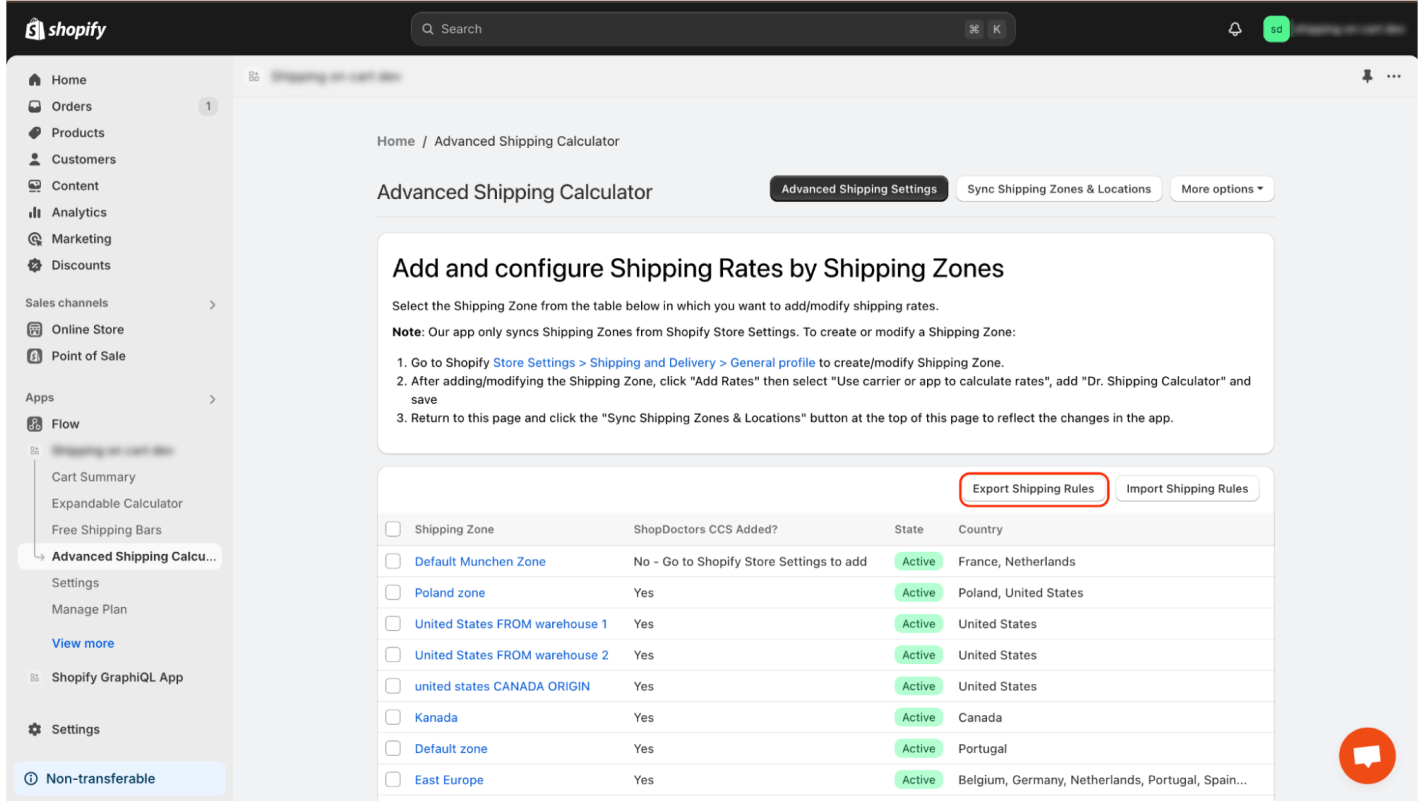
- Click on the “Export Shipping Rules” button
- Then, click the “Export” button.
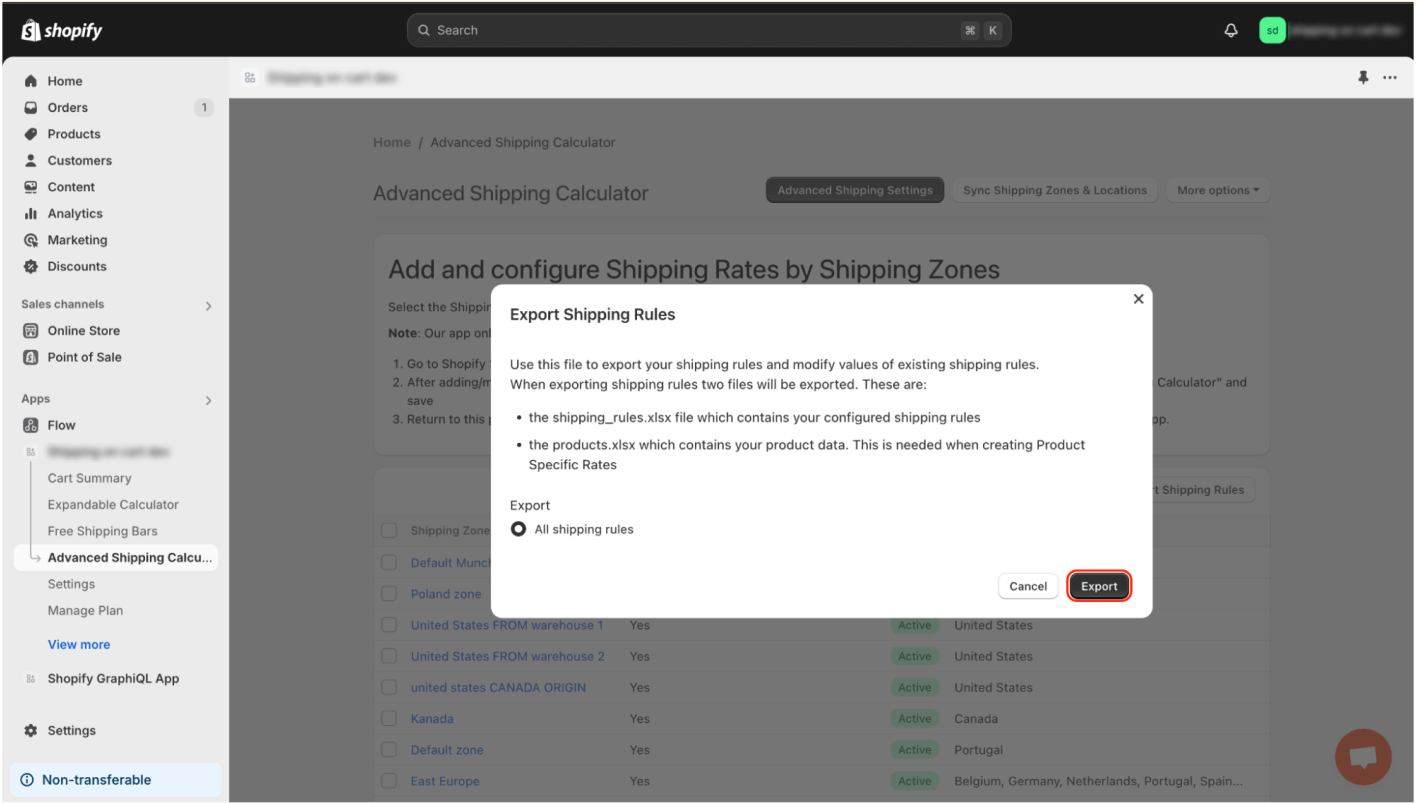
If you need more information about export options, please read this article.
Step 2: Edit the Template
Once the file is downloaded, you can start editing it. Open the file using Excel, then go to the “Incremental Rate Template” tab.
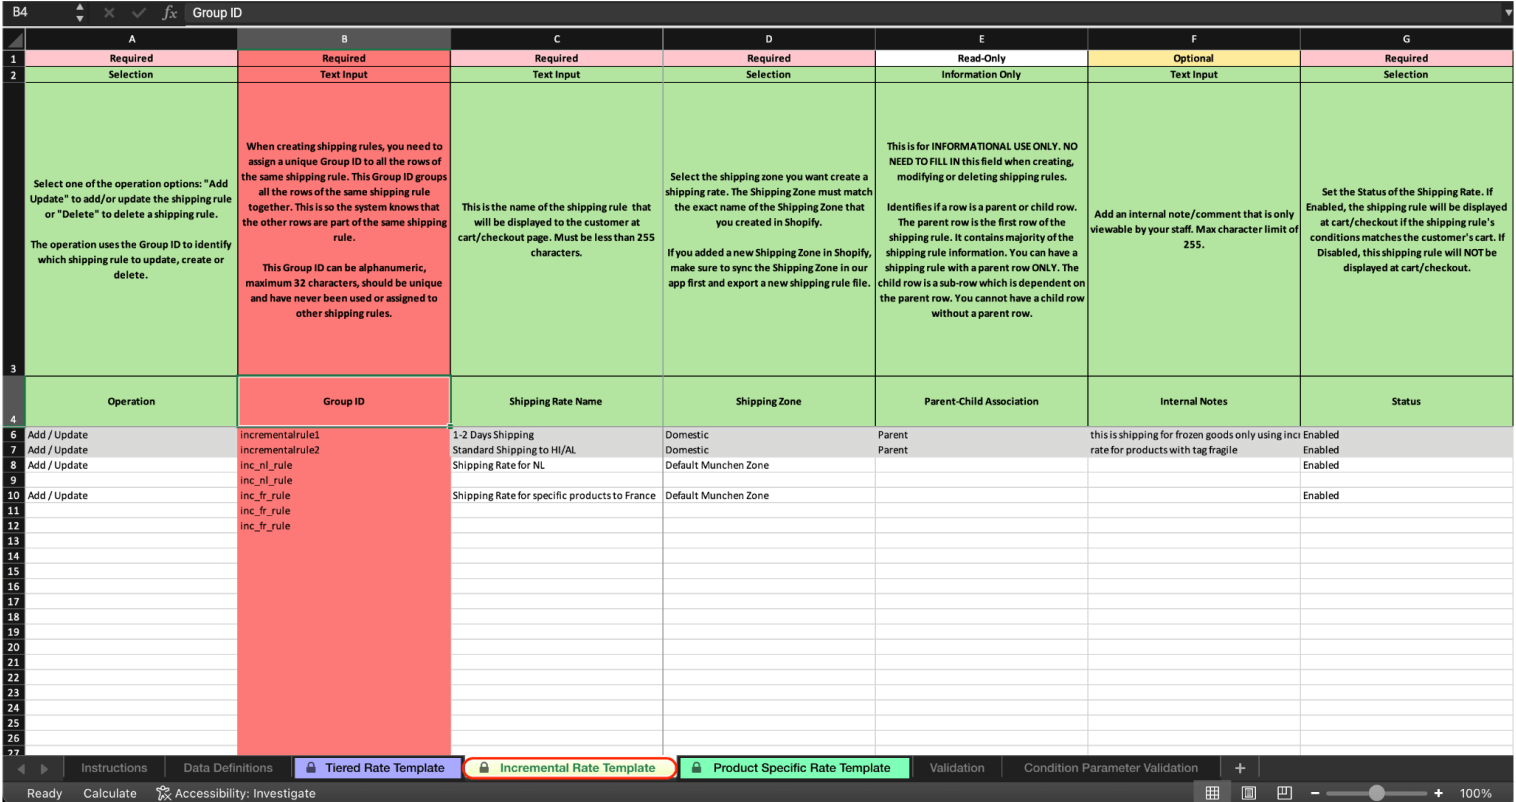
We’ll walk through an example where we want to create two different incremental shipping rates for two different countries, based on which warehouse each shipment will originate from. For this example, we will configure each of these two rates in a different way, including different conditions.
Creating the First Rate
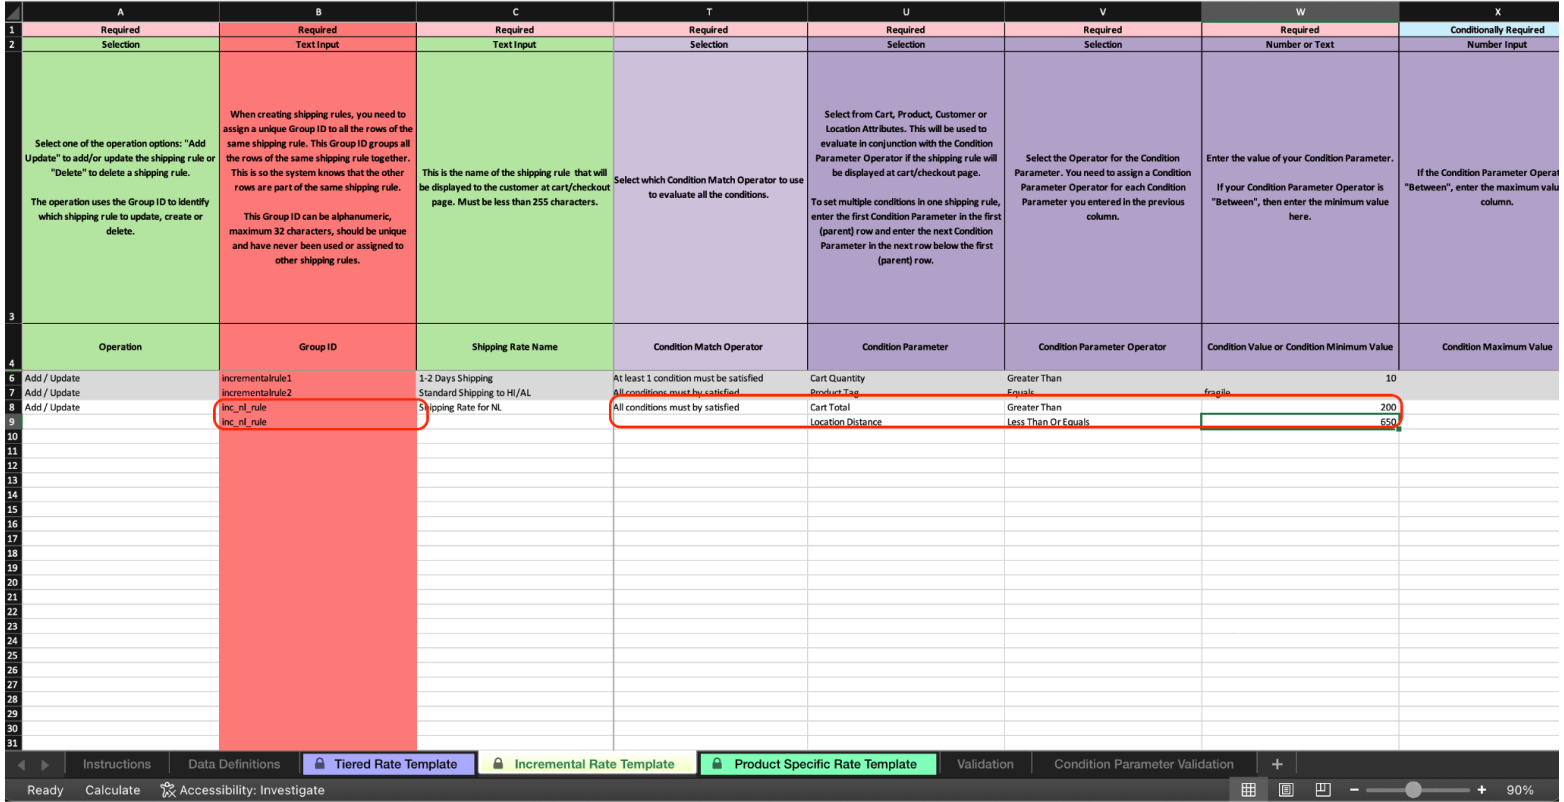
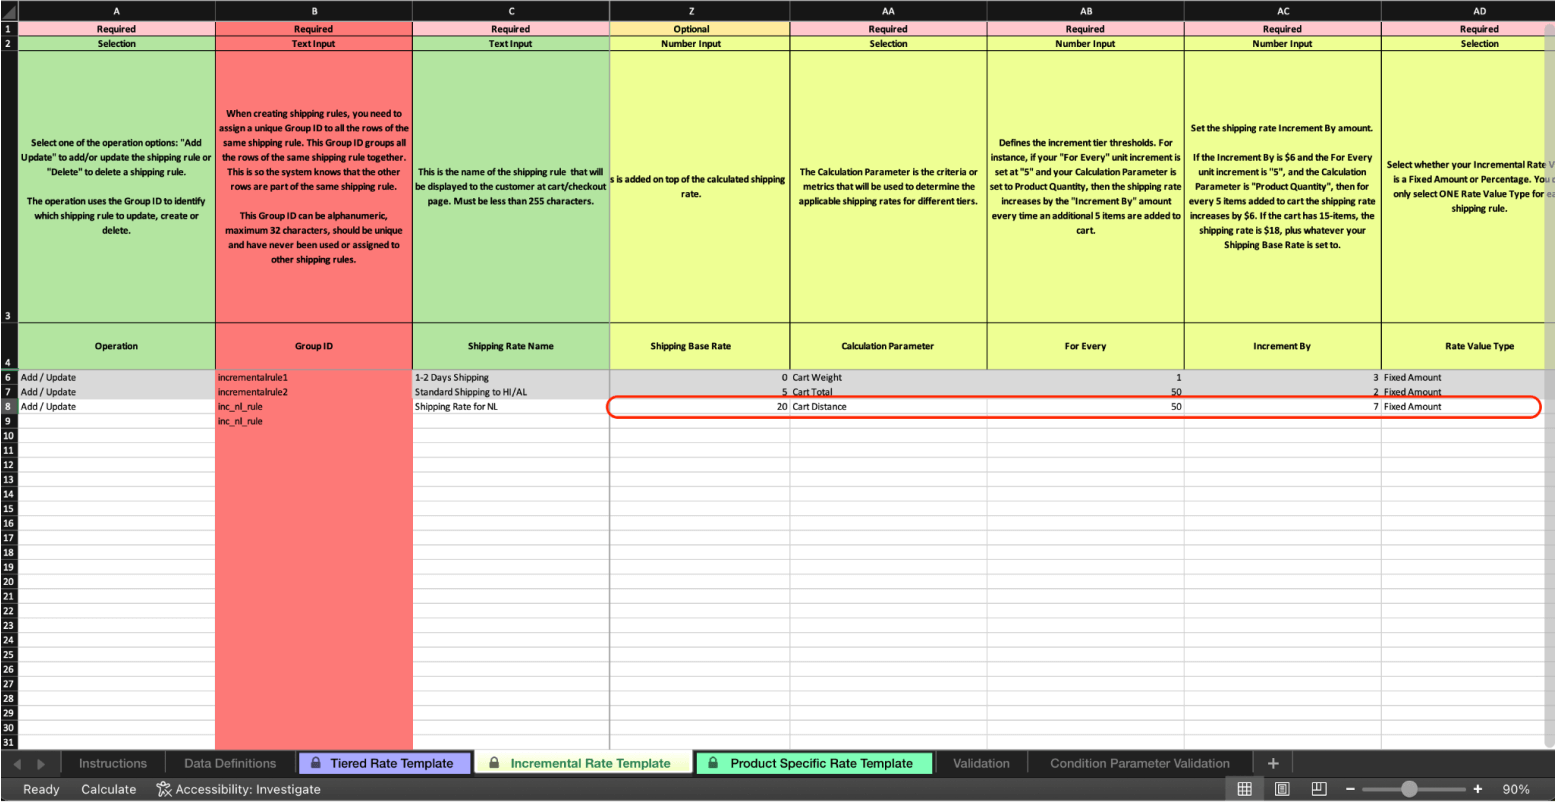
For this rate, we’ll configure shipping from Munich (DE) to the Netherlands (NL). The rate will only be available if the order exceeds 200 EUR and the distance is no more than 650 km. The base shipping rate will be 20 EUR. The increment shipping rate will start increasing by 7 EUR for each additional 50 km after 520 km (the Netherlands border is 520 km from Munich).
- Create the Main Row (Parent Row):
- If you’re not familiar with the parent/child row concept, please read this article.
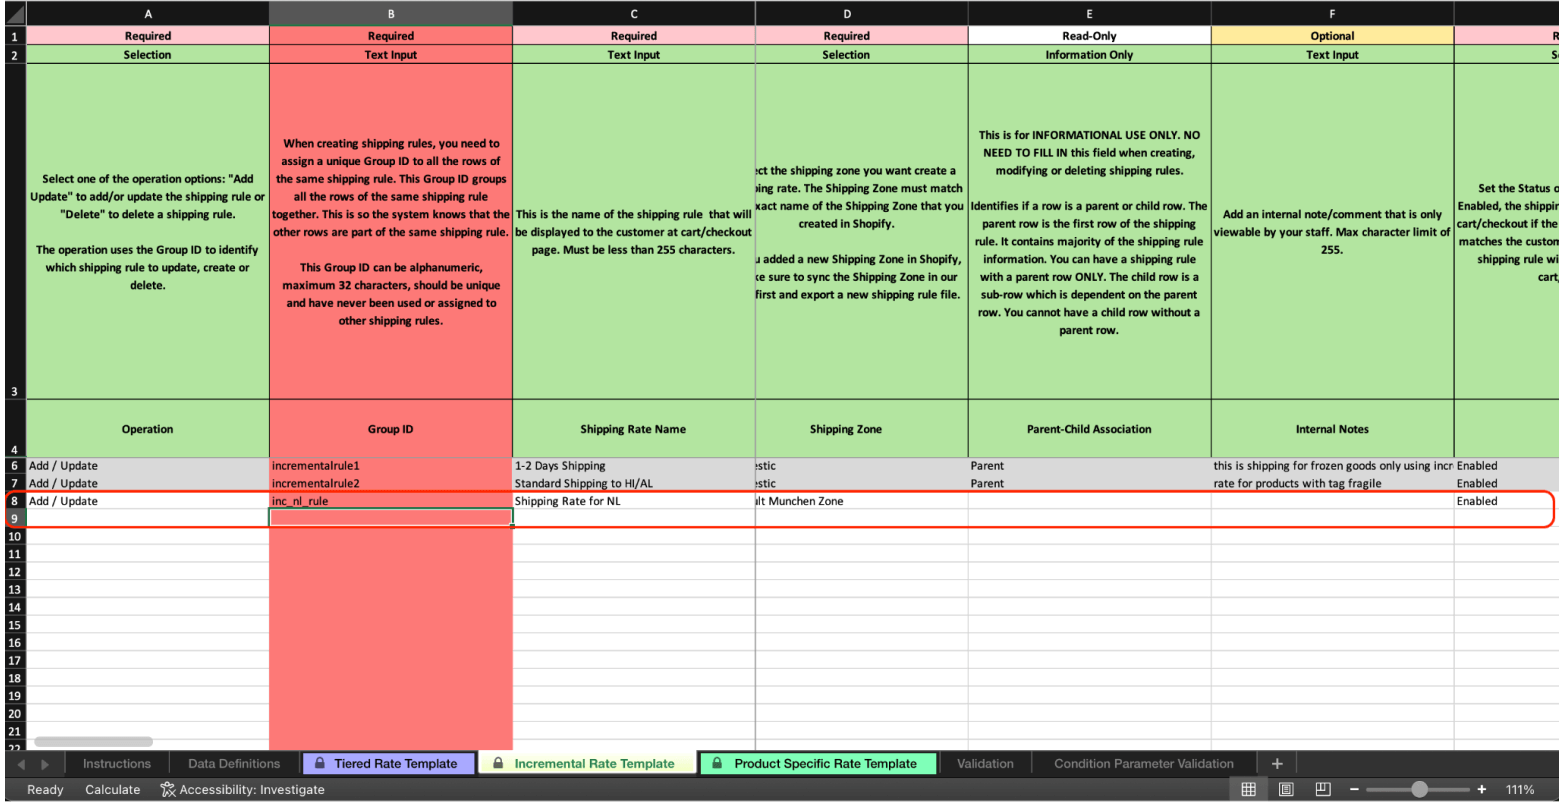
- Fill in all the required data, including the Group ID, select the shipping zone, set the calculation units, and enter the origin address. If you want to learn more about group ID and how to specify them, read this article
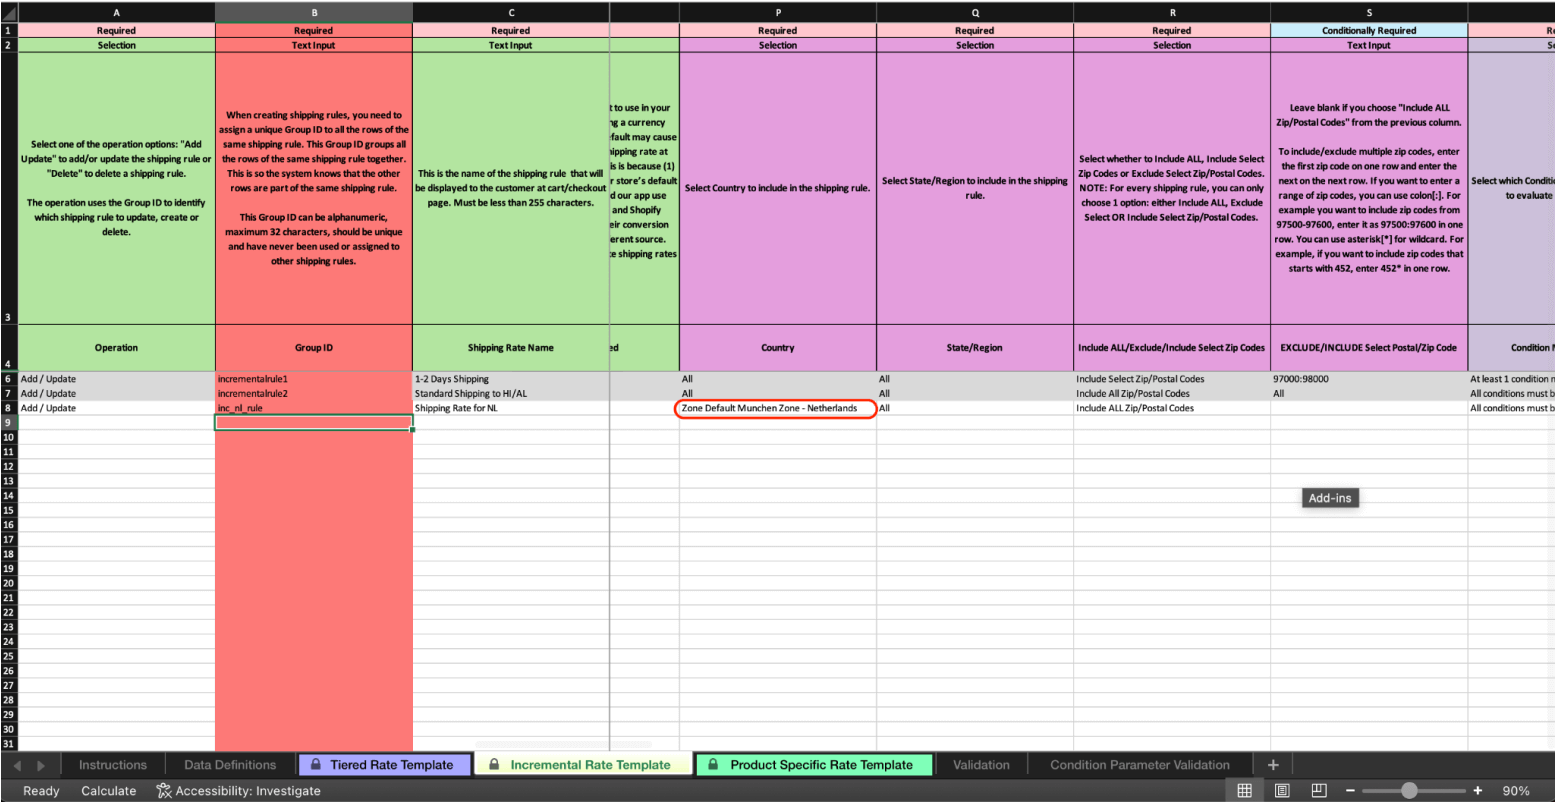
- Restrict the shipping zone to the Netherlands. Notice that countries have shipping zone prefixes. To learn more about that, read this article
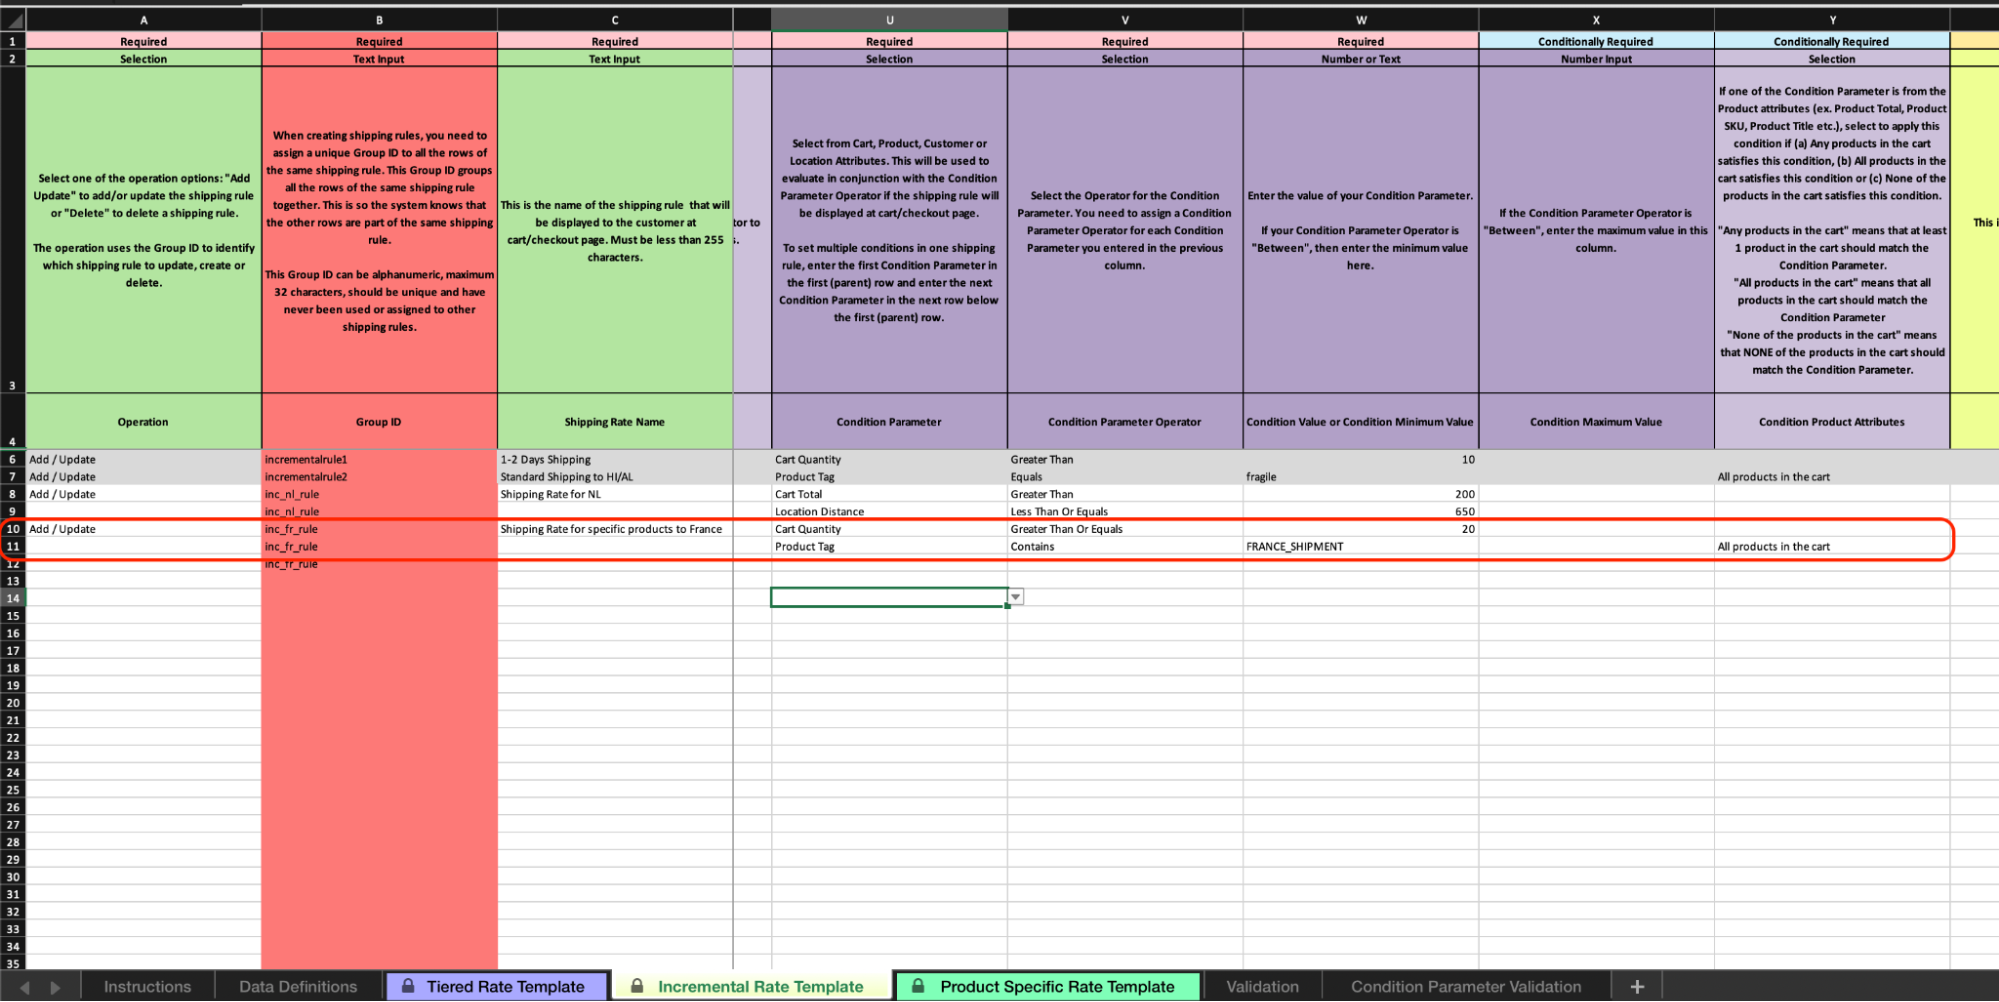
- Set Up the Conditions:
- To configure the conditions for this rate, find the “Conditions” section in the import file. Create an additional child row since there will be two conditions—one in the main row and another in the additional row. Remember to fill in the Group ID for the child row.
- Note: the Group ID will always be the same for parent and child rows
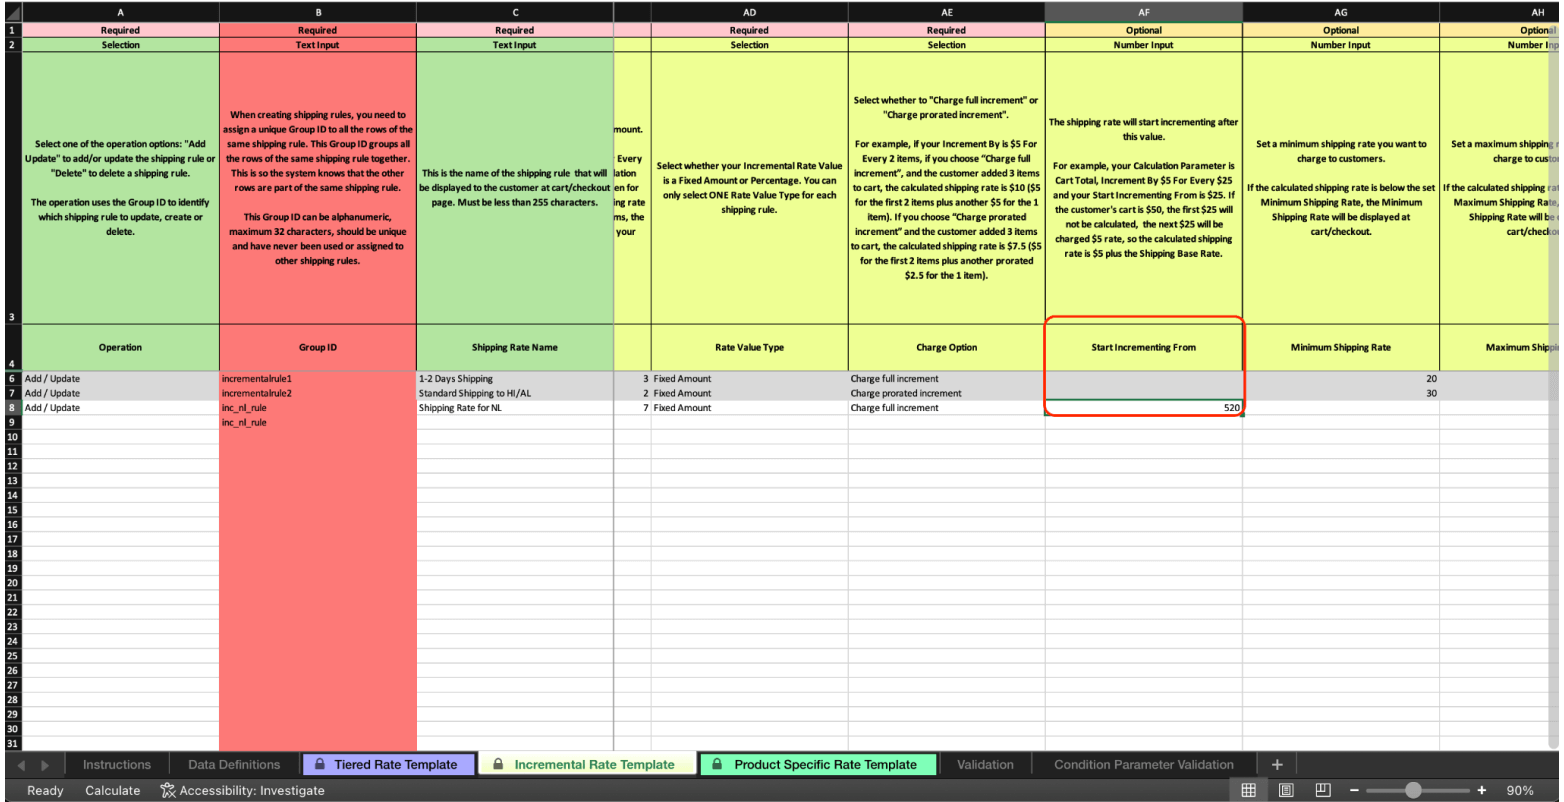
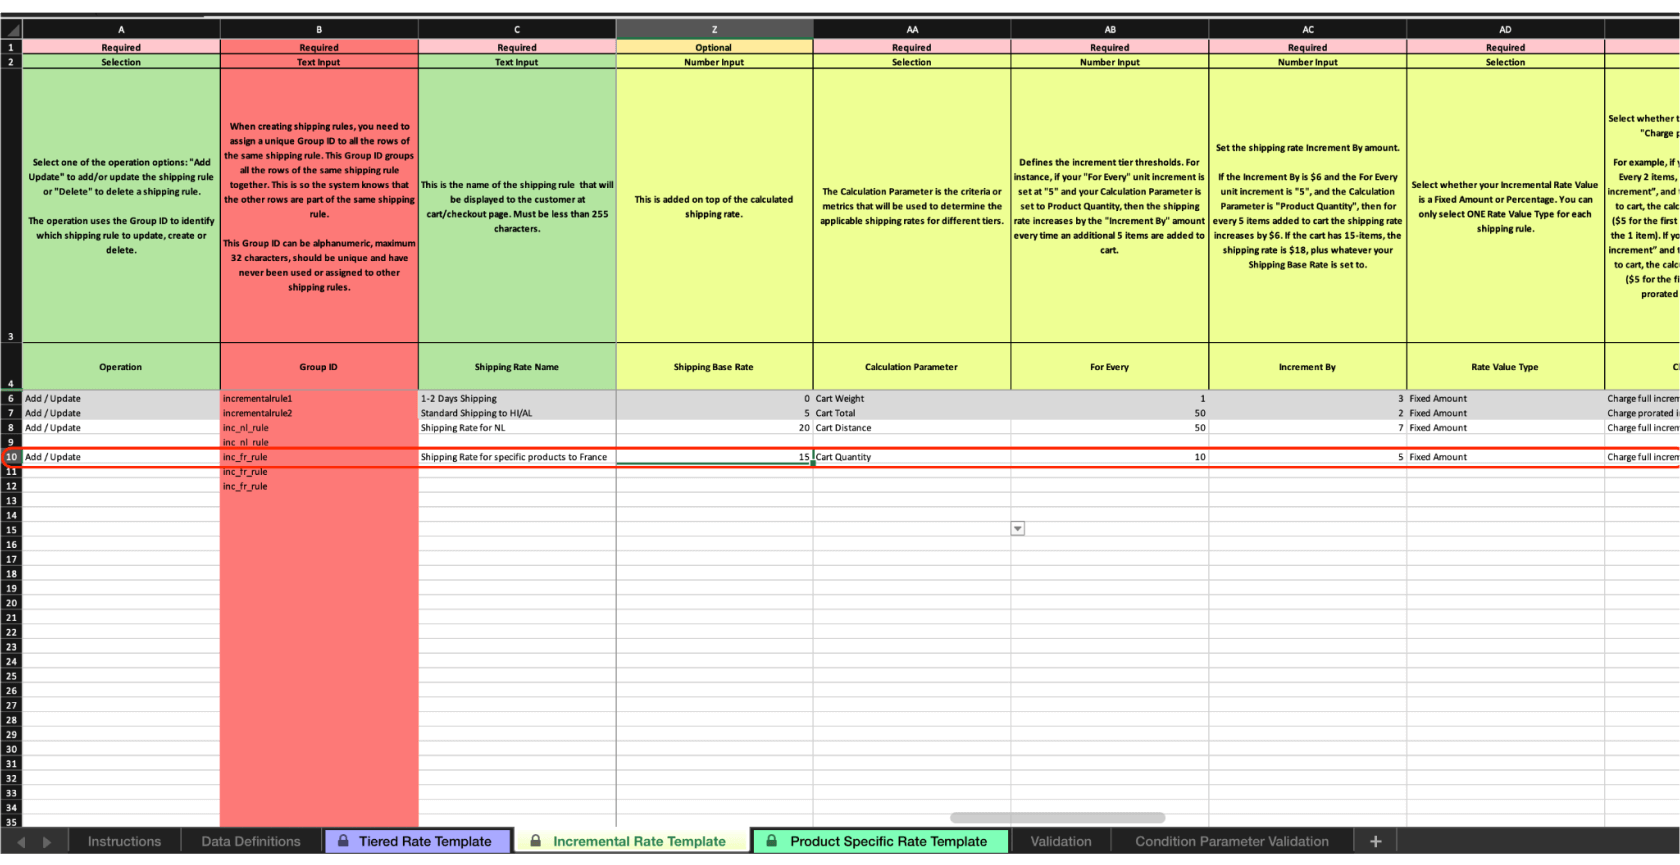
- Configure the Shipping Rate:
- Set the base price to 20 EUR and ensure that the price increment starts only after 520 km. If you want to learn more about the details of “incremental” calculations, read this article. This article delves into “incremental” calculations, provides various examples, and explores different configuration options.
Creating the Second Rate
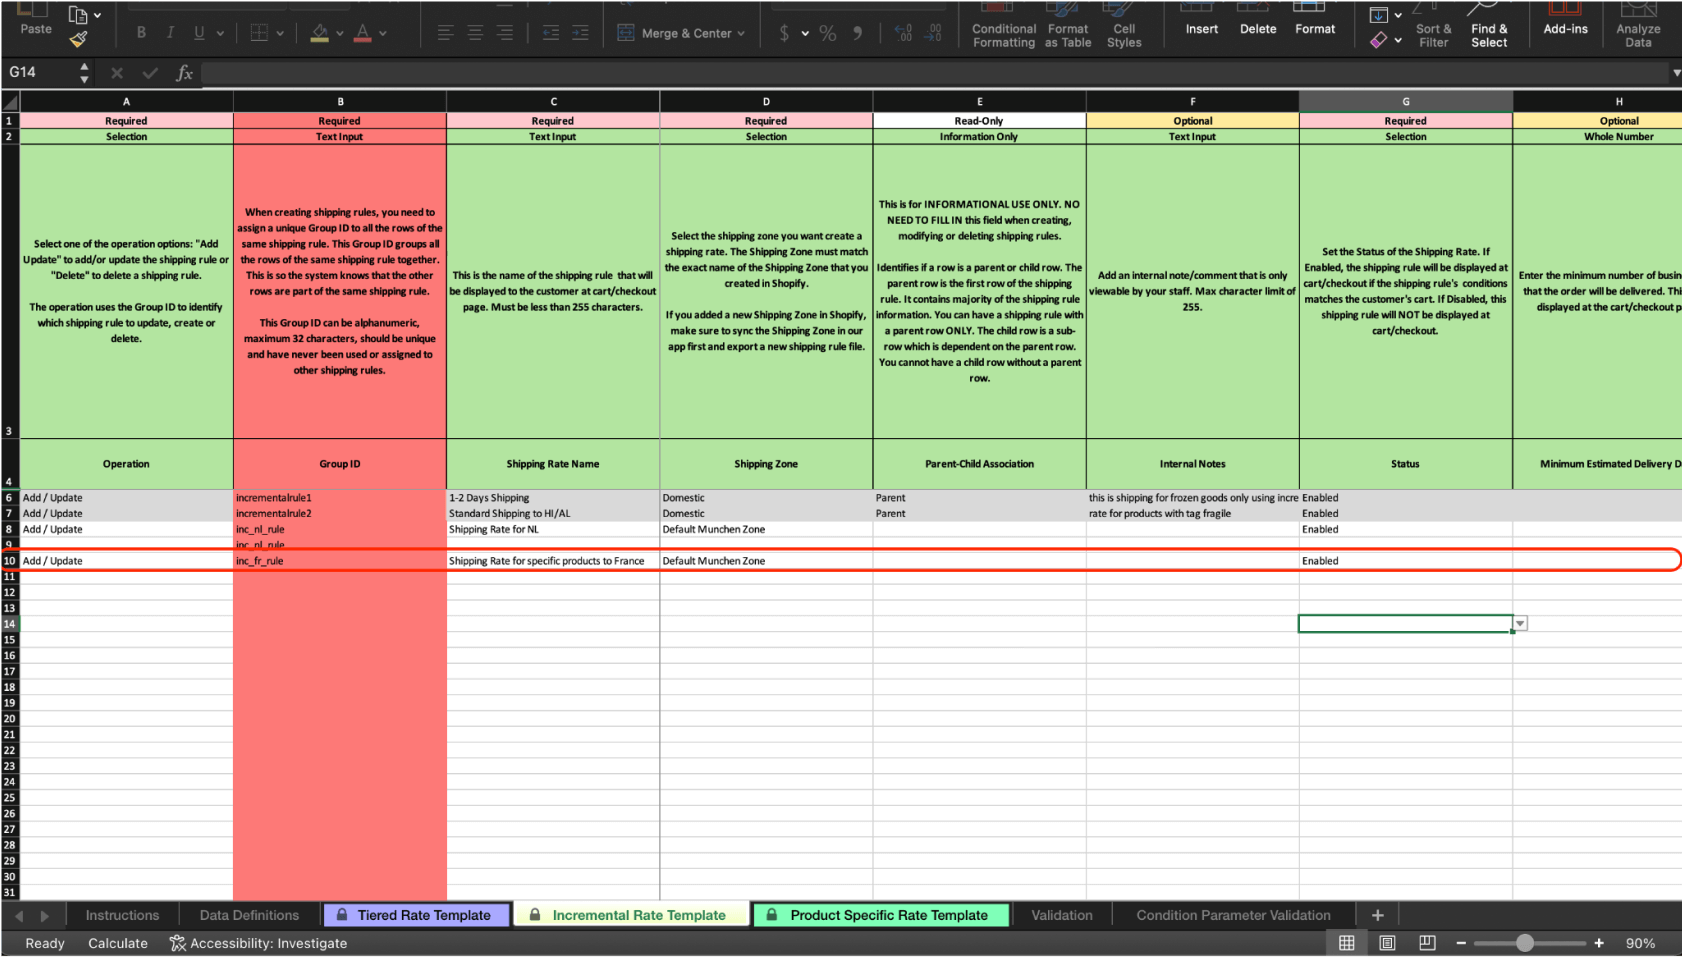
For the second rate, shipping will be to France, but only to selected postal codes. The rate will be in EUR. The conditions will include the number of items in the cart, and this rate will only be available for products tagged with FRANCE_SHIPMENT. However, products within the collection “Frozen products” shouldn’t be included in these calculations. For this example, we’ll configure such products and demonstrate how the condition for products in the cart works.
- Product Configuration:
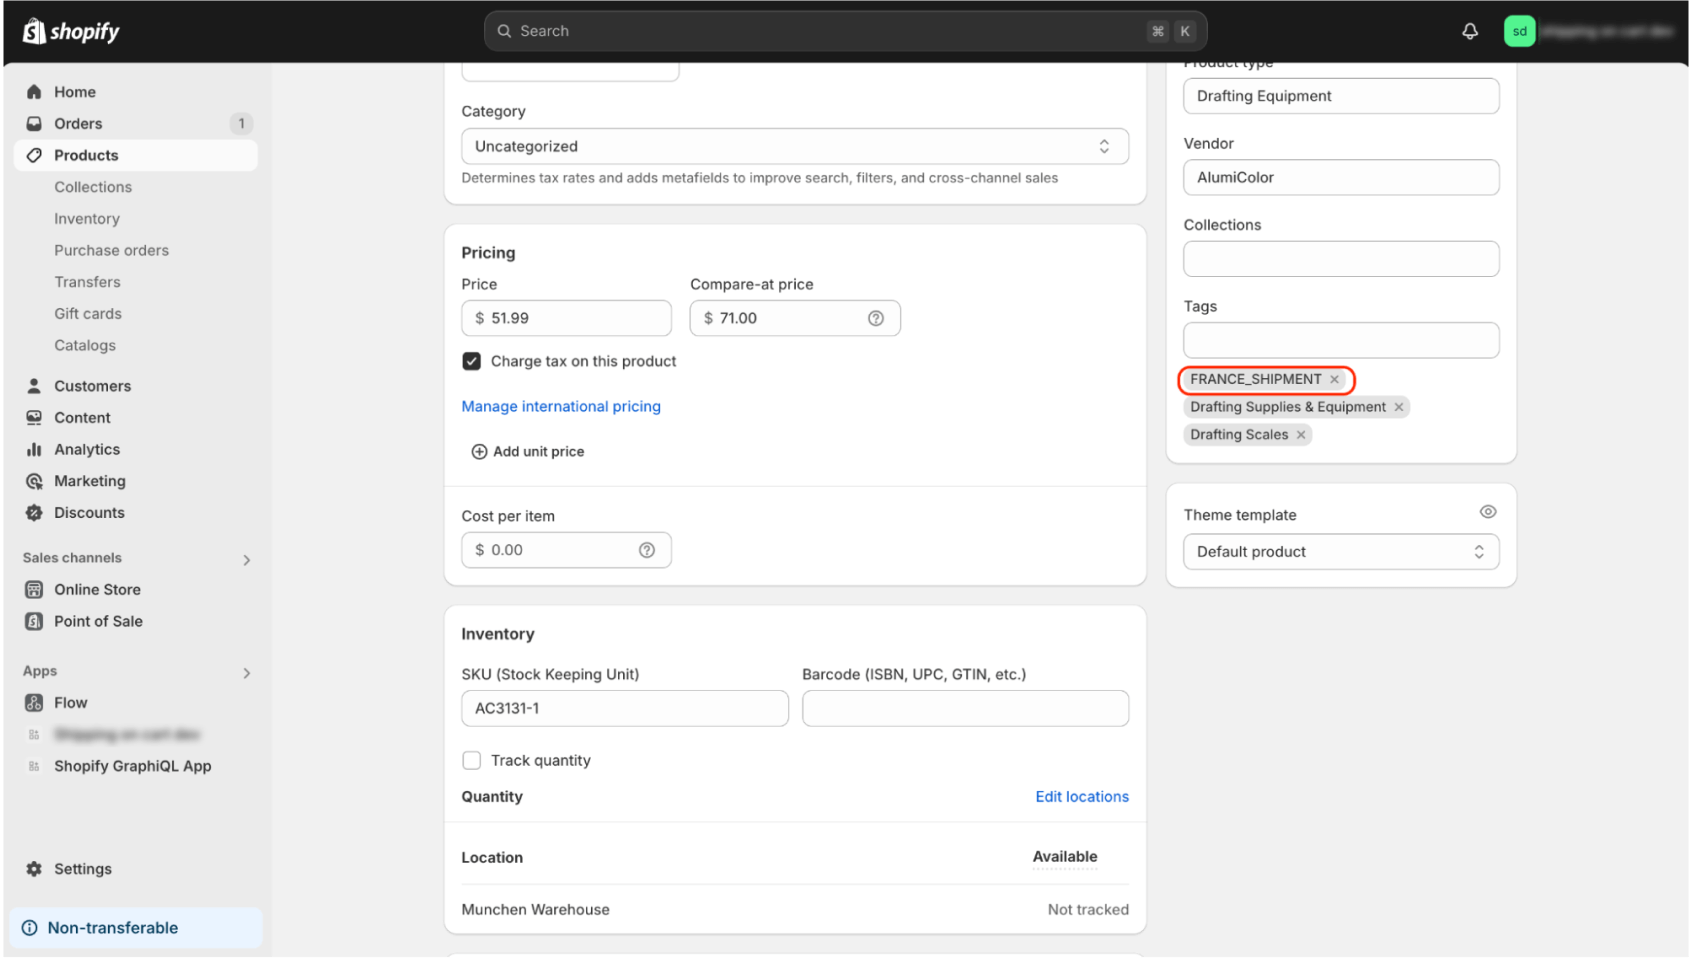
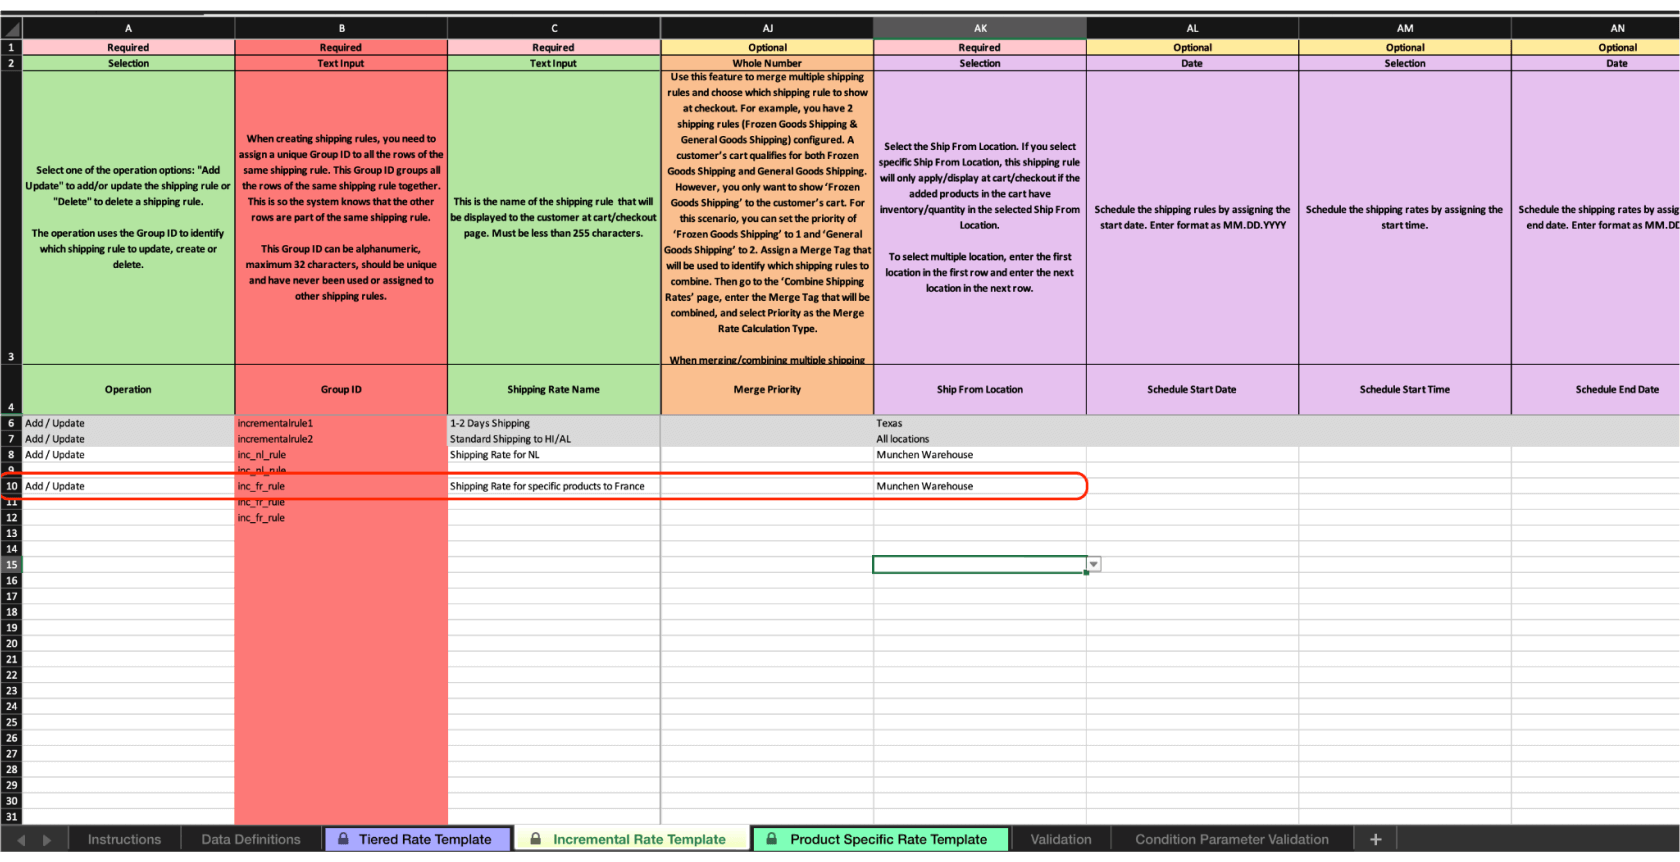
- Create the Rate in the Import File:
Set the locations along with the postal codes to which this shipment should be delivered and from where it should be shipped. If you select “Include Select Zip/Postal Codes” option, in “Include ALL/Exclude/Includes Select Zip Codes” column in import file, you have to specify also postal codes in next column “EXCLUDE/INCLUDE Select Postal/Zip Code”. Also notice that we select “Zone Default Munchen Zone – France” in Country selection.

- Configure the Conditions:
- Configure the Rate Calculation
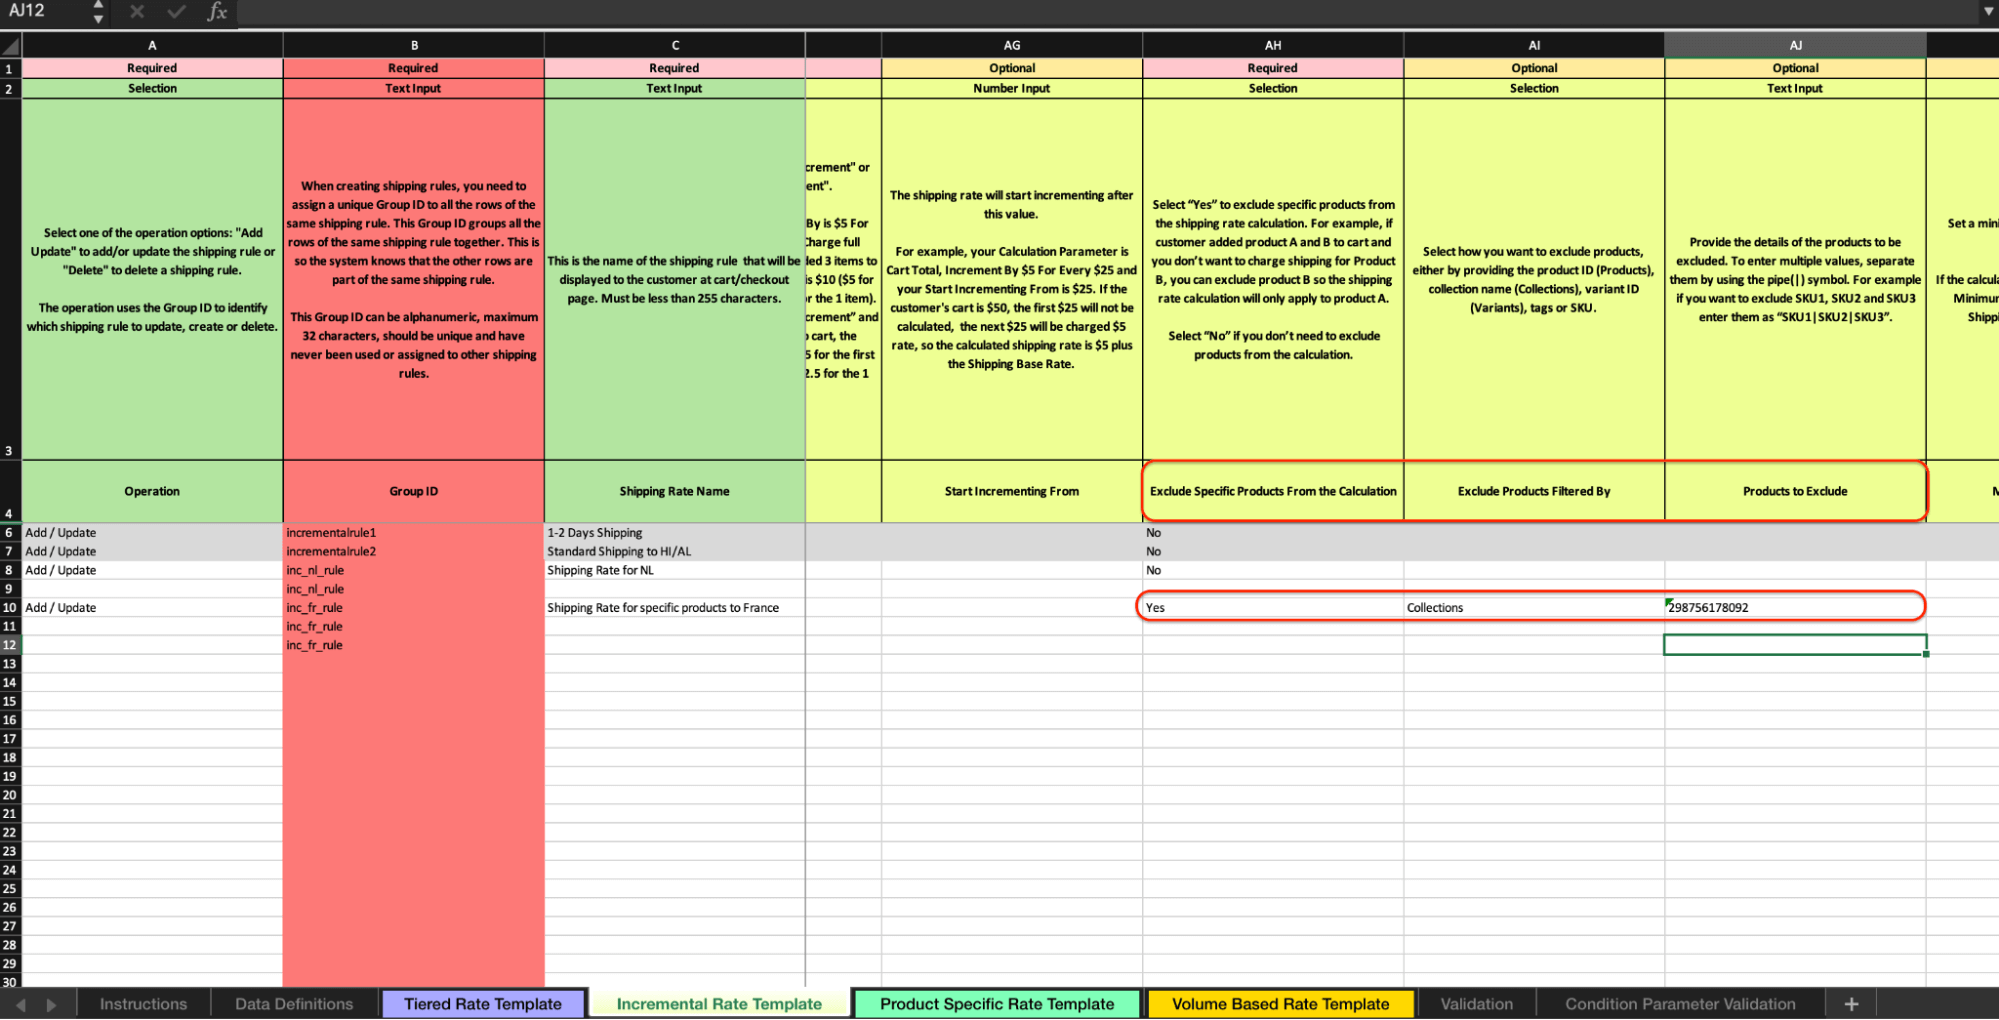
- In the calculation section we will also set-up excluded products that will not take into account during calculation. These will be products from the “Frozen products” collection. To do this we need to select “Exclude Specific Products From the Calculation” to “Yes”, in “Exclude Products Filtered By” select “Collections” and in “Products to Exclude” put every collection ID that you want to exclude separate by pipe sign “|”. For example “1234|5678|1011” Learn more about this feature.
Now you can import your shipping rules file.
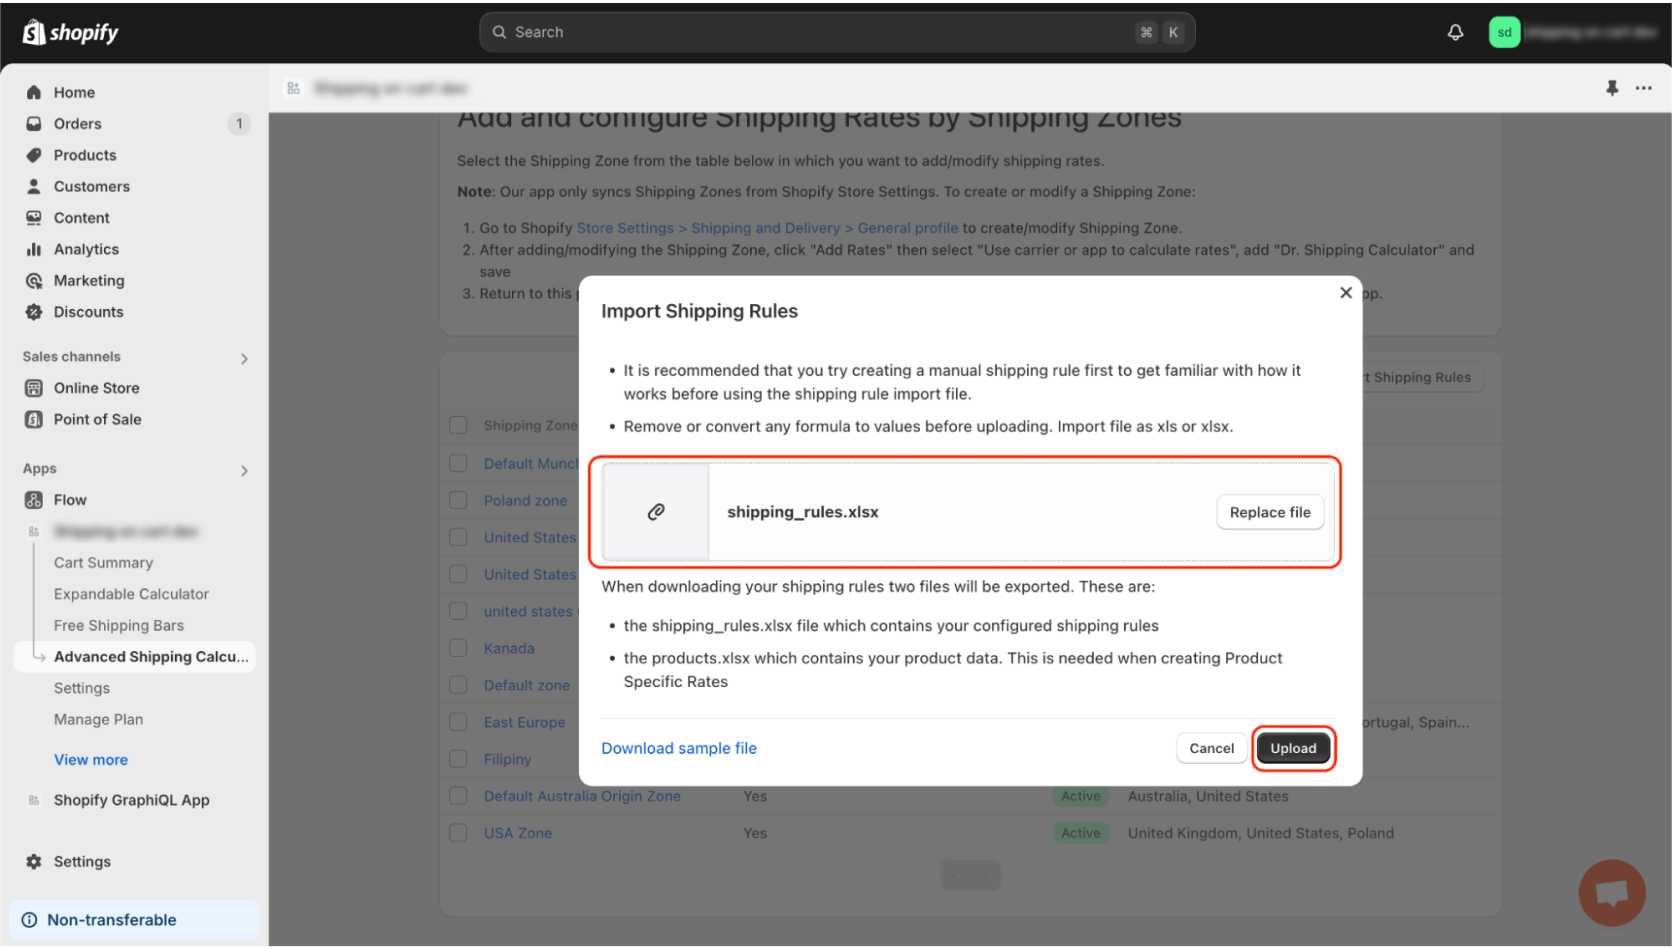
- Go to “Advanced Shipping Calculator” page and click “Import Shipping Rules”
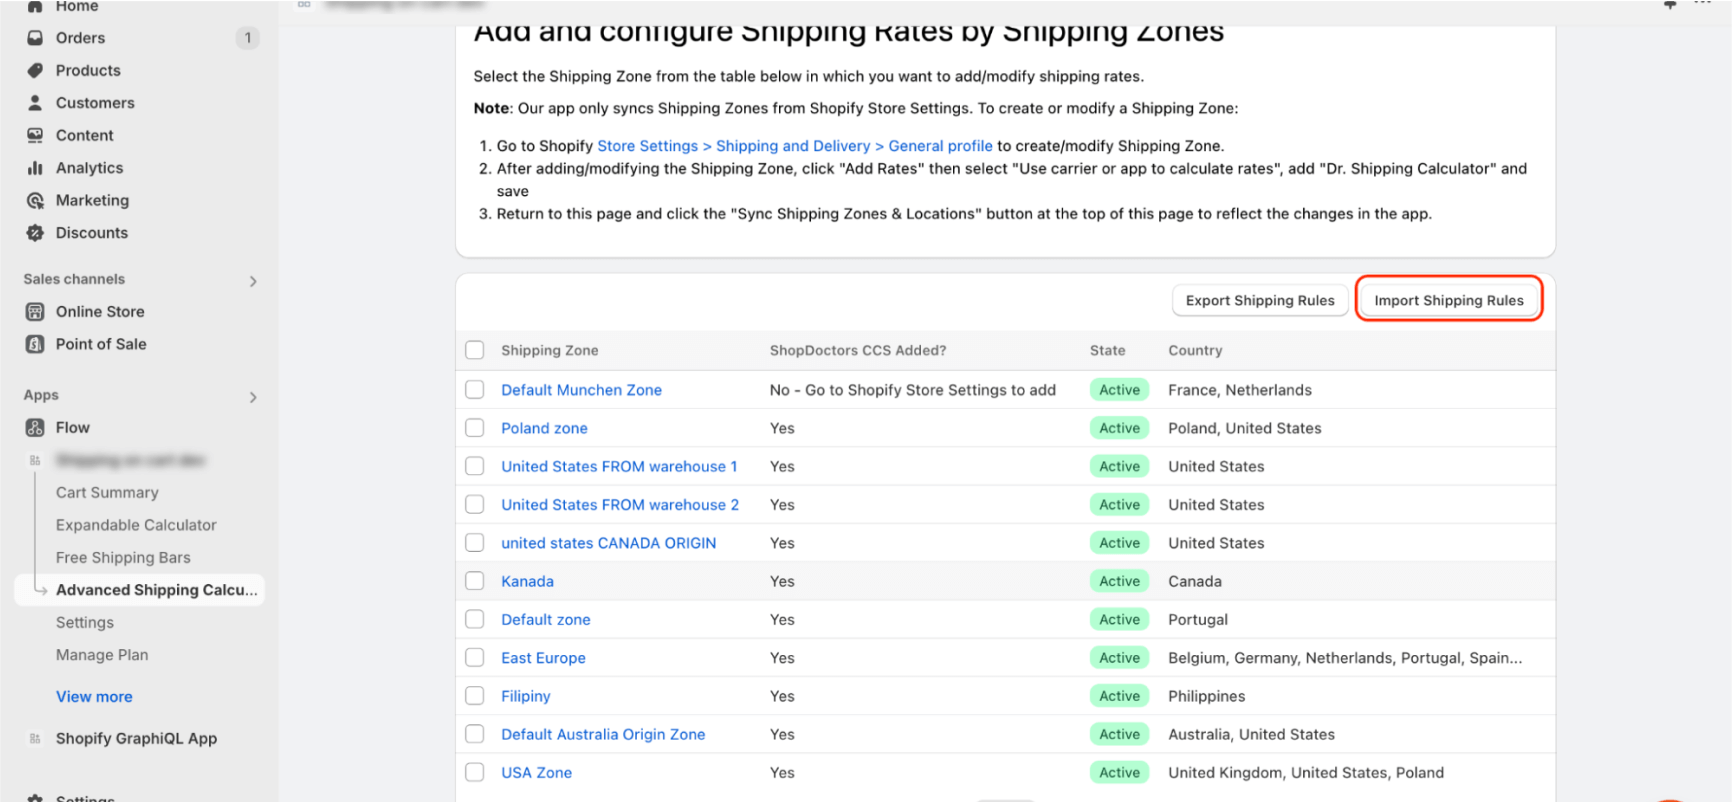
- Select file and click “Upload”
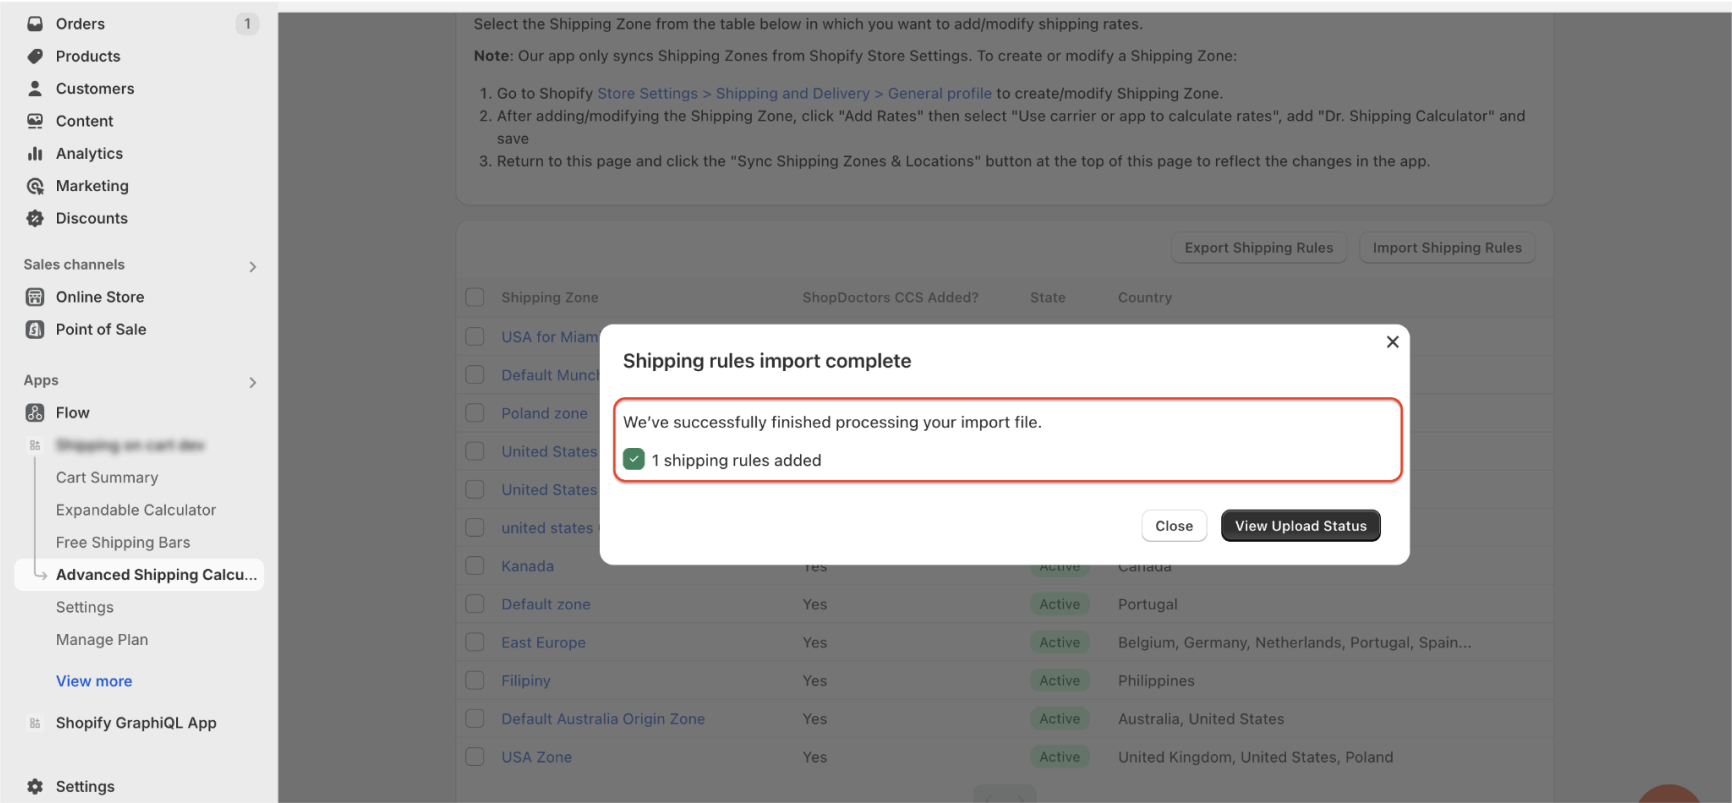
- As you can see, rules were created successfully. We can preview those rules in the admin panel and see if everything works.
If you don’t see the defined rates for this shipping zone, it may indicate that something went wrong during the import process. The best course of action is to check the import history to identify the issue. To learn more about how to review the import history, please read this article.
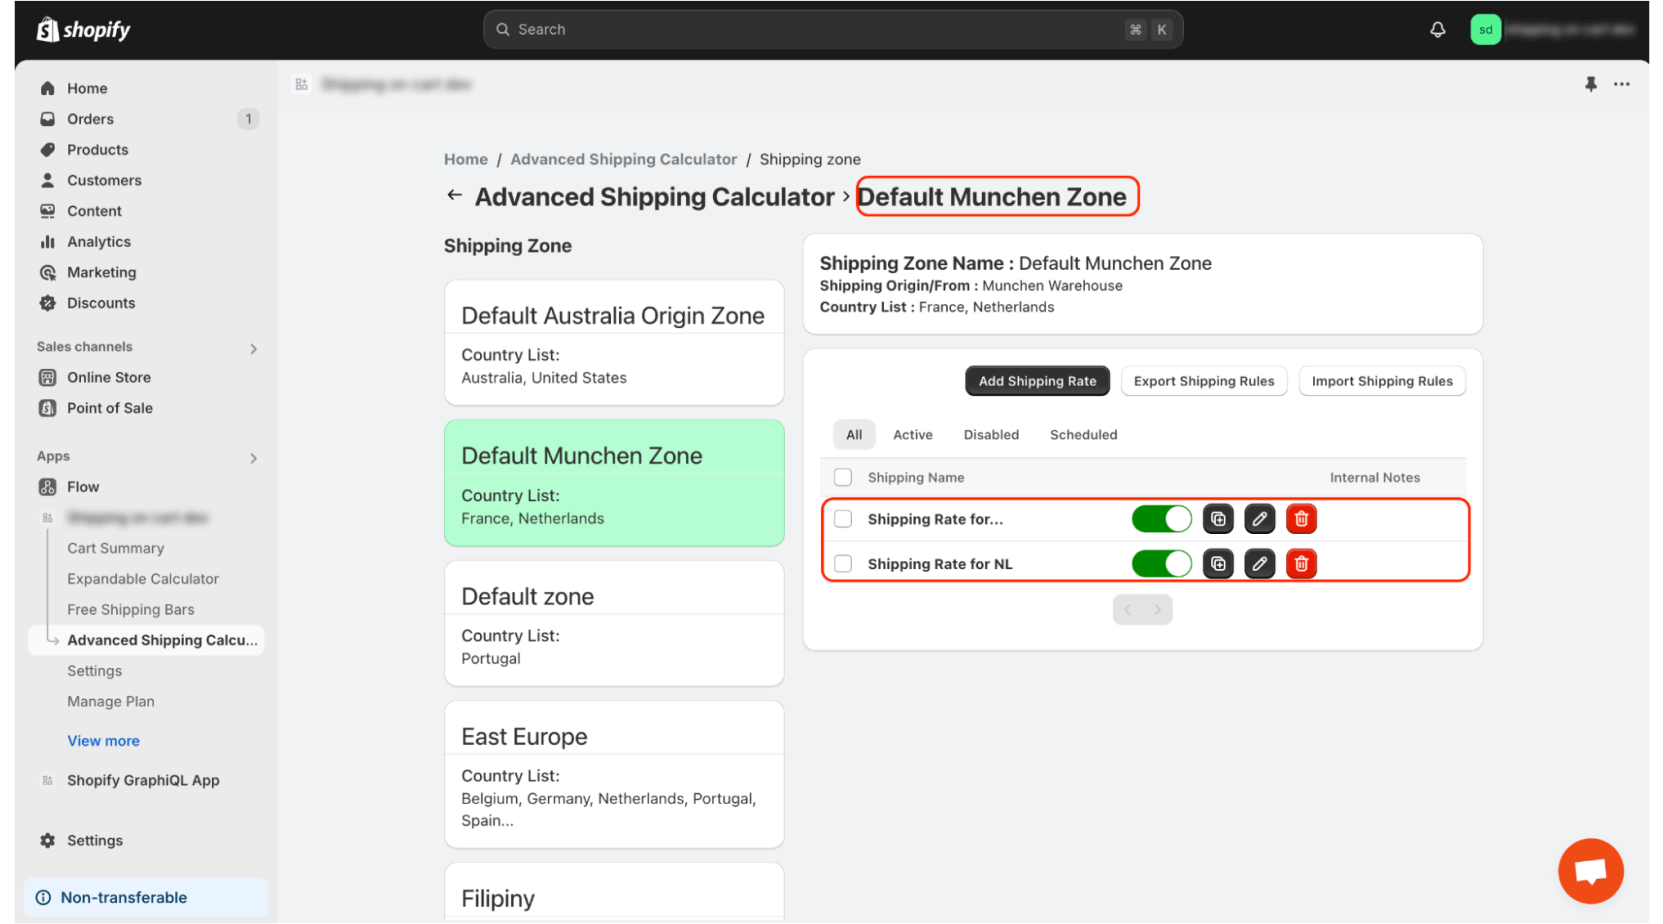
You can edit one of your existing shipping rules to check if the configuration in the admin panel matches the values in the import file. If the values don’t match, ensure that you’ve entered the correct information in the appropriate fields of the import file.

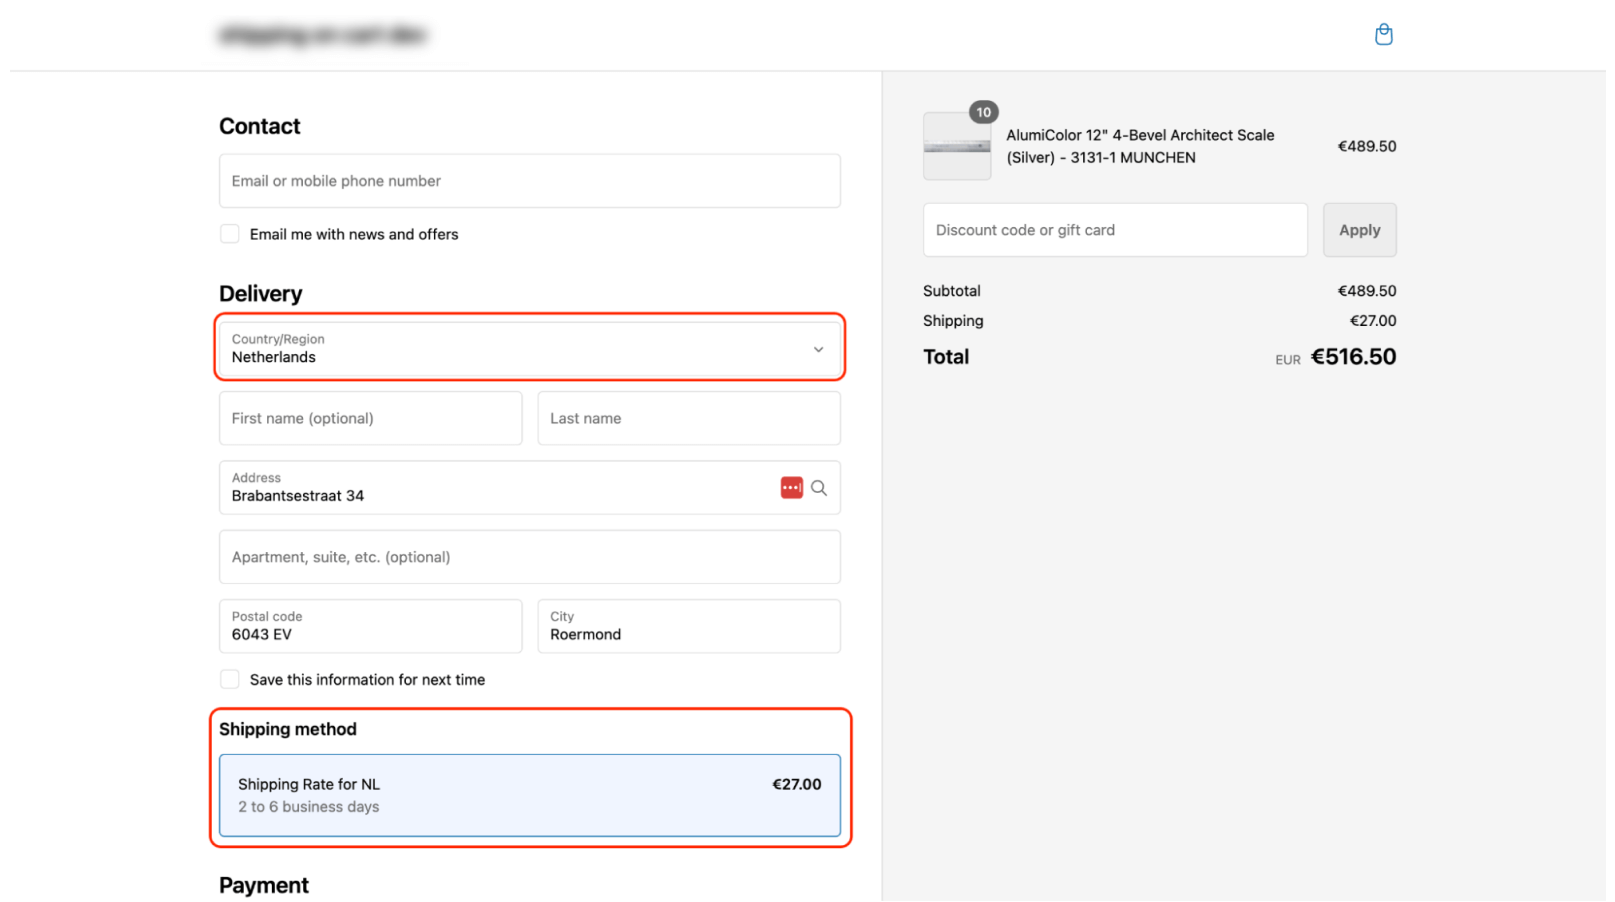
The final step is to test the calculation during the checkout process. You can create a sample order to verify if your configuration is correct.
In this case, we’ll order a product available only in the Munich warehouse and deliver it to two locations in the Netherlands. The first location is approximately 525 km from the warehouse, and the second is about 575 km away. Let’s see if the incremental rate is applied correctly.
If everything in the admin panel appears to be correct and the import file is accurate, but you’re still seeing unexpected shipping rates during checkout, please contact our support team. We’ll be happy to help.