How to Create Volume-Based Rate Using Import in Shopify Advanced Shipping Calculator
GENERAL
ADVANCED SHIPPING SETTINGS
SHIPPING PROFILE & ZONES
SHIPPING RULE/RATE SETUP
SHIPPING RULE/RATE SETUP USING CARRIER RATES INTEGRATION
SHIPPING RULES IMPORT/EXPORT FUNCTIONALITY
MERGING MULTIPLE SHIPPING RULES
PRODUCT DIMENSIONS SETUP
HISTORY/AUDIT TRAIL
COMMON ISSUES & FAQs
How to Create Volume-Based Rate Using Import in Shopify Advanced Shipping Calculator
In this article, you will learn:
- When to use Volume-Based Rates and the import feature
- How data entered during import is reflected in the admin panel for Volume-Based Rates
- Step-by-step guide on creating Volume-Based shipping rules using the import feature
- Best practices and tips for successful import of Volume-Based Rates
When to Use Volume-Based Rates and Import
Volume-Based Rates are particularly useful for businesses that:
- Sell products of varying sizes
- Want to optimize shipping costs based on actual package dimensions
- Aim to reduce shipping overcharges or undercharges
Consider this scenario:
TechTreasures, an online electronics store, sells a wide range of products from small accessories to large appliances. They’ve been using flat-rate shipping, which often results in overcharging for small items and undercharging for larger ones. This has led to cart abandonment for small purchases and losses on shipping large items.
TechTreasures decides to implement Volume-Based Rates to address these issues. They need to set up rates for:
- 5 different box sizes
- 3 shipping zones (Domestic, Canada, and International)
- 2 shipping speed options (Standard and Express)
In total, they need to create 6 different shipping rules (3 x 2) and define 5 box sizes in each. Creating these manually would be time-consuming and prone to errors. This is where the import feature becomes invaluable.
When to use import for creating Volume-Based Rates:
- You need to create multiple shipping rules at once
- You’re migrating from another system and have existing rate data
- You want to ensure consistency across numerous rules
- You’re implementing a complex shipping strategy with many variables
Now, let’s dive into how to use the import feature for creating Volume-Based Rates.
Understanding Volume-Based Rates in Import Files
Before we dive into the import process, it’s crucial to understand how the data you enter during import corresponds to the settings in the admin panel for Volume-Based Rates.
Key fields for Volume-Based Rates in the import file:
- “Shipping Base Rate” – corresponds to “Set Shipping Base Price” in the admin panel
- “Box Length” – defines the length of each package
- “Box Width” – defines the width of each package
- “Box Height” – defines the height of each package
- “Box Max Weight Limit” – sets the maximum weight limit for each package (optional)
- “Reduce Box Size for Padding” – allows for adjustment to ensure secure packaging (optional)
- “Box Shipping Rate” – sets the shipping rate for each defined package“Minimum Shipping Rate” – corresponds to “Set Minimum Shipping Rate (Optional)” in the configuration
- “Minimum Shipping Rate” – corresponds to “Set Minimum Shipping Rate (Optional)” in the configuration
- “Maximum Shipping Rate” – corresponds to “Set Maximum Shipping Rate (Optional)” in the configuration
Step-by-Step Guide to Creating Volume-Based Rates Using Import
1. Ensure Product Dimensions are Set
Before setting up Volume-Based Rates, it’s crucial to have accurate product dimensions in the Advanced Shipping Calculator app. You can set these dimensions manually in the app or via import.
For detailed instructions on how to add product dimensions, refer to this guide: How to Add Product Dimensions for Accurate Shipping Calculations in Advanced Shipping Calculator
2. Obtain the Base Import File
Download the base import file from the Advanced Shipping Calculator app. This file will be your starting point for creating Volume-Based Rates (for more information visit “Understanding the Shipping Rules Import File in Shopify Advanced Shipping Calculator”)
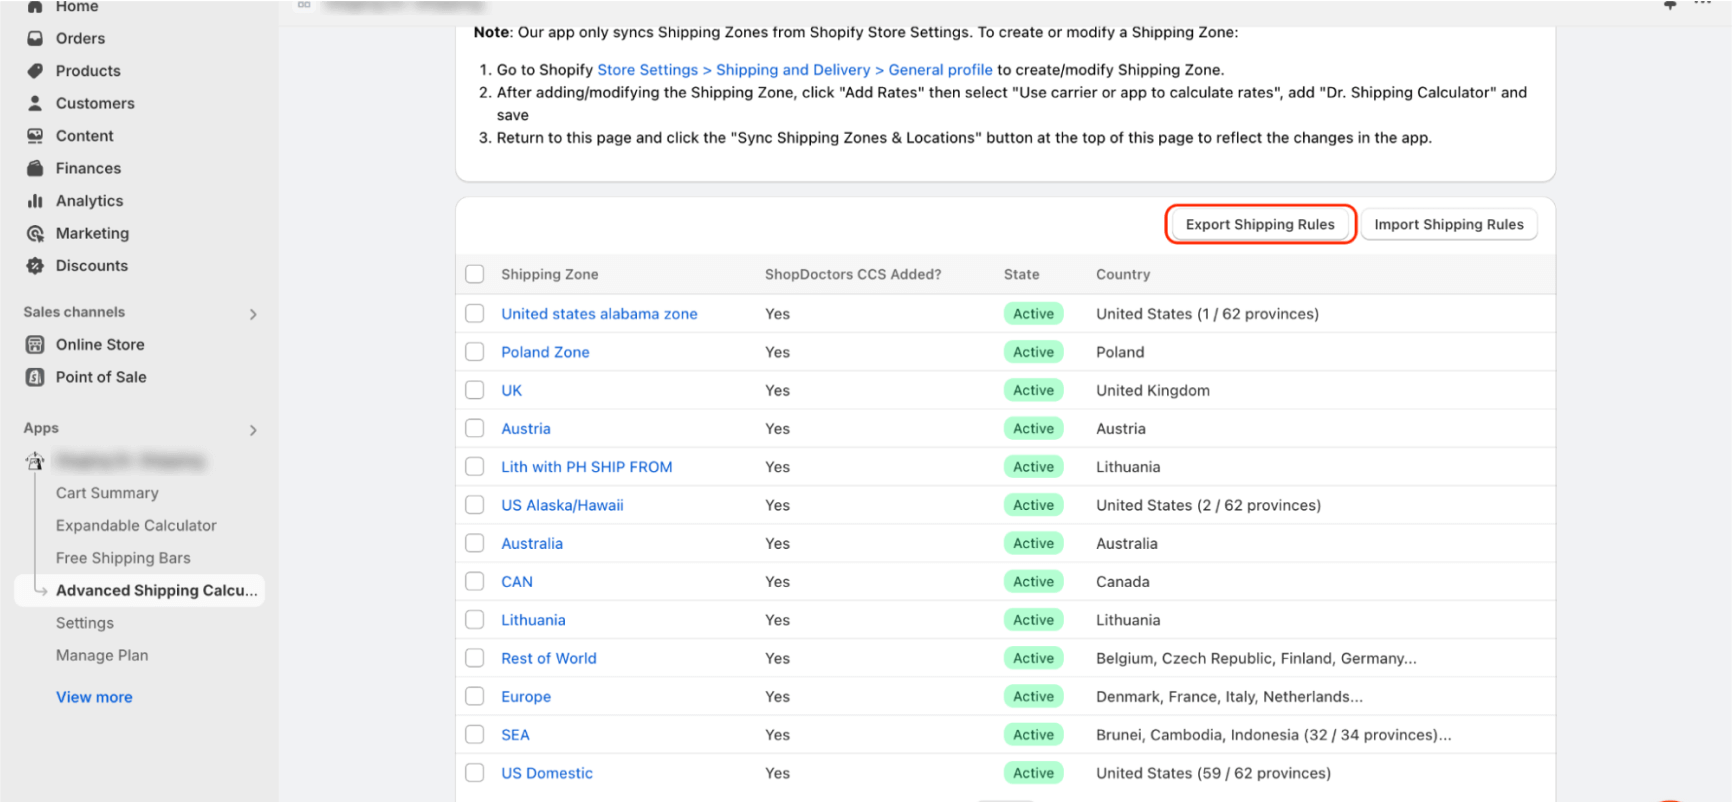
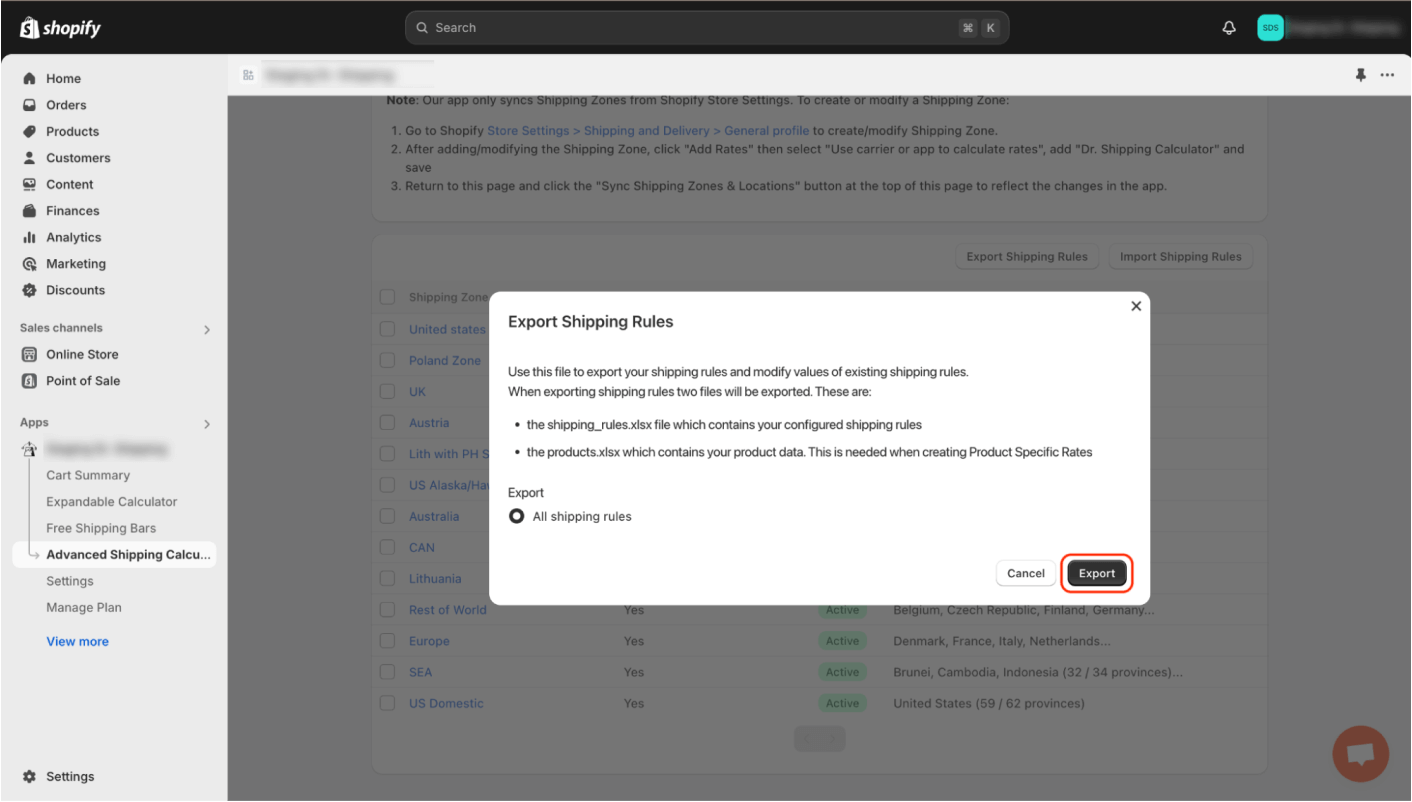
3. Open the Correct Sheet
Open the downloaded Excel file and navigate to the “Volume Based Rate Template” sheet. This is where you’ll input your Volume-Based Rate configurations.
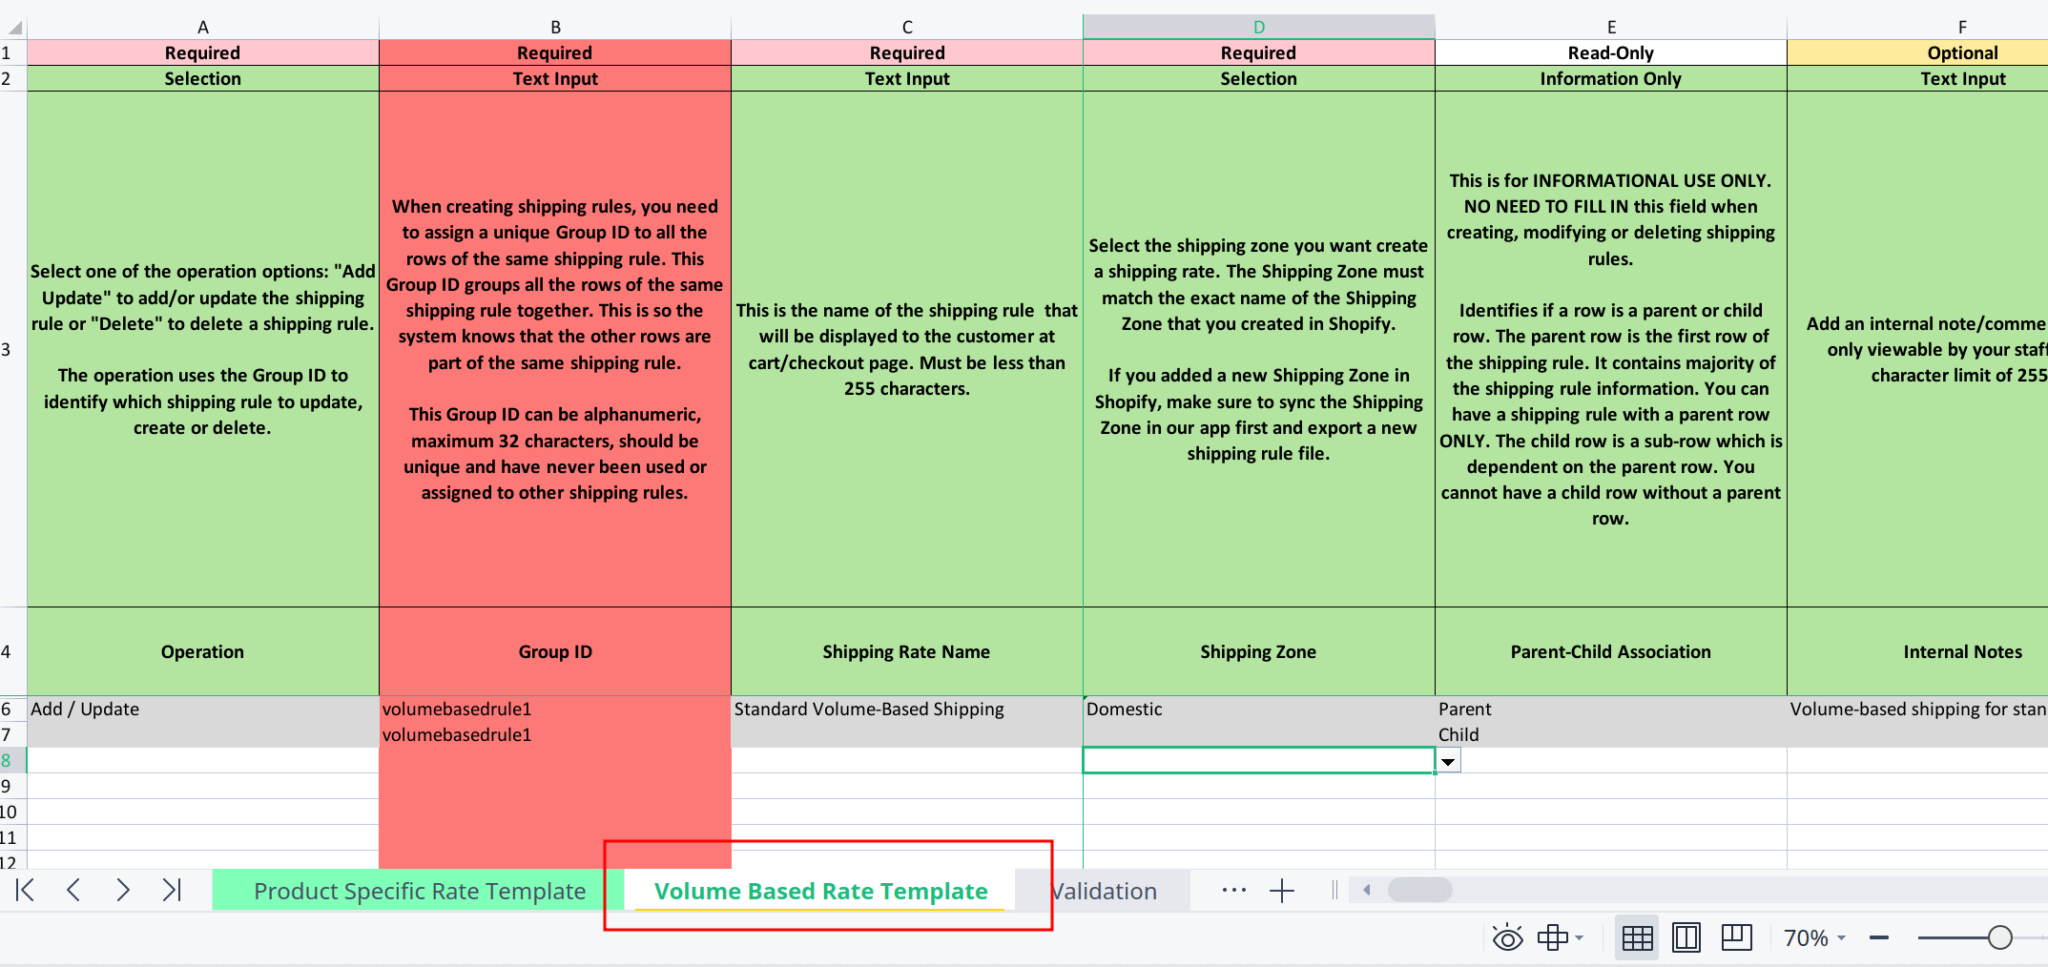
4. Configure Base Rule Settings
Start by creating the main (parent) row for your Volume-Based Rate. This row will contain the basic information and settings common to all shipping rule imports. You’ll need to fill in details such as the operation type (Add/Update), a unique group ID, the shipping rate name, applicable shipping zone, and the rule’s status.
You’ll also set up any necessary location filters, define conditions for when the rate should apply, and select the appropriate weight and dimensional units. If needed, you can specify merge tags to combine multiple shipping rules and set active dates to schedule when the rule should be applied.
For detailed information on each of these fields and how to fill them correctly, please refer to our comprehensive guide: “Understanding the Shipping Rules Import File in Shopify Advanced Shipping Calculator”. This guide provides in-depth explanations of each field and its impact on your shipping rules.
5. Configure Volume-Based Rate Settings
Now, create child rows to define your package sizes and their corresponding rates:
- Copy the “Group ID” from the parent row to each child row.
- Set “Shipping Base Rate” if You want to add some additional fee on top of calculated shipping (Optional)
- For each package size, fill in:
- “Box Length”
- “Box Width”
- “Box Height”
- “Box Max Weight Limit” (optional)
- “Reduce Box Size for Padding” (optional)
- “Box Shipping Rate”
Example for TechTreasures: Let’s say they want to define five box sizes for their Domestic Standard shipping:
- Small Box (for accessories): 20cm x 15cm x 10cm, Rate: $5
- Medium Box (for smartphones): 30cm x 20cm x 15cm, Rate: $8
- Large Box (for laptops): 50cm x 40cm x 10cm, Rate: $12
- XL Box (for desktop PCs): 60cm x 50cm x 40cm, Rate: $20
- Appliance Box (for large items): 100cm x 80cm x 60cm, Rate: $35
You would create five child rows, each with the same Group ID as the parent, and fill in the respective dimensions and rates.

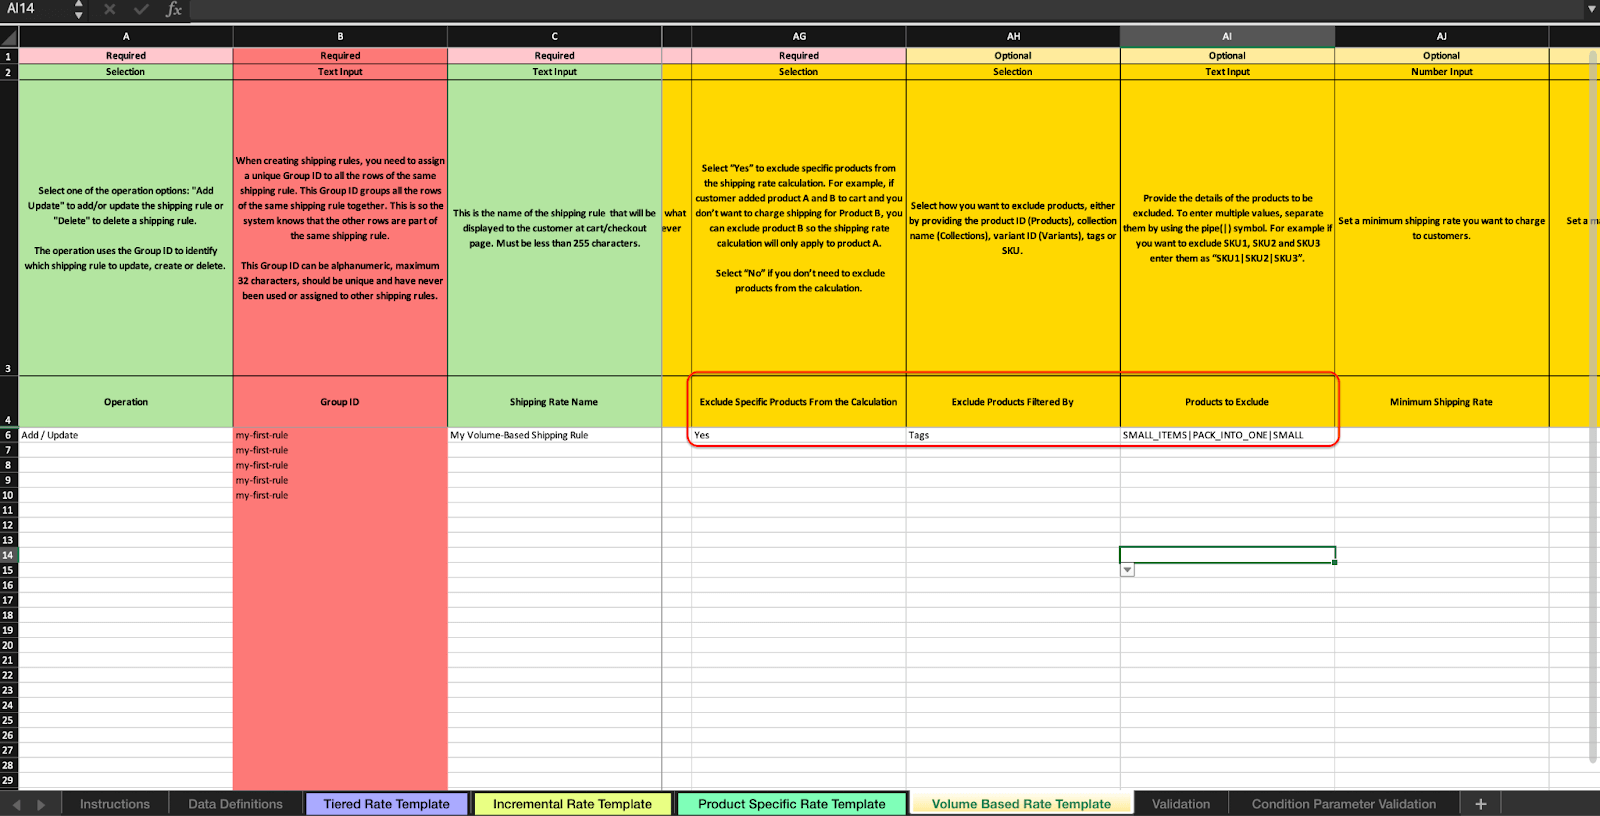
- (Optional) Set excluded products
You can also import products excluded from the calculation. These excluded products will not be considered when attempting to pack items into predefined packages. To correctly fill in the fields for excluded products in the Excel file, follow the guidelines provided in the description of these fields. Alternatively, you can set the option ‘Exclude Specific Products From the Calculation’ to ‘No’ and leave the other two fields blank. To learn more about this option, read this article.
- Set Minimum and Maximum Rates (Optional)
In the parent row, you can set:
- “Minimum Shipping Rate”
- “Maximum Shipping Rate”
These ensure your shipping costs stay within a desired range.

6. Repeat for Different Zones and Shipping Speeds
For TechTreasures, you’d repeat steps 4 and 5 for each combination of shipping zone and speed. This means creating 6 parent rows (3 zones x 2 speeds) and 24 child rows in total.
7. Save and Import
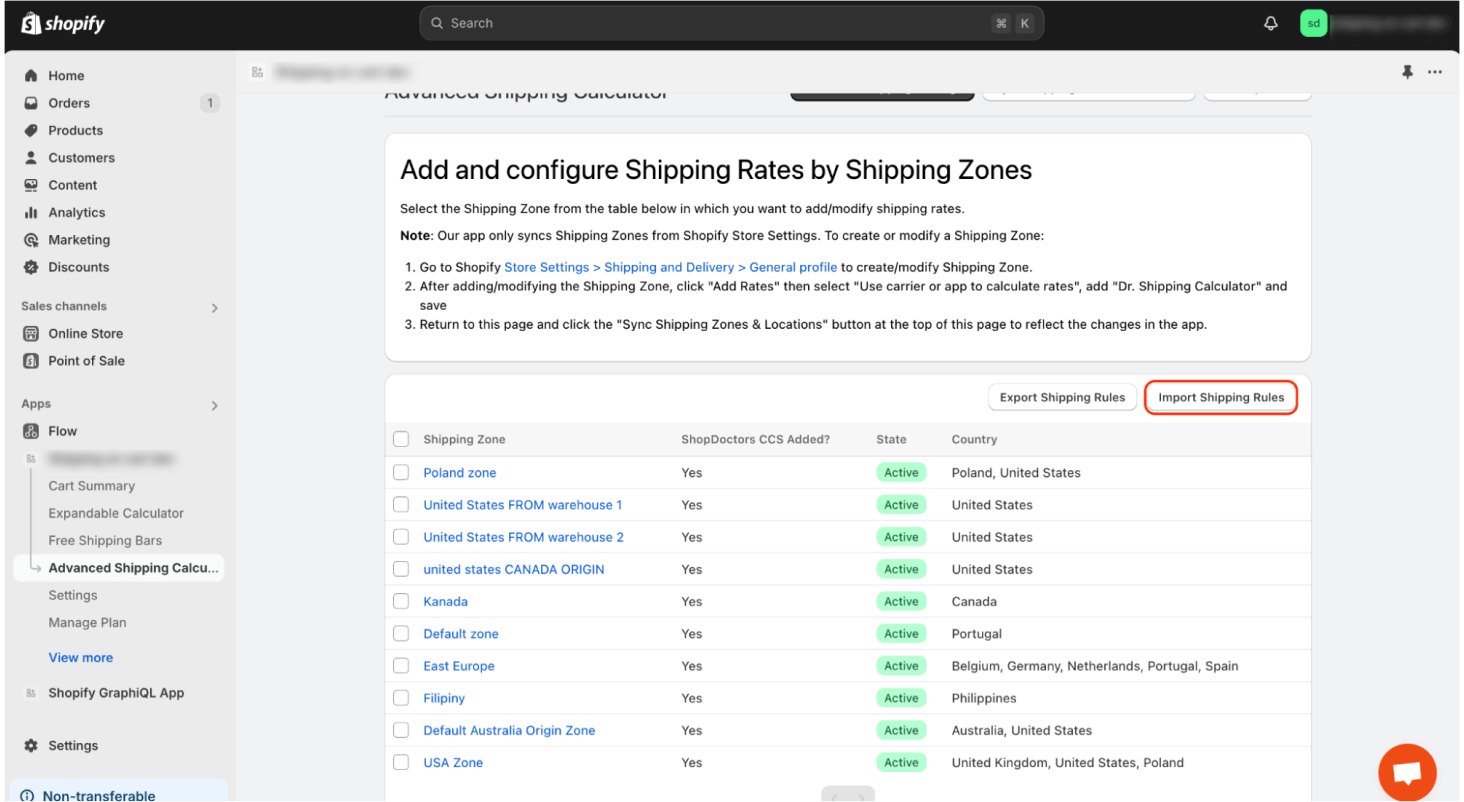
Once you’ve configured all your Volume-Based Rates, save the Excel file and upload it through the import option in the Advanced Shipping Calculator app (see “Understanding the Shipping Rules Import File in Shopify Advanced Shipping Calculator” for more information)
Best Practices and Tips
- Accurate Product Dimensions: Ensure all your products have correct dimensions set in the Advanced Shipping Calculator app before implementing Volume-Based Rates. You can do this manually or via import (refer to “How to Add Product Dimensions for Accurate Shipping Calculations in Advanced Shipping Calculator?” for details).
- Diverse Package Sizes: Create a range of package sizes to accommodate different order combinations efficiently.
- Test Your Import: After importing, always test your new Volume-Based Rates to ensure they function as expected during checkout.
- Use Examples as Reference: Refer to the example rows provided in the import file for guidance on how to structure your Volume-Based Rates.
- Gradual Implementation: If you’re new to Volume-Based Rates, start with a simple configuration and gradually increase complexity as you become more comfortable with the system.
- Bulk Editing: Use spreadsheet features like copy-paste and drag-to-fill for efficient data entry when creating multiple similar rules.
- Regular Review: Periodically export your rates, review them in the spreadsheet, make necessary adjustments, and re-import to keep your shipping strategy optimized.
- Keep Dimensions Updated: Regularly review and update product dimensions in the Advanced Shipping Calculator app, especially when introducing new products or modifying existing ones.
Conclusion
Creating Volume-Based Rates using the import feature in the Advanced Shipping Calculator app allows for efficient setup of complex shipping rate structures based on package dimensions. For businesses like TechTreasures, this approach can significantly improve shipping accuracy, reduce costs, and enhance customer satisfaction.
By following this guide and leveraging the import functionality, you can quickly implement a sophisticated Volume-Based shipping strategy that accurately reflects your true shipping costs while optimizing packing efficiency.
Remember, the key to successful Volume-Based Rates is finding the right balance between pricing accuracy and operational simplicity. Don’t hesitate to adjust your rates and package sizes as you learn more about your shipping patterns and customer behavior. And always ensure your product dimensions are up-to-date in the Advanced Shipping Calculator app for the most accurate calculations.